I
Istruzioni per luso
COMBINATO FRIGORIFERO/CONGELATORE
Italiano, 1
Français, 29
Portuges, 57
Espanol, 43
English,15
GB
I
F
PT
E
MBT 2022 CZ/HA
Sommario
Installazione, 2
Posizionamento e collegamento
Reversibilità apertura porte
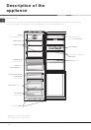
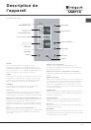
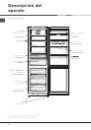
Descrizione dellapparecchio, 3-4
Pannello di controllo
Vista dinsieme
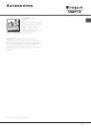
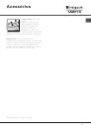
Accessori, 5
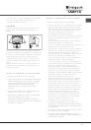
Avvio e utilizzo, 6-7-8
Avviare lapparecchio
Come muoversi nel display
Pure Wind
Utilizzare al meglio il frigorifero
Utilizzare al meglio il congelatore
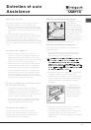
Manutenzione e cura, 9-10
Escludere la corrente elettrica
Pulire lapparecchio
Evitare muffe e cattivi odori
Sbrinare lapparecchio
Sostituire la lampadina
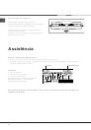
Assistenza, 10
Assistenza attiva 7 giorni su 7
Precauzioni e consigli, 11
Sicurezza generale
Smaltimento
Risparmiare e rispettare lambiente
Anomalie e rimedi, 12
Polski, 61
PL