O N - S C R E E N P R O G R A M M I N G
3 - 2
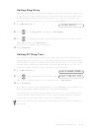
Navigation Keys
You can access the menu mode by pressing
Menu/Set. When you enter the Menu, the
LCD scrolls:
Then press 1 for Initial Setup Menu—OR—
Press 2 for Setup Receive Menu—OR—
Press 3 for Setup Send Menu
Press 0 for
TEL SERVICE
—OR—
You can scroll more quickly through the each menu level by pressing
, and
then set an option by pressing Menu/Set when that option appears on the LCD.
Then the LCD shows next menu level. Press
to scroll to your next menu
selection, and then press Menu/Set.
When you finish setting an option, the LCD shows ACCEPTED.
* Access the Menu
* Go to next menu level
* Accept an option
* Scroll through the
current menu level
* Back to previous menu
level
* Forward to next menu
level
* Exit the Menu
Note
Use
to scroll backward if you passed your choices or to save keystrokes.
2.SETUP RECEIVE
3.SETUP SEND
1.INITIAL SETUP
SELECT & SET
0.TEL SERVICE
or
or