114
C H A P T E R T H I R T E E N
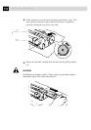
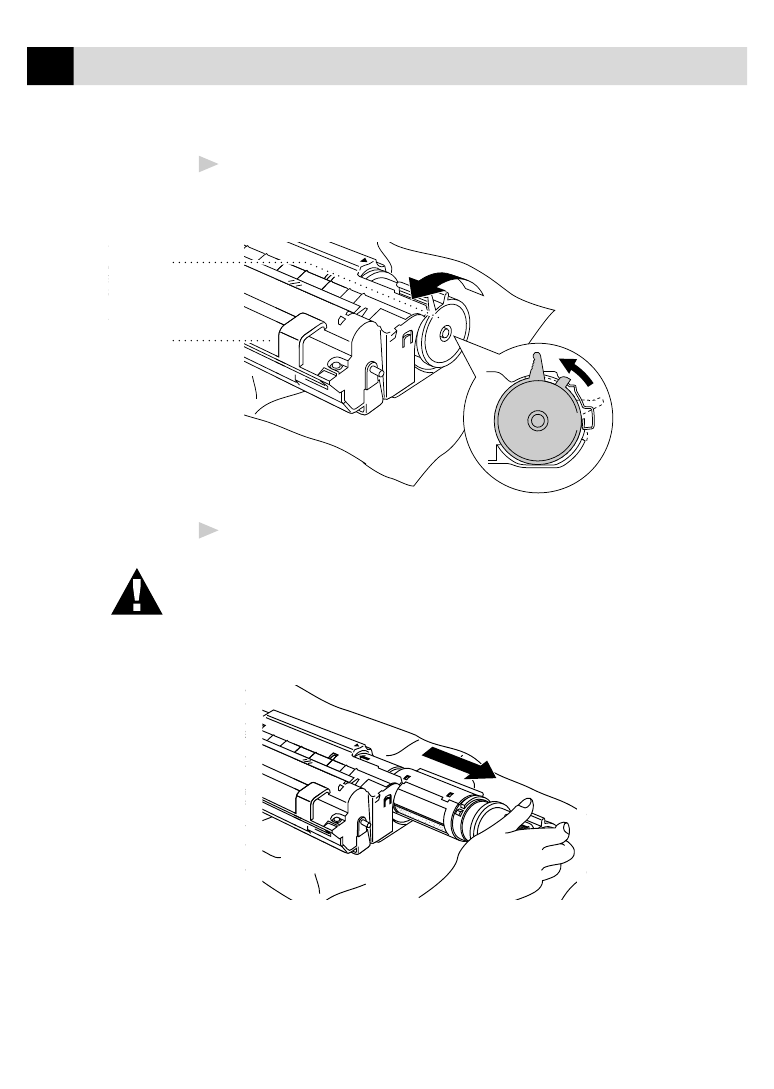
2
Gently turn the lever on the toner cartridge forward until it stops. The
toner cartridge cannot be removed unless the shutter is completely
closed, by turning the lever fully to the front.
Drum
Unit
Toner
Cartridge
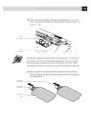
3
Remove the old toner cartridge from the drum unit by gently pulling it
out.
WARNING
Handle the toner cartridge carefully. If toner scatters on your hands or clothes,
immediately wipe it off or wash it with cold water.