Доступность: Бесплатно как и все руководства на сайте. Без регистрации и SMS.
Дополнительно: Чтение инструкции онлайн
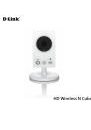
User Manual
HD Wireless N Cube Network Camera
DCS-2132L
Version 1.0 | 25/05/2012
Страница: (1 из 82)
навигация
1
2
3
4
5
6
7
8
9
10
11
12
13
14
15
16
17
18
19
20
21
22
23
24
25
26
27
28
29
30
31
32
33
34
35
36
37
38
39
40
41
42
43
44
45
46
47
48
49
50
51
52
53
54
55
56
57
58
59
60
61
62
63
64
65
66
67
68
69
70
71
72
73
74
75
76
77
78
79
80
81
82
Оглавление инструкции
Страница 1 из 83 Version 1.0 | 25/05/2012 User Manual HD Wireless N Cube Network Camera DCS-2132L
Страница 2 из 83 Preface D-Link reserves the right to revise this publication and to make changes in the content hereof without obligation to notify any person or organization of such revisions or changes. Information in this document may become obsolete as our services and websites develop and change. Please refer
Страница 3 из 83 Table of Contents Product Overview.......................................................................... 5 Package Contents.................................................................. 5 Introduction............................................................................. 6 System
Страница 4 из 83 Help......................................................................................76 DI/DO Specifications..................................................................77 Technical Specifications............................................................78 Safety
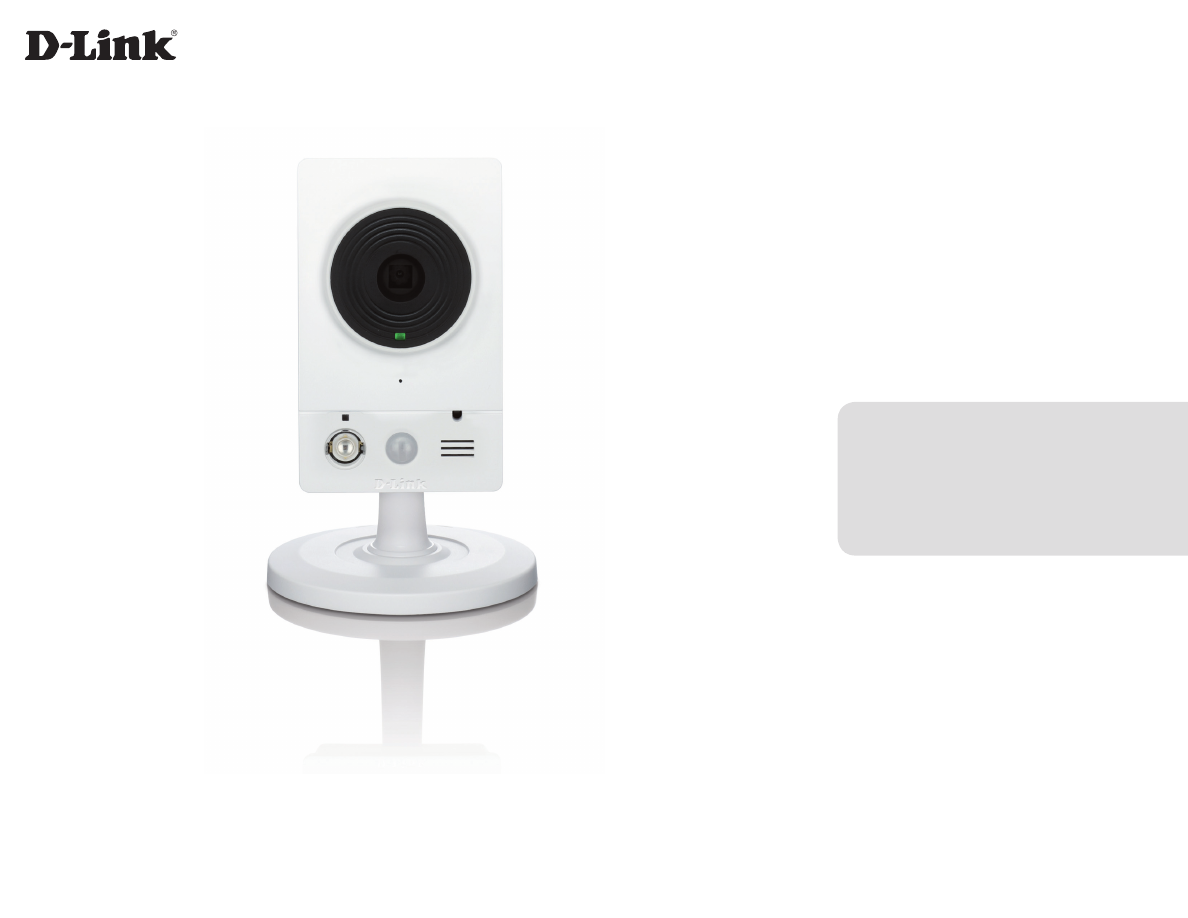
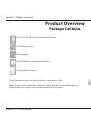
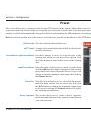
Страница 5 из 83 Section 1: Product Overview Product Overview Package Contents DCS-2132L HD Wireless N Cube Network Camera CAT5 Ethernet cable Power adapter CD-ROM with User Manual and software Quick Installation Guide If any of the above items are missing, please contact your reseller. Note: Using a power supply
Страница 6 из 83 Section 1: Product Overview Introduction Congratulations on your purchase of the DCS-2132L HD Wireless N Cube Network Camera. The DCS-2132L is a versatile and unique solution for your small office or home. Unlike a standard webcam, the DCS-2132L is a complete system with a built-in CPU and web
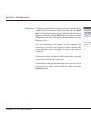
Страница 7 из 83 Section 1: Product Overview Features Simple to Use The DCS-2132L is a stand-alone system with a built-in CPU, requiring no special hardware or software. The DCS-2132L supports both ActiveX mode for Internet Explorer and Java mode for other browsers such as Firefox® and Safari®. Supports a Variety
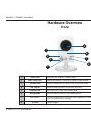
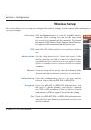
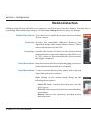
Страница 8 из 83 Section 1: Product Overview Hardware Overview Front 5 1 2 6 3 4 7 8 1 Status LED 2 WPS Status LED Indicates the WPS connection status of the camera 3 Infrared LED Used to illuminate the camera's field of view at night 4 PIR Sensor 5 Camera Lens Records video of the surrounding area 6 Microphone
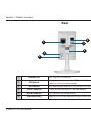
Страница 9 из 83 Section 1: Product Overview Rear 1 5 4 6 2 3 1 Ethernet Port 2 WPS Button Press this button, then press the WPS button for 5 seconds on your router to set up a wireless connection automatically 3 Reset Button Press and hold this button for 10 seconds to reset the camera 4 Power Connector Connects
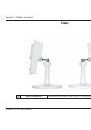
Страница 10 из 83 Section 1: Product Overview Sides 1 1 Micro SD Card Slot D-Link DCS-2132L User Manual Insert a MicroSD card for Local storage for storing recorded image and video 10
Страница 11 из 83 Section 2: Installation Installation Wireless Installation Considerations This D-Link device can connect to your wireless network from anywhere within the operating range of your wireless network. However, the number, thickness and location of walls, ceilings, or other objects that the wireless
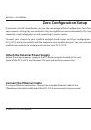
Страница 12 из 83 Section 2: Installation Zero Configuration Setup If you have a D-Link Cloud Router, you can take advantage of Zero Configuration. Zero Configuration automatically configures your camera's settings for you, and adds it to your mydlink account automatically. This type of setup allows you to set up
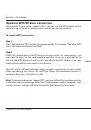
Страница 13 из 83 Section 2: Installation Optional: WPS Wireless Connection Alternatively, if your router supports WPS, you can use the WPS button on the camera to easily create a secure wireless connection to your network. To create a WPS connection: Step 1 Press and hold the WPS button for approximately 5-6
Страница 14 из 83 Section 2: Installation Check Your mydlink Account From any computer, open a web browser, go to http://www.mydlink.com and log into your account. Once mydlink detects your camera, a New Device Found! notice will appear in the bottom-left corner. Click on the device name to continue. A summary and
Страница 15 из 83 Section 2: Installation Zero Configuration is now complete and your camera has been added to your mydlink account. You can now view your camera on the mydlink Live View tab. If you wish to connect your camera to your router wirelessly, you can simply disconnect the Ethernet cable and move the
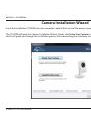
Страница 16 из 83 Section 2: Installation Camera Installation Wizard Insert the Installation CD-ROM into your computer’s optical drive to start the autorun program. The CD-ROM will open the Camera Installation Wizard. Simply click Setup Your Camera to go through the Installation Wizard, which will guide you through
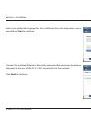
Страница 17 из 83 Section 2: Installation Select your preferred language for the installation from the drop down menu and click on Start to continue. Connect the included Ethernet cable to the network cable connector located on the panel at the rear of the DCS-2132L and attach it to the network. Click Next to
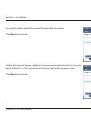
Страница 18 из 83 Section 2: Installation Connect the other end of the same Ethernet cable to a router. Click Next to continue. Attach the external power supply to the power connector located on the rear panel of the DCS-2132L and connect it to your wall outlet or power strip. Click Next to continue. D-Link
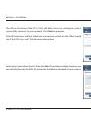
Страница 19 из 83 Section 2: Installation The LED on the front of the DCS-2132L will blink, then turn solid green once it successfully connects to your network. Click Next to proceed. If the LED continues to blink, check your connections or click on the "What should I do if the LED stays red?" link for more
Страница 20 из 83 Section 2: Installation If you wish to remove the camera from a previously registered mydlink account, press and hold the reset button on the rear panel for at least 6 seconds and click Restart to restart the wizard. After you have selected your camera from the list, you will be asked to create and
Страница 21 из 83 Section 2: Installation To move the camera to a wireless connection by using WPS or by selecting a wireless network, select the appropriate option then follow the steps displayed. Otherwise, click Next to continue. Complete the mydlink account registration form with your details making sure to
Страница 22 из 83 Section 2: Installation If you already have a mydlink account, enter your login details and click Next to proceed. Confirm your mydlink account details and give the camera a unique name and click Done. D-Link DCS-2132L User Manual 22
Страница 23 из 83 Section 2: Installation Confirm your camera login details and IP address details and click Done. Your DCS-2132L camera is now set up. Log on to your mydlink account and explore the exciting benefits available to you. Your camera is now set up, and you can skip to "mydlink" on page 26 to learn more
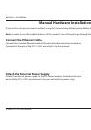
Страница 24 из 83 Section 2: Installation Manual Hardware Installation If you wish to set up your camera without using the Camera Setup Wizard, please follow these steps. Note: In order to use the mydlink features of this product, you will need to go through the Camera Setup Wizard. Connect the Ethernet Cable
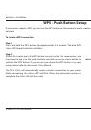
Страница 25 из 83 Section 2: Installation WPS - Push Button Setup If your router supports WPS, you can use the WPS button on the camera to easily create a secure wireless connection to your network. To create a WPS connection: Step 1 Press and hold the WPS button for approximately 5-6 seconds. The blue WPS status
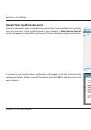
Страница 26 из 83 Section 3: mydlink mydlink After registering your DCS-2132L camera with a mydlink account in the Camera Installation Wizard. You will be able to remotely access your camera from the www.mydlink.com website. After signing in to your mydlink account, you will see a screen similar to the following:
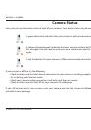
Страница 27 из 83 Section 3: mydlink Camera Status Here, you can see the online status of each of your cameras. Your online status may be one of the following: A green checkmark indicates that your camera is online and ready to use. A yellow exclamation point indicates that your camera is online, but the camera
Страница 28 из 83 Section 3: mydlink Live Video In the main part of the screen, the Live Video tab will be selected by default. If the camera is available, a Live Video feed will be displayed. Video will be shown at VGA resolution (640x480) if viewing your camera from a PC on the same local network, or at QVGA
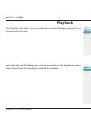
Страница 29 из 83 Section 3: mydlink Playback The Playback tab allows you to review pre-recorded footage captured to an inserted microSD card. Select the date of the footage you wish to preview from the drop down menu, then choose from the recordings available for playback. D-Link DCS-2132L User Manual 29
Страница 30 из 83 Section 3: mydlink Settings The Settings tab contains several options for you to control how your DCS‑2312L operates. Camera Name: Click on the Edit button to change how the camera name appears. mydlink No: This is the unique mydlink number for your device. Model name: This shows the model name of
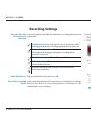
Страница 31 из 83 Section 3: mydlink Recording Settings Record video clips Select this option to enable the automatic recording when motion when motion is is detected. detected: Add Detection Area: Click on this icon to draw areas that will trigger automatic recording when motion is detected. Remove Detection Area:
Страница 32 из 83 Section 3: mydlink Record Video Clips by This option enables either continuous or recurring scheduled Schedule: recording. Email Notification: Toggles notification by email on or off. Video Clips Recording In the event that the microSD card can not store further recordings, Mode: the user can
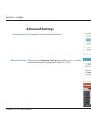
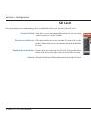
Страница 33 из 83 Section 3: mydlink Advanced Settings Show password: Checking this box will show the password. Advanced Setting: Clicking on the Advanced Setting button will open a secondary window allowing full configuration of the DCS-2312L D-Link DCS-2132L User Manual 33
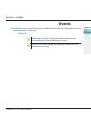
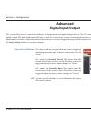
Страница 34 из 83 Section 3: mydlink Events Record video clips Select this option to enable the automatic recording when motion when motion is is detected. detected: Mark Page as Read: Clicking this button will mark the current page of event notifications as read. Mark all as Read: Clicking this button will mark all
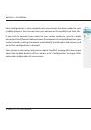
Страница 35 из 83 Section 4: Configuration Configuration Using the Configuration Interface After completing the Camera Installation Wizard, you are ready to use your camera. The camera’s built-in Web configuration utility is designed to allow you to easily access and configure your DCS-2132L. At the end of the
Страница 36 из 83 Section 4: Configuration Live Video This section shows your camera’s live video. You may select any of the available icons listed below to operate the camera. You may also select your language using the drop-down menu on the left side of the screen. You can zoom in and out on the live video image
Страница 37 из 83 Section 4: Configuration Global View: This window indicates the total field of view (FOV) of the camera. The red box indicates the visible region of interest (ROI). Language: You may select the interface language using this menu. Video Profile 1 Record a Video Clip Video Profile 2 Set a Storage
Страница 38 из 83 Section 4: Configuration Setup Setup Wizard To configure your Network Camera, click Internet Connection Setup Wizard. Alternatively, you may click Manual Internet Connection Setup to manually configure your Network Camera and skip to "Network Setup" on page 44. To quickly configure your Network
Страница 39 из 83 Section 4: Configuration Internet Connection Setup Wizard This wizard will guide you through a step-by-step process to configure your new D-Link Camera and connect the camera to the internet. Click Next to continue. Note: Select DHCP if you are unsure of which settings to choose. Click Next to
Страница 40 из 83 Section 4: Configuration Select Static IP if your Internet Service Provider has provided you with connection settings, or if you wish to set a static address within your home network. Enter the correct configuration information and click Next to continue. If you are using PPPoE, select Enable PPPoE
Страница 41 из 83 Section 4: Configuration Configure the correct time to ensure that all events will be triggered as scheduled. Click Next to continue. If you have selected DHCP, you will see a summary of your settings, including the camera's IP address. Please write down all of this information as you will need it
Страница 42 из 83 Section 4: Configuration Motion Detection Setup Wizard This wizard will guide you through a step-by-step process to configure your camera's motion detection functions. Click Next to continue. Step 1 This step will allow you to enable or disable motion detection, specify the detection sensitivity,
Страница 43 из 83 Section 4: Configuration Step 3 This step allows you to specify how you will receive event notifications from your camera. You may choose not to receive notifications, or to receive notifications via e-mail or FTP. Please enter the relevant information for your e-mail or FTP account. Click Next to
Страница 44 из 83 Section 4: Configuration Network Setup Use this section to configure the network connections for your camera. All relevant information must be entered accurately. After making any changes, click the Save Settings button to save your changes. LAN Settings: This section lets you configure settings
Страница 45 из 83 Section 4: Configuration Enable UPnP Presentation: Enabling this setting allows your camera to be configured as a UPnP device on your network. Enable UPnP Port Forwarding: Enabling this setting allows the camera to add port forwarding entries into the router automatically on a UPnP capable network.
Страница 46 из 83 Section 4: Configuration Enable CoS: Enabling the Class of Service setting implements a best-effort policy without making any bandwidth reservations. Enable QoS: Enabling QoS allows you to specify a traffic priority policy to ensure a consistent Quality of Service during busy periods. If the
Страница 47 из 83 Section 4: Configuration Wireless Setup This section allows you to set up and configure the wireless settings on your camera. After making any changes, click the Save Settings button to save your changes. Site Survey: Click the Rescan button to scan for available wireless networks. After scanning,
Страница 48 из 83 Section 4: Configuration Dynamic DNS DDNS (Dynamic Domain Name Server) will hold a DNS host name and synchronize the public IP address of the modem when it has been modified. A user name and password are required when using the DDNS service. After making any changes, click the Save Settings button
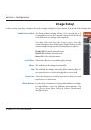
Страница 49 из 83 Section 4: Configuration Image Setup In this section, you may configure the video image settings for your camera. A preview of the image will be shown in Live Video. Enable Privacy Mask: The Privacy Mask setting allows you to specify up to 3 rectangular areas on the camera's image to be blocked/
Страница 50 из 83 Section 4: Configuration Exposure Mode: Changes the exposure mode. Use the drop-down box to set the camera for Indoor, Outdoor, or Night environments, or to Moving to capture moving objects. The Low Noise option will focus on creating a highquality picture without noise. You can also create 3
Страница 51 из 83 Section 4: Configuration Audio and Video You may configure up to 3 video profiles with different settings for your camera. Hence, you may set up different profiles for your computer and mobile display. In addition, you may also configure the two-way audio settings for your camera. After making any
Страница 52 из 83 Section 4: Configuration Maximum frame rate: A higher frame rate provides smoother motion for videos, and requires more bandwidth. Lower frame rates will result in stuttering motion, and requires less bandwidth. Video Quality: This limits the maximum frame rate, which can be combined with the
Страница 53 из 83 Section 4: Configuration Preset This screen allows you to set preset points for the ePTZ function of the camera, which allows you to look around the camera's viewable area by using a zoomed view. Presets allow you to quickly go to and view a specific part of the area your camera is covering, and
Страница 54 из 83 Section 4: Configuration Preset List: To add a preset to the sequence, select it from the dropdown box at the bottom of this window, set the Dwell time to determine how long the camera view will stay at that preset, then click the Add button. The preset name will appear in the list, followed by the
Страница 55 из 83 Section 4: Configuration Motion Detection Enabling Video Motion will allow your camera to use the motion detection feature. You may draw a finite motion area that will be used for monitoring. After making any changes, click the Save Settings button to save your changes. Enable Video Motion: Select
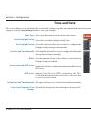
Страница 56 из 83 Section 4: Configuration Time and Date This section allows you to automatically or manually configure, update, and maintain the internal system clock for your camera. After making any changes, click the Save Settings button to save your changes. Time Zone: Select your time zone from the drop-down
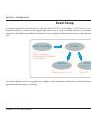
Страница 57 из 83 Section 4: Configuration Event Setup In a typical application, when motion is detected, the DCS-2132L sends images to a FTP server or via e-mail as notifications. As shown in the illustration below, an event can be triggered by many sources, such as motion detection or external digital input
Страница 58 из 83 Section 4: Configuration The Event Setup page includes 4 different sections. • Event • Server • Media • Recording 1. To add a new item - "event, server or media," click Add. A screen will appear and allow you to update the fields accordingly. 2. To delete the selected item from the pull-down menu
Страница 59 из 83 Section 4: Configuration Add Server You can configure up to 5 servers to save snapshots and/or video to. After making any changes, click the Save Settings button to save your changes. Server Name: Enter the unique name of your server. E-mail: Enter the configuration for the target e-mail server
Страница 60 из 83 Section 4: Configuration Add Media There are three types of media, Snapshot, Video Clip, and System Log. After making any changes, click the Save Settings button to save your changes. Media Name: Enter a unique name for media type you want to create. Snapshot: Select this option to set the media
Страница 61 из 83 Section 4: Configuration Video clip: Select this option to set the media type to video clips. Source: Set the video profile to use as the media source. Refer to "Audio and Video" on page 46 for more information on video profiles. Pre-event recording: This sets how many seconds to record before the
Страница 62 из 83 Section 4: Configuration Add Event Create and schedule up to 2 events with their own settings here. After making any changes, click the Save Settings button to save your changes. Event name: Enter a name for the event. Enable this event: Select this box to activate this event. Priority: Set the
Страница 63 из 83 Section 4: Configuration Time: Select Always or enter the time interval. Trigger D/O: Select to trigger the digital output for a specific number of seconds when an event occurs. Server: Specify the location where the event information should be saved to. D-Link DCS-2132L User Manual 63
Страница 64 из 83 Section 4: Configuration Add Recording Here you can configure and schedule the recording settings. After making any changes, click the Save Settings button to save your changes. Recording entry name: The unique name of the entry. Enable this recording: Select this to enable the recording function.
Страница 65 из 83 Section 4: Configuration Size of each file for recording: If this is selected, files will be separated based on the file size you specify. Time of each file for recording: If this is selected, files will be separated based on the maximum length you specify. File Name Prefix: The prefix name will be
Страница 66 из 83 Section 4: Configuration SD Card Here you may browse and manage the recorded files which are stored on the SD card. Format SD Card: Click this icon to automatically format the SD card and create "picture" & "video" folders. View Recorded Picture: If the picture files are stored on the SD card,
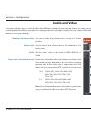
Страница 67 из 83 Section 4: Configuration Advanced Digital Input/Output This screen allows you to control the behavior of digital input and digital output devices. The I/O connector provides the physical interface for digital output (DO) and digital input (DI) that is used for connecting a variety of external alarm
Страница 68 из 83 Section 4: Configuration ICR and IR Here you can configure the ICR and IR settings. An IR(Infrared) Cut-Removable(ICR) filter can be disengaged for increased sensitivity in low light environments. Automatic: The Day/Night mode is set automatically. Generally, the camera uses Day mode and switches
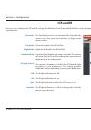
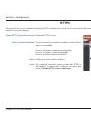
Страница 69 из 83 Section 4: Configuration HTTPS This page allows you to install and activate an HTTPS certificate for secure access to your camera. After making any changes, click the Save Settings button to save your changes. Enable HTTPS Secure Connection: Enable the HTTPS service. Create Certificate Method:
Страница 70 из 83 Section 4: Configuration Access List Here you can set access permissions for users to view your DCS-2132L. Allow list: The list of IP addresses that have the access right to the camera. Start IP address: The starting IP Address of the devices (such as a computer) that have permission to access the
Страница 71 из 83 Section 4: Configuration Maintenance Device Management You may modify the name and administrator’s password of your camera, as well as add and manage the user accounts for accessing the camera. You may also use this section to create a unique name and configure the OSD settings for your camera.
Страница 72 из 83 Section 4: Configuration Backup and Restore In this section, you may backup, restore and reset the camera configuration, or reboot the camera. Save To Local Hard Drive: You may save your current camera configuration as a file on your computer. Local From Local Hard Drive: Locate a pre-saved
Страница 73 из 83 Section 4: Configuration Firmware Upgrade The camera's current firmware version will be displayed on this screen. You may visit the D-Link Support Website to check for the latest available firmware version. To upgrade the firmware on your DCS-2132L, please download and save the latest firmware
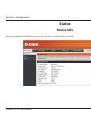
Страница 74 из 83 Section 4: Configuration Status Device Info This page displays detailed information about your device and network connection. D-Link DCS-2132L User Manual 74
Страница 75 из 83 Section 4: Configuration Logs This page displays the log information of your camera. You may download the information by clicking Download. You may also click Clear to delete the saved log information. D-Link DCS-2132L User Manual 75
Страница 76 из 83 Section 4: Configuration Help This page provides helpful information regarding camera operation. D-Link DCS-2132L User Manual 76
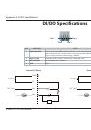
Страница 77 из 83 Appendix A: DI/DO Specifications DI/DO Specifications Pin 1 Pin 4 Pin 2 PIN Pin 3 NOTE FUNCTION 1 Digital Out (DO) Uses an open-drain NFET transistor with the source connected to GND in camera. If used with an external relay, a diode must be connected in parallel with the load for protection
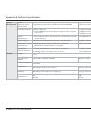
Страница 78 из 83 Appendix B: Technical Specifications Technical Specifications Camera Network Camera Hardware Profile 1/4” Megapixel progressive CMOS sensor 5 meter IR illumination distance Minimum illumination: 0 lux with IR LED on Built-in Infrared-Cut Removable (ICR) Filter module Built-in PIR
Страница 79 из 83 Appendix B: Technical Specifications System System Management Requirements for Web Interface General Operating System: Microsoft Windows 7/Vista/XP/2000 Browser: Internet Explorer, Firefox, Netscape, Opera Event Management Motion detection Event notification and uploading of
Страница 80 из 83 Appendix B: Technical Specifications Dimensions • D-Link DCS-2132L User Manual 80
Страница 81 из 83 Appendix C: Safety Statements Safety Statements CE Mark Warning: This is a Class B product. In a domestic environment, this product may cause radio interference, in which case the user may be required to take adequate measures. FCC Statement: This equipment has been tested and found to comply with
Страница 82 из 83 Appendix C: Safety Statements IMPORTANT NOTICE: FCC Radiation Exposure Statement: This equipment complies with FCC radiation exposure limits set forth for an uncontrolled environment. This equipment should be installed and operated with minimum distance 20cm between the radiator & your body. This