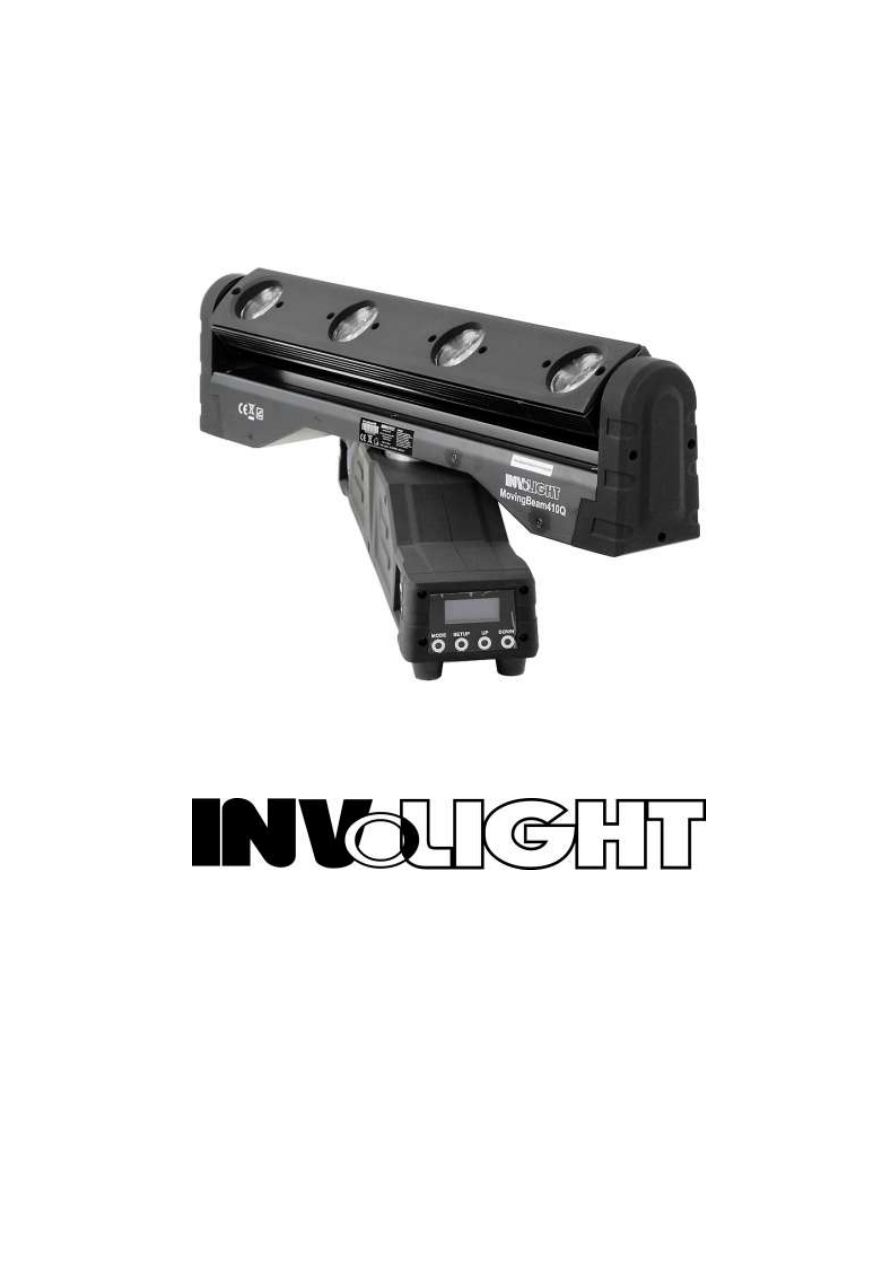
Страница 2 из 10 DMX LED Moving Head, 4-in-1 10W RGBW User Manual Please read the manual before operation A. SPECIFICATION 1. Power input: AC 100V-240V, 60Hz/50Hz 2. Wattage: 70W 3. LEDs: 4-in-1 10W RGBW 4. Beam angle: 1.8 degrees 5. Selectable:1,22, 26 DMX channels 6. Operation mode: LCD display 7. Working
Страница 3 из 10 C. FUNCTION DESCRIPTION LCD Menu struture chart 1. Auto running When the display shows “AUTO”, the light will run as the program which had been set. Press “SETUP” button to enter into the optional menu. Press “UP” and DOWN” to choose the optional which need to set the parameter as below: Led, Pan
Страница 4 из 10 Press “UP” and “DOWN” to select the parameter. When choose “Speed”, press “SETUP” to choose the speed menu of the auto running. Press “UP” and “DOWN” to adjust the auto running speed from 01-20. When choose “Freq.”, press “SETUP” to set the flash speed. Press “UP” and “DOWN” to adjust the flash
Страница 5 из 10 can’t be reset). 3. Sound-active Mode When display shows “SOUND”, enter the sound-active mode. Press “SETUP” enters the menu of adjusting the sound sensitivity. Press “UP” and “DOWN” to adjust the sensitive value from 0-31. 4. DMX Mode When display shows “DMX”, enter the DMX mode. Press “SETUP”
Страница 6 из 10 22-ch Channel Number Function 1 0-255 Pan 0-540° 2 0-255 Pan fine turning 3 0-255 Tilt 0-200° 4 0-255 Tilt fine turning 5 0-255 Pan/Tilt Speed The speed is lower when the No. is larger. 0-129 No function 130-192 The speed is from fast to low when pan moves forward. 193-255 The speed is from low to
Страница 7 из 10 6 130-192 The speed is from fast to low when pan moves forward. 193-255 The speed is from low to fast when pan moves forward. 7 0-255 LED Master Dimming 8 0-255 LED1 R 0-100% 9 0-255 LED1 G 0-100% 10 0-255 LED1 B 0-100% 11 0-255 LED1 W 0-100% 12 0-255 LED2 R 0-100% 13 0-255 LED2 G 0-100% 14 0-255
Страница 8 из 10 5. Master/slave Mode When the LCD displays shows “SLAVE”, it enters the M/S mode. D. SETTING In the setting menu, press “SETUP” button enter to select the menu. There are 9 options, you may select through “UP” and “DOWN” button. 1) BL Time: to set the LCD light time 2) Adjust: to set the motor
Страница 9 из 10 g. When choose “Use”, press “SETUP” button to show the usage time of fixture. Press “SETUP” button to choose “Clear Y/N”. If not, press “MODE” back to the menu H. When choose “Sensor”, press “SETUP” button to enter the menu: P-Hall It is about the pan sensor state. Press “SETUP” button to check it.