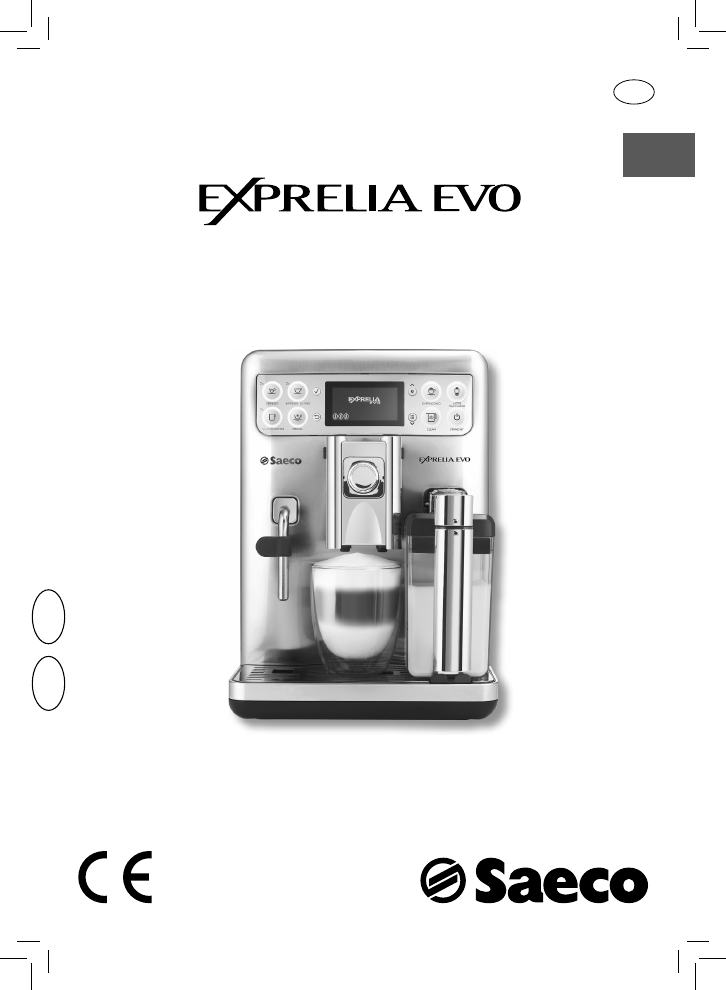
Инструкция для SAECO HD8859/01 Exprelia, HD8858/01, HD8859/01

(скачивание инструкции бесплатно)
Формат файла: PDF
Доступность: Бесплатно как и все руководства на сайте. Без регистрации и SMS.
Дополнительно: Чтение инструкции онлайн
background image

USER MANUAL

PLEASE READ THIS USER MANUAL CAREFULLY BEFORE USING THE MACHINE.

Register your product and get support at 

www.saeco.com/welcome

English

Type HD8858 / HD8859

EN

02

02

1
2
3
4
5
6
7
8
9
10
11
12
13
14
15
16
17
18
19
20
21
22
23
24
25
26
27
28
29
30
31
32
33
34
35
36
37
38
39
40
41
42
43
44
45
46
47
48
49
50
51
52
53
54
55
56
57
58
59
60
61
62
63
64
65
66
67
68
69
70
71
72
73
74
75
76
77
78
79
80
81
82
83
84
85
86
87
88
Оглавление инструкции
  • Страница 1 из 89
    Register your product and get support at 02 English www.saeco.com/welcome Type HD8858 / HD8859 02 EN USER MANUAL PLEASE READ THIS USER MANUAL CAREFULLY BEFORE USING THE MACHINE.
  • Страница 2 из 89
    IMPORTANT SAFEGUARDS When using electrical appliances, basic safety precautions should always be followed, including the following: 1. Read all instructions. 2. Do not touch hot surfaces. Use handles or knobs. 3. To protect against fire, electric shock and injury to persons do not immerse cord,
  • Страница 3 из 89
    CAUTION This appliance is for household use only. Any servicing, other than cleaning and user maintenance, should be performed by an authorized service center. Do not immerse machine in water. To reduce the risk of fire or electric shock, do not disassemble the machine. There are no parts inside
  • Страница 4 из 89
    2 ENGLISH Congratulations on your purchase of a Saeco Exprelia EVO fully automatic coffee machine! To fully benefit from the support that Saeco offers, please register your product at www.saeco.com/welcome. This user manual applies to HD8858 and HD8859. The machine is suitable for preparing
  • Страница 5 из 89
    ENGLISH Adjusting the Dispensing Spout.........................................................................................................26 Adjusting the Coffee Length .............................................................................................................28 BREWING
  • Страница 6 из 89
    4 ENGLISH IMPORTANT Safety Instructions This machine is equipped with safety devices. Nevertheless, read and follow the safety instructions carefully and only use the machine properly as described in these instructions to avoid accidental injury or damage due to improper use of the machine. Keep
  • Страница 7 из 89
    ENGLISH • • • • • • • • • • • 5 - If the machine will not be used for a long time; - before cleaning the machine. Pull on the mains plug, not on the power cord. Do not touch the mains plug with wet hands. Do not use the machine if the mains plug, the power cord or the machine itself is damaged. Do
  • Страница 8 из 89
    6 ENGLISH Cautions • The machine is for household use only. It is not intended for use in environments such as canteens, staff kitchens of shops, offices, factories or other work environments. • Always put the machine on a flat and stable surface. • Do not place the machine on hot surfaces,
  • Страница 9 из 89
    ENGLISH 7 Electromagnetic Fields This appliance complies with all the applicable standards and regulations relating to the exposure to electromagnetic fields. Disposal This symbol on a product indicates that the product is covered by EU Directive 2012/19/EU. Please inform yourself about the local
  • Страница 10 из 89
    8 INSTALLATION Product Overview 12 1 2 7 8 9 3 10 13 14 4 5 15 16 11 6 18 26 17 25 19 23 22 27 28 24 33 32 34 35 29 38 36 37 20 21 30 31
  • Страница 11 из 89
    ENGLISH General Description 1. Water tank 2. Pre-ground coffee compartment 3. Service door 4. Coffee dispensing spout 5. Steam/hot water wand 6. Full drip tray indicator 7. Coffee bean hopper with lid 8. Coffee grinder adjustment 9. Control panel 10. Carafe coupling cap 11. Drip tray (external) 12.
  • Страница 12 из 89
    10 ENGLISH PREPARING FOR USE Machine Packaging The original packaging has been designed and constructed to protect the machine during transport. We recommend keeping the packaging material for possible future transport. Machine Installation 1 Remove the drip tray with grill from the packaging. 2
  • Страница 13 из 89
    ENGLISH 11 5 Lift the lid and remove the water tank using the handle. 6 Rinse the water tank with fresh water. 7 Fill the water tank with fresh water up to the MAX level and put it back into the machine. Make sure it is fully inserted. Caution: Never fill the water tank with warm, hot, sparkling
  • Страница 14 из 89
    12 ENGLISH 10 Insert the plug into the socket located on the back of the machine. 11 Insert the plug on the other end of the power cord into a wall socket with suitable power voltage. 12 Switch the power button to “I” to turn on the machine. LANGUAGE ITALIANO ENGLISH DEUTSCH LANGUAGE ITALIANO
  • Страница 15 из 89
    ENGLISH 13 USING THE MACHINE FOR THE FIRST TIME Automatic Rinse/Self-Cleaning Cycle When warm-up has been completed, the machine automatically performs a rinse/self-cleaning cycle of the internal circuits with fresh water. This takes less than a minute. 16 Place a container under the dispensing
  • Страница 16 из 89
    14 ENGLISH Manual Rinse Cycle You need to perform a rinse cycle when using the machine for the first time. During this process, the coffee brewing cycle is activated and fresh water flows through the dispensing spout. This takes a few minutes. 1 Place a container under the dispensing spout. 2
  • Страница 17 из 89
    ENGLISH 15 6 Press the “ SPECIAL BEVERAGES MILK FROTH HOT WATER STEAM ” button. 7 Press the “ ” button to scroll down the options. Press the “ to select HOT WATER. ” button 8 After dispensing water, remove and empty the container. 9 Repeat the steps from 5 to 8 until the water tank is empty, then
  • Страница 18 из 89
    16 ENGLISH MEASURING AND PROGRAMMING WATER HARDNESS Measuring water hardness is essential for preserving coffee flavour. To measure water hardness, follow the steps below. 1 Immerse the water hardness test strip supplied with the machine in water for 1 second. Note: The test strip can only be used
  • Страница 19 из 89
    ENGLISH 17 2 5 Press the “ ” button to scroll down the options. Press the “ to select MACHINE MENU. MENU BEVERAGE MENU MACHINE MENU ” button 1 2MACHINE MENU 6 Press the “ ” button to select SETTINGS. Press “ 7 Press the “ ” button to select the WATER HARDNESS option. Press “ ” to confirm.
  • Страница 20 из 89
    18 ENGLISH AQUACLEAN WATER FILTER The AquaClean filter is designed to reduce limescale build-up inside the machine and to provide filtered water in order to preserve the coffee aroma and flavour in each cup. By using the series of 8 AquaClean filters as indicated in this user manual, you will not
  • Страница 21 из 89
    ENGLISH 19 Activating the AquaClean Filter You can install the AquaClean filter when first installing the machine as part of the overall installation procedure. If you did not install the AquaClean filter upon first use, you can install it later by accessing the menu as described here below. 1
  • Страница 22 из 89
    20 ENGLISH eighth filter (when the display shows 8/8), the machine will require a descaling cycle to be performed when installing the next filter. 5 The display is prompting you to insert the filter and to fill the water tank. Prepare the AquaClean filter and place it inside the water tank (refer
  • Страница 23 из 89
    ENGLISH 21 9 When the operations described above have been completed, the 100% machine shows this display. The icon shows the capacity of the AQUACLEAN filter that you have just installed. The 100% AquaClean icon appears on the machine-ready screen to indicate that the filter has been activated.
  • Страница 24 из 89
    22 ENGLISH 4 If you do not replace the filter, the filter icon flashes on and off for 1 second when filter capacity drops to 0%. If you ignore this warning, the display will not show the filter icon anymore. 10% 5 If the filter icon is not displayed anymore, you will need to descale the machine
  • Страница 25 из 89
    ENGLISH 23 4 Press the “ ” button to confirm that you have placed a container OK 1/8 PLACE A CONTAINER UNDER THE WATER SPOUT ESC under the water dispensing spout. 5 A bar showing the filter activation progress status is displayed on the filter activation screen. 6 When the operations described
  • Страница 26 из 89
    24 ENGLISH ADJUSTMENTS The machine allows for certain adjustments so that you can brew the best tasting coffee possible. Saeco Adapting System Coffee is a natural product whose characteristics may change according to its origin, blend and roast. The machine is equipped with a self-adjusting system
  • Страница 27 из 89
    ENGLISH 25 2 Press and turn the grinder adjustment knob one notch at a time. You will taste the difference after brewing 2-3 cups of espresso. 3 The reference marks on the coffee bean hopper lid indicate the grind setting. There are 15 different grind settings to choose from, from: - very coarse
  • Страница 28 из 89
    26 ENGLISH Adjusting the Aroma (Coffee Strength) Choose your favourite coffee blend and adjust the amount of coffee to be ground according to your own taste. You can also select the pre-ground coffee function. Note: Selection must be made prior to selecting coffee. CAPPUCCINO STRENGTH COFFEE AMOUNT
  • Страница 29 из 89
    ENGLISH 27 The recommended positions are: For small cups; For large cups; For Latte Macchiato cups. Note: The dispensing spout can also be removed to allow the use of large containers. Two cups can be placed under the dispensing spout to brew two coffees at the same time.
  • Страница 30 из 89
    28 ENGLISH Adjusting the Coffee Length The machine allows you to adjust the amount of brewed coffee or milk according to your taste and the size of your cups. ”, “ ” and “ ” buttons are pressed, the machine Each time the “ brews a pre-set amount of product. Each button may be individually
  • Страница 31 из 89
    ENGLISH 29 BREWING ESPRESSO, COFFEE AND LONG COFFEE Before brewing coffee, make sure that there are no warnings shown on the display and that the water tank and coffee bean hopper are filled. Brewing Espresso, Coffee and Long Coffee Using Coffee Beans 1 Place 1 or 2 cups under the dispensing spout.
  • Страница 32 из 89
    30 ENGLISH Brewing Espresso, Coffee and Long Coffee Using Pre-Ground Coffee This function allows you to use pre-ground and decaffeinated coffee. With the pre-ground coffee function you can only brew one coffee at a time. 1 To select the pre-ground coffee function, keep the “ until the “ ” button
  • Страница 33 из 89
    ENGLISH 31 5 Lift the pre-ground coffee compartment lid and add one measuring scoop of pre-ground coffee to the compartment. Use only the measuring scoop supplied with the machine. Then close the pre-ground coffee compartment lid. Warning: Add only pre-ground coffee to the pre-ground coffee
  • Страница 34 из 89
    32 ENGLISH MILK CARAFE This chapter explains how to use the milk carafe to prepare a cappuccino, a Latte Macchiato or hot milk. Note: Before using the milk carafe, clean it thoroughly as described in the “Cleaning and Maintenance” chapter. We recommend filling it with cold milk (approx. 5°C). After
  • Страница 35 из 89
    ENGLISH 33 4 Refit the lid and close the milk carafe dispensing spout by turning it counter-clockwise. The milk carafe is now ready for use. Inserting the Milk Carafe 1 Slightly tilt the milk carafe and insert it in the front part of the machine. 2 At this stage, the carafe holes (A) are lower than
  • Страница 36 из 89
    ENGLISH 34 3 Push the carafe towards the bottom while rotating it at the same time until it is locked onto the (external) drip tray (E). Caution: Do not force the carafe while inserting it. E Removing the Milk Carafe 1 Close the milk carafe dispensing spout by turning it counter-clockwise. 2 Turn
  • Страница 37 из 89
    ENGLISH 35 3 Pull it away from the machine until it is completely removed. Emptying the Milk Carafe 1 Open the milk carafe dispensing spout by turning it clockwise. 2 Press the release buttons to remove the lid. 3 Lift the lid. Empty the milk carafe and clean it properly. Note: After each use,
  • Страница 38 из 89
    36 ENGLISH BREWING A CAPPUCCINO Warning: Danger of burning! Dispensing may be preceded by jets of milk and steam. Never seize the carafe handle during the cleaning cycle: danger of burning! Wait until the end of the cycle before removing the milk carafe. 1 Fill the carafe with milk. The milk level
  • Страница 39 из 89
    ENGLISH 37 4 Open the milk carafe dispensing spout by turning it clockwise. 5 Press the “ ” button to start dispensing. 6 The machine is warming up. CAPPUCCINO PLEASE WAIT … STOP Note: If the ECOMODE function is active, the machine requires a longer waiting time for warm-up. For further details,
  • Страница 40 из 89
    38 ENGLISH Adjusting the Cappuccino Length Each time the “ ” button is pressed, the machine dispenses a pre-set quantity of cappuccino into the cup. The machine allows you to adjust the amount of cappuccino according to your taste and the size of your cups. 1 Fill the carafe with milk and place it
  • Страница 41 из 89
    ENGLISH 39 BREWING LATTE MACCHIATO Warning: Danger of burning! Dispensing may be preceded by jets of milk and steam. Never seize the carafe handle during the cleaning cycle: danger of burning! Wait until the end of the cycle before removing the milk carafe. 1 Fill the carafe with milk. The milk
  • Страница 42 из 89
    40 ENGLISH 4 Open the milk carafe dispensing spout by turning it clockwise. 5 Press the “ ” button to start dispensing. 6 The machine is warming up. LATTE MACCHIATO PLEASE WAIT … STOP Note: If the ECOMODE function is active, the machine requires a longer waiting time for warm-up. For further
  • Страница 43 из 89
    ENGLISH 41 Adjusting the Latte Macchiato Length Each time the “ ” button is pressed, the machine dispenses a pre-set quantity of Latte Macchiato into the cup. The machine allows you to adjust the amount of Latte Macchiato according to your taste and the size of your cups. 1 Fill the milk carafe
  • Страница 44 из 89
    42 ENGLISH SPECIAL BEVERAGES The machine is designed to brew more products than those described above. For this, follow the steps below: 1 Press the “ SPECIAL BEVERAGES MILK FROTH HOT WATER STEAM SPECIAL BEVERAGES MILK FROTH HOT WATER STEAM ” button to access the SPECIAL BEVERAGES menu. 2 Select
  • Страница 45 из 89
    ENGLISH 43 Hot Milk Warning: Danger of burning! Dispensing may be preceded by jets of milk and steam. Never seize the carafe handle during the cleaning cycle: danger of burning! Wait until the end of the cycle before removing the milk carafe. 1 Insert the milk carafe and place a cup under the
  • Страница 46 из 89
    44 ENGLISH Hot Water Dispensing Warning: Danger of burning! Dispensing may be preceded by small jets of hot water and steam. Do not touch the steam/hot water wand with bare hands. 1 Place a container under the steam/hot water wand. 2 Press the “ SPECIAL BEVERAGES MILK FROTH HOT WATER STEAM ” button
  • Страница 47 из 89
    ENGLISH 45 Brewing a Strong Coffee 1 Place a cup under the coffee dispensing spout. 2 Press the “ SPECIAL BEVERAGES STEAM RISTRETTO ESPRESSO MACCHIATO ” button to access the SPECIAL BEVERAGES menu. 3 After selecting RISTRETTO by pressing the “ ton, confirm by pressing “ ” or “ ” scrolling but- ”. 4
  • Страница 48 из 89
    46 ENGLISH Espresso Macchiato Warning: Danger of burning! Dispensing may be preceded by jets of milk and steam. Never seize the carafe handle during the cleaning cycle: danger of burning! Wait until the end of the cycle before removing the milk carafe. 1 Insert the milk carafe and place a cup under
  • Страница 49 из 89
    ENGLISH 47 Flat White Warning: Danger of burning! Dispensing may be preceded by jets of milk and steam. Never seize the carafe handle during the cleaning cycle: danger of burning! Wait until the end of the cycle before removing the milk carafe. 1 Insert the milk carafe and place a cup under the
  • Страница 50 из 89
    48 ENGLISH BEVERAGE PROGRAMMING The machine can be programmed to tailor the coffee taste to your personal preferences. Each beverage has its own adjustable settings. 1 Press the “ MENU ” button to access the machine main menu. 2 Press the “ ” button to access the BEVERAGE MENU. BEVERAGE MENU
  • Страница 51 из 89
    ENGLISH 49 Cappuccino Programming The following procedure describes how to program a cappuccino. The settings of each submenu are explained below. You can select these by pressing the “ ” or “ ” scrolling button. Confirm the settings with “ ”. BEVERAGE MENU COFFEE CAPPUCCINO LATTE MACCHIATO Press “
  • Страница 52 из 89
    50 ENGLISH TEMPERATURE TASTE MILK AMOUNT MILK AMOUNT RESTORE TO DEFAULT This setting allows you to adjust the coffee temperature. HIGH: high temperature. NORMAL: medium temperature. LOW: low temperature. During prebrewing, the coffee is slightly dampened to bring out the aroma in full. DELICATE:the
  • Страница 53 из 89
    ENGLISH 51 Hot Water Programming The following procedure describes how to program hot water. 1 Select SPECIAL BEVERAGES from the beverage menu by pressing the BEVERAGE MENU LATTE MACCHIATO SPECIAL BEVERAGES “ ” or “ ” scrolling button. Press “ ” to confirm. SPECIAL BEVERAGES MILK FROTH HOT WATER
  • Страница 54 из 89
    52 ENGLISH MACHINE PROGRAMMING 1 Press the “ ” button to access the machine main menu. 2 Select MACHINE MENU by pressing the “ MENU BEVERAGE MENU MACHINE MENU Press “ ” or “ ” scrolling button. ” button to confirm. AquaClean Filter AQUACLEAN FILTER The general menu allows you to adjust the water
  • Страница 55 из 89
    ENGLISH 53 Settings Menu SETTINGS LANGUAGE The general menu allows you to change the operation settings. This setting is important to automatically adjust the machine parameters according to the user's country. This setting allows you to adjust the display brightness. BRIGHTNESS The BUTTON SOUND
  • Страница 56 из 89
    54 ENGLISH Maintenance Menu MAINTENANCE The MAINTENANCE menu allows you to set all the functions for correctly managing machine maintenance. BREW GROUP CLEAN The BREW GROUP CLEAN function enables the brew group monthly cleaning (see the “Monthly Cleaning of the Brew Group with Coffee Oil Remover”
  • Страница 57 из 89
    ENGLISH 55 CLEANING AND MAINTENANCE Daily Cleaning of the Machine Caution: Timely cleaning and maintenance of your machine is very important as it prolongs the life of your machine. Your machine is continuously exposed to moisture, coffee and limescale! This chapter describes in detail which
  • Страница 58 из 89
    56 ENGLISH 3 Empty the coffee grounds drawer and wash it with fresh water. 4 Empty the (internal) drip tray and the lid and wash them with fresh water. 5 Correctly reinstall all the components. 6 Insert the drip tray and the coffee grounds drawer and close the service door. Note: If the coffee
  • Страница 59 из 89
    ENGLISH 57 Daily Cleaning of the Milk Carafe: "CLEAN" Self-cleaning Cycle (After Each Use) After preparing a milk-based beverage, the machine performs an automatic cleaning cycle by releasing steam jets from the milk dispensing spout. You can also activate this cycle manually by pressing the “ ”
  • Страница 60 из 89
    58 ENGLISH 3 Remove the grill and wash it thoroughly. 4 Remove the support under the grill. Wash the support and the drip tray. 5 Dry the grill, reassemble it and place it back in the machine. 6 Remove the dispensing spout and wash it with water. 7 Clean the pre-ground coffee compartment with a
  • Страница 61 из 89
    ENGLISH 59 8 Clean the steam/hot water wand and the display with a damp cloth. Weekly Cleaning of the Milk Carafe The weekly cleaning is more thorough as any milk residue is removed from the carafe dispensing spout. 1 Before cleaning, remove the carafe from the machine and empty it. 2 Open the milk
  • Страница 62 из 89
    60 ENGLISH 5 Remove the connector which comes into contact with the machine. 6 Remove the handle with the suction tube. 7 Remove the suction tube. 8 Remove the external fitting. 9 Remove the internal fitting. 10 Clean all the parts thoroughly with lukewarm water. 11 Reassemble the parts following
  • Страница 63 из 89
    ENGLISH 61 Weekly Cleaning of the Brew Group The brew group should be cleaned every time the coffee bean hopper is filled or at least once a week. 1 Press the button and open the service door. 2 Remove the (internal) drip tray and coffee grounds drawer. 3 To remove the brew group, press the «PUSH»
  • Страница 64 из 89
    62 ENGLISH 5 Thoroughly wash the brew group with fresh, lukewarm water and carefully clean the upper filter. Caution: Do not use any detergent or soap to clean the brew group. 6 Let the brew group air-dry thoroughly. 7 Thoroughly clean the inside of the machine using a soft, dampened cloth. 8 Make
  • Страница 65 из 89
    ENGLISH 63 11 Make sure that the hook which locks the brew group is in the correct position. If it is still in the downward position, push it upward until it locks correctly into place. 12 Insert the brew group back into its seat until it locks into place without pressing the “PUSH” button. 13
  • Страница 66 из 89
    64 ENGLISH Monthly Cleaning of the Milk Carafe In the monthly cleaning cycle we recommend using the “Saeco Milk Circuit Cleaner” to keep the entire circuit clean of milk residues. The “Saeco Milk Circuit Cleaner” can be purchased separately. For further details, please refer to the maintenance
  • Страница 67 из 89
    ENGLISH 65 6 Put the lid back on. 7 Rotate the milk dispensing spout counter-clockwise to the lock position. 8 Insert the milk carafe into the machine. 9 Place a large container (1.5 l) under the dispensing spout. Open the milk dispensing spout by turning it clockwise.
  • Страница 68 из 89
    66 ENGLISH 10 Press the “ ” button to start the cycle. The machine starts dispensing OK POUR DETERGENT INTO CARAFE & FILL WITH WATER the solution through the milk dispensing spout. 11 This icon is displayed. The bar shows the cycle progress. CARAFE CLEANING Warning: Never drink the solution
  • Страница 69 из 89
    ENGLISH 67 16 The machine starts dispensing water from both the coffee dispensing CARAFE RINSING spout and the milk dispensing spout. The bar shows the cycle progress. 17 At the end of the cycle, the machine returns to the product brewing menu. 18 Disassemble and wash the milk carafe as described
  • Страница 70 из 89
    68 ENGLISH 2 Also lubricate the shaft. 3 Insert the brew group into its seat until it locks into place (see the “Weekly Cleaning of the Brew Group” chapter). 4 Insert the (internal) drip tray and the coffee grounds drawer and close the service door. Monthly Cleaning of the Brew Group with “Coffee
  • Страница 71 из 89
    ENGLISH 69 3 Press the “ ” button to confirm. OK PERFORM BREW GROUP CLEANING? ESC 4 Fill the water tank with fresh water up to the MAX level. Press the “ ” OK REFILL WATER TANK button. 5 Put a “Coffee Oil Remover” tablet in the pre-ground coffee compartOK ment. Press the “ ” button. INSERT GROUP
  • Страница 72 из 89
    70 ENGLISH 7 This icon is displayed. The bar shows the cycle progress. BREW GROUP CLEAN Warning: Never drink the solution dispensed during this step. 8 When the machine stops dispensing, remove and empty the container. 9 Clean the brew group as described in the “Weekly Cleaning of the Brew Group”
  • Страница 73 из 89
    ENGLISH 71 DESCALING When the "CALC CLEAN" icon is displayed, you need to descale the machine. The descaling cycle takes approx. 30 minutes. Caution: Not doing this will ultimately make your machine stop working properly. In this case, repair is NOT covered by warranty. Warning: Use the Saeco
  • Страница 74 из 89
    72 ENGLISH 2 Select “DESCALING” and confirm with “ ”. MAINTENANCE CARAFE CLEANING DESCALING CARAFE CLEAN 3 Press the “ ” button to confirm. OK START DESCALING? (~ 30 MINUTES) Note: If you press the “ ESC ” button by mistake, press the “ ” button to quit. 4 Remove the water tank and the AQUACLEAN
  • Страница 75 из 89
    ENGLISH 73 6 Fill half the milk carafe with fresh water. Insert the carafe and open the milk dispensing spout by turning it clockwise. Press the “ ” button. OK FILL HALF CARAFE WITH WATER. INSERT IN BREW. POSITION 7 Place a large container (1.5 l) under both the steam/hot water dispensOK PLACE A
  • Страница 76 из 89
    74 ENGLISH 9 The machine will start dispensing the descaling solution at regular STEP 1/2 DESCALING intervals. The bar on the display shows the cycle progress. PAUSE Note: To empty the container during the process and to pause the descaling cycle, press the “ ” button. To resume the cycle, press
  • Страница 77 из 89
    ENGLISH 75 13 Empty the container and place it under both the steam/hot water OK PLACE A CONTAINER UNDER HOT WATER & CARAFE DISP SPOUT dispensing spout and the milk carafe dispensing spout. Press the “ button. ” 14 The rinse cycle starts. The bar shows the cycle progress. STEP 2/2 RINSING PAUSE 15
  • Страница 78 из 89
    76 ENGLISH Interruption of the Descaling Cycle Once the descaling cycle has started, it must be completed; do not turn off the machine mid-cycle. If the machine stops, you can quit the cycle by pressing the ON/OFF button. If this occurs, or in the event of power failure or accidental disconnection
  • Страница 79 из 89
    ENGLISH 77 MEANING OF THE DISPLAY Displayed message CLOSE HOPPER DOOR ADD COFFEE INSERT BREW GROUP INSERT COFFEE GROUNDS DRAWER How to reset the message Close the coffee bean hopper inner lid. Fill the coffee bean hopper. The brew group must be inserted into the machine. Insert the coffee grounds
  • Страница 80 из 89
    78 ENGLISH Displayed message INSERT CARAFE How to reset the message Insert the milk carafe to start brewing. Press “ ” to exit. ESC You need to descale the machine. Follow the steps described in the “Descaling” chapter of this manual. Please note that not descaling your machine will ultimately make
  • Страница 81 из 89
    ENGLISH 79 TROUBLESHOOTING This chapter summarizes the most common problems you could encounter with your machine. If you are unable to solve the problem with the information below, visit www.saeco.com/support for a list of frequently asked questions or contact the Philips Saeco hotline in your
  • Страница 82 из 89
    80 ENGLISH Machine actions Causes Solutions The machine takes a The machine circuit is clogged by Descale the machine. long time to warm up or limescale. the amount of water dispensed from the wand is too little. The brew group cannot be removed. The brew group is out of place. Turn on the machine.
  • Страница 83 из 89
    ENGLISH 81 Machine actions Causes The machine grinds the There is no water. coffee beans but no coffee is brewed (see note). The brew group is dirty. Coffee leaks out of the dispensing spout. Fill the water tank and prime the circuit (see the "Manual Rinse Cycle" chapter). Clean the brew group (see
  • Страница 84 из 89
    82 ENGLISH ENERGY SAVING Stand-by The Saeco fully automatic espresso coffee machine is designed for energy saving, as proven by the Class A energy label. After a certain time of inactivity that can be set by the user (see the “Machine Programming” chapter), the machine turns off automatically. If a
  • Страница 85 из 89
    ENGLISH 83 TECHNICAL SPECIFICATIONS The manufacturer reserves the right to make changes to the technical specifications of the product. Nominal Voltage - Power Rating Power Supply See data plate on the appliance Housing material Thermoplastic material Size (w x h x d) 245 x 360 x 420 mm Weight 13.4
  • Страница 86 из 89
    84 ENGLISH ORDERING MAINTENANCE PRODUCTS For cleaning and descaling, use Saeco maintenance products only. You can purchase the products at the Philips online shop at www.shop.philips.com/ service, from your local dealer or at authorised service centres. If you have any difficulties obtaining
  • Страница 87 из 89
    ENGLISH 85 - Coffee Oil Remover CA6704 - Milk Circuit Cleaner CA6705
  • Страница 88 из 89
    del 15-09-15 02 EN Rev.00 02 The manufacturer reserves the right to make changes without prior notice. www.philips.com/saeco
  • Страница 89 из 89