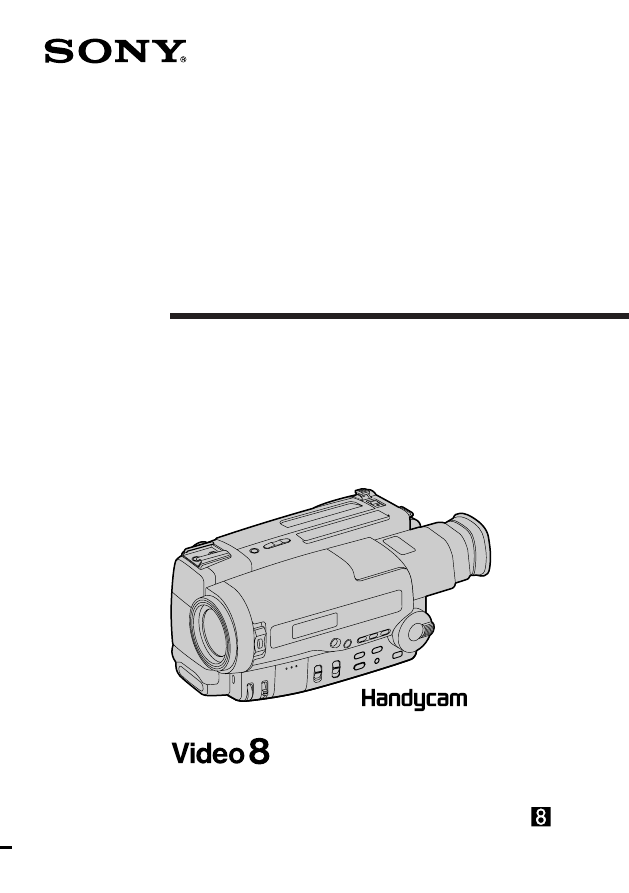
Инструкция для SONY CCD-TR502E

(скачивание инструкции бесплатно)
Формат файла: PDF
Доступность: Бесплатно как и все руководства на сайте. Без регистрации и SMS.
Дополнительно: Чтение инструкции онлайн
background image

Video Camera
Recorder

Operating Instructions

Before operating the unit, please read this manual thoroughly,
and retain it for future reference.

Инструкция по эксплуатации

Перед началом эксплуатации данного аппарата просим внимательно
прочесть настоящее руководство и оставить его для будущих справок.

© 1997 by Sony Corporation

CCD-TR501E/TR502E/TR503E/

TR506E/TR720E/TR740E 

3-859-173-

14

 (1)

CCD-TR740E

1
2
3
4
5
6
7
8
9
10
11
12
13
14
15
16
17
18
19
20
21
22
23
24
25
26
27
28
29
30
31
32
33
34
35
36
37
38
39
40
41
42
43
44
45
46
47
48
49
50
51
52
53
54
55
56
57
58
59
60
61
62
63
64
65
66
67
68
69
70
71
72
73
74
75
76
77
78
79
80
81
82
83
84
85
86
87
88
Оглавление инструкции
  • Страница 1 из 89
    3-859-173-14 (1) Video Camera Recorder Operating Instructions Before operating the unit, please read this manual thoroughly, and retain it for future reference. Инструкция по эксплуатации Перед началом эксплуатации данного аппарата просим внимательно прочесть настоящее руководство и оставить его
  • Страница 2 из 89
    Русский English Welcome! Добро ! Congratulations on your purchase of this Sony Handycam camcorder. With your Handycam, you can capture life’s precious moments with superior picture and sound quality. Your Handycam is loaded with advanced features, but at the same time it is very easy to use. You
  • Страница 3 из 89
    Table of contents Оглавление Getting started Charging and installing the battery pack .......... 7 Inserting a cassette ............................................... 11 Подготовка к началу работы Зарядка и установка батарейного блока ...... 7 Вставка кассеты
  • Страница 4 из 89
    Перед началом работы Before you begin Using this manual Использование данного руководства The instructions in this manual are for the six models listed below. Before you start reading this manual and operating the unit, check your model number by looking at the bottom of your camcorder. The
  • Страница 5 из 89
    Using this manual Использование данного руководства Precaution on copyright Предостережение об авторском праве Телевизионные программы, кинофильмы, видеоленты и другие материалы могут быть защищены авторским правом. Неправомочная запись таких материалов может противоречить условиям закона об
  • Страница 6 из 89
    Checking supplied accessories Check that the following accessories are supplied with your camcorder. Проверка прилагаемых принадлежностей Проверьте наличие следующих принадлежностей, прилагаемых к Вашей видеокамере. 1 2 3 4 5 6 * or/или 7 1 Wireless Remote Commander (1) (p. 23, 81) 2 NP-33 Battery
  • Страница 7 из 89
    Getting started Подготовка к началу работы Charging and installing the battery pack Зарядка и установка батарейного блока Before using your camcorder, you first need to charge and install the battery pack. To charge the battery pack, use the supplied AC power adaptor. Перед пользованием Вашей
  • Страница 8 из 89
    Charging and installing the battery pack Battery life Срок службы батарейки CCD-TR501E/TR502E/TR503E CCD-TR501E/TR502E/TR503E Battery pack Typical recording time** 55 Continuous recording time*** 100 Батарейный блок Типичное время записи* * NP-33 ( прилагается) 55 Непрерывное время записи*** 100
  • Страница 9 из 89
    Charging and installing the battery pack Зарядка и установка батарейного блока Для снятия батарейного блока Предвиньте батарейный блок в направлении стрелки. Notes on charging the battery pack •The POWER lamp will remain lit for a while even if the battery pack is removed and the mains lead is
  • Страница 10 из 89
    Charging and installing the battery pack Зарядка и установка батарейного блока Installing the battery pack Установка батарейного блока (1) Insert the top of the battery pack into the top of the battery mounting surface. (2) Push the battery pack so that it attaches firmly. Make sure that you hear
  • Страница 11 из 89
    Inserting a cassette 2 3 To eject the cassette Для выталкивания кассеты While pressing the small blue button, slide EJECT in the direction of the arrow. Нажимая маленькую синюю кнопку, сдвиньте EJECT в направлении стрелки. To prevent accidental erasure Для предотвращения случайного стирания
  • Страница 12 из 89
    Basic operations Camera recording Make sure that a power source and a cassette is inserted and that the START/STOP MODE switch is set to . When you use the camcorder for the first time, power on it and reset the date and time to your time (p. 51) before you start recording. The date is
  • Страница 13 из 89
    Camera recording Запись с помощью видеокамеры To stop recording momentarily [a] Для временной остановки записи [a] Press START/STOP again. The “REC” indicator in the viewfinder changes to the “STBY” indicator (Standby mode). Нажмите опять START/STOP. В видоискателе индикатор “REC” изменится на
  • Страница 14 из 89
    Camera recording To focus the viewfinder lens Для фокусировки объектива видоискателя If the viewfinder is not in focus at all or when you use the camcorder after someone else has used it, focus the viewfinder lens. Turn the viewfinder lens adjustment ring [a] (CCDTR501E/TR502E) or move the
  • Страница 15 из 89
    Camera recording Using the zoom feature Zooming speed (Variable speed zooming) Turn the power zoom lever fully for a highspeed zoom. Turn it lightly for a relatively slow zoom. When you shoot a subject using a telephoto zoom If you cannot get a sharp focus while in extreme telephoto zoom, move the
  • Страница 16 из 89
    Camera recording Notes on digital zoom – CCD-TR502E/TR506E/TR720E/TR740E only •More than 15x zoom is performed digitally, and the picture quality deteriorates as you go toward the “ T ” side. If you do not want to use the digital zoom, set D ZOOM to OFF in the menu system. •The right side [a] of
  • Страница 17 из 89
    Hints for better shooting Cautions on the viewfinder •Do not pick up the camcorder by the viewfinder [c]. •Do not place the camcorder so as to point the viewfinder toward the sun. The inside of the viewfinder may be damaged. Be careful when placing the camcorder under sunlight or by a window [d].
  • Страница 18 из 89
    Checking the recorded picture Проверка записанного изображения Using EDITSEARCH, you can review the last recorded scene or check the recorded picture in the viewfinder. (1) While pressing the small green button on the POWER switch, set it to CAMERA. (2) Turn STANDBY up. (3) Press the – (Œ) side of
  • Страница 19 из 89
    Connections for playback Connect the camcorder to your VCR or TV to watch the playback picture on the TV screen. When monitoring the playback picture by connecting the camcorder to your TV, we recommend you to use mains for the power source. Подсоединение прямо к КВМ/ телевизору с входными гнездами
  • Страница 20 из 89
    Connections for playback If your TV or VCR is a monaural type – CCD-TR506E/TR720E/TR740E only Connect only the white plug for audio on both the camcorder and the TV or the VCR. With this connection, the sound is monaural. To connect to a VCR or TV without Video/Audio input jacks Use an RFU adaptor
  • Страница 21 из 89
    Connections for playback If your TV or VCR is a monaural type Connect the yellow plug for video and connect only the white plug for audio on both the AV cordless IR receiver and the TV or VCR. With this connection, the sound is monaural. To play back on a TV Notes on connecting AV cordless IR
  • Страница 22 из 89
    Playing back a tape You can monitor the playback picture in the viewfinder. You can also monitor a picture on a TV screen, after connecting the camcorder to a TV or VCR. (1) While pressing the small green button on the POWER switch, set it to PLAYER. (2) Insert the recorded tape with the window
  • Страница 23 из 89
    Playing back a tape Using the Remote Commander You can control playback using the supplied Remote Commander. Before using the Remote Commander, insert the R6 (size AA) batteries. To erase the indicators Various playback modes To view a still picture (Playback pause) Press P during playback. To
  • Страница 24 из 89
    Advanced operations Using alternative power sources You can choose any of the following power sources for your camcorder: battery pack, the mains and 12/24 V car battery. Choose the appropriate power source depending on where you want to use your camcorder. Place Power source Accessory to be used
  • Страница 25 из 89
    Using alternative power sources Использование альтернативных источников питания Using the mains Использование электрической сети To use the supplied AC power adaptor: (1) Connect the mains lead to the mains. Insert the top of the connecting plate of the AC power adaptor into the top of the battery
  • Страница 26 из 89
    Using alternative power sources Notes on the POWER lamp •The POWER lamp will remain lit for a while even if the unit is unplugged after use. This is normal. •If the POWER lamp does not light, set the selector to VTR (DC OUT) and disconnect the mains lead. After about one minute, reconnect the mains
  • Страница 27 из 89
    Изменение режимных установок You can change the mode settings to further enjoy the features and functions of the camcorder. (1) Press MENU to display the menu. (2) Turn the control dial to select the desired item, and press the dial. (3) Turn the control dial to select the desired mode, and press
  • Страница 28 из 89
    Changing the mode settings Изменение режимных установок Selecting the mode setting of each item Выбор режима каждой установки Items for both CAMERA and PLAYER modes Установки для режимов CAMERA и PLAYER COMMANDER <ON/OFF> •Select ON when using the supplied Remote Commander for the camcorder.
  • Страница 29 из 89
    Changing the mode settings Изменение режимных установок CLOCK SET* Reset the date or time. CLOCK SET* Дату или время. DEMO MODE* <ON/OFF> •Select ON to make the demonstration appear. •Select OFF to make the demonstration not appear. DEMO MODE* <ON/OFF> •Выберите ON, чтобы появилась демонстрация.
  • Страница 30 из 89
    Recording with the date or time Before you start recording or during recording, press DATE or TIME. You can record the date or time displayed in the viewfinder with the picture. You cannot record the date and time at the same time. Except for the date or time indicator, no indicator is recorded.
  • Страница 31 из 89
    Selecting the START/STOP mode Выбор режима START/STOP To extend the recording time in 5 SEC mode Для продления времени записи в режиме записи 5 SEC Press START/STOP again before all the dots disappear. Recording continues for about 5 seconds from the moment you press START/ STOP. Снова нажмите
  • Страница 32 из 89
    Fade-in and fade-out You can fade in or out to give your recording a professional appearance. When fading in, the picture gradually fades in from black while the sound increases. When fading out, the picture gradually fades to black while the sound decreases. When fading in [a] (1) While the
  • Страница 33 из 89
    Fade-in and fade-out Введение и выведение изображения To cancel the fade-in/fade-out function Для отмены функции введения/ выведения изображения Before pressing START/STOP, press FADER to turn off the FADER indicator. Перед нажатием START/STOP нажмите кнопку FADER, чтобы выключить индикатор FADER.
  • Страница 34 из 89
    Enjoying picture effect Наслаждение эффектами изображения Selecting picture effect Выбор эффекта изображения You can make pictures like those of television with the Picture Effect function. [a] [c] MOSAIC [a] the picture is mosaic. MOSAIC [a] Изображение будет мозаическим. SOLARIZE [b] The light
  • Страница 35 из 89
    Enjoying picture effect Using picture effect function While the camcorder is in Standby mode, press PICTURE EFFECT to select the desired Picture Effect mode. Наслаждение эффектами изображения Использование функции эффектов изображения В то время, когда видеокамера находится в режиме готовности,
  • Страница 36 из 89
    Using the wide mode function – CCD-TR502E/TR506E/TR720E/TR740E only Selecting the desired mode Использование функции широкоформатного режима – Только CCD-TR502E/TR506E/ TR720E/TR740E Выбор желаемого режима You can record a cinemalike picture (CINEMA) or a 16:9 wide picture to watch on the 16:9
  • Страница 37 из 89
    Using the wide mode function Using the wide mode function While the camcorder is in Standby mode, press 16:9 WIDE repeatedly so that the desired mode indicator appears. Использование функции широкоформатного режима Использование функции широкоформатного режима Когда видеокамера находится в режиме
  • Страница 38 из 89
    Focusing manually Фокусировка вручную When to use manual focus При использовании ручной фокусировки In the following cases you should obtain better results by adjusting the focus manually. [a] [b] •Insufficient light [a] •Subjects with little contrast — walls, sky, etc. [b] •Too much brightness
  • Страница 39 из 89
    Focusing manually Фокусировка вручную Focusing manually Ручная фокусировка To return to the autofocus mode Для возврата к режиму автоматической фокусировки Усовершенствованные операции При ручной фокусировке сперва перед записью выполнить фокусировку в режиме телефото, а затем установить расстояние
  • Страница 40 из 89
    Using the PROGRAM AE function You can select from three PROGRAM AE (Auto Exposure) modes to suit your shooting situation. When you use PROGRAM AE, you can capture high-speed action or night views. Использование функции PROGRAM AE Вы можете выбрать один из трех режимов PROGRAM AE (автоматической
  • Страница 41 из 89
    Using the PROGRAM AE function Using the PROGRAM AE function While the camcorder is in Standby mode, set the mark of the desired mode to r mark above the PROGRAM AE dial. Использование функции PROGRAM AE Использование функции PROGRAM AE В то время, когда видеокамера находится в режиме готовности,
  • Страница 42 из 89
    Shooting with backlighting When you shoot a subject with the light source behind the subject or a subject with a light background, use the BACK LIGHT function. Если Вы снимаете объект с источником света позади объекта или объект на светлом фоне, используйте функциию BACK LIGHT. Press BACK LIGHT.
  • Страница 43 из 89
    Releasing the STEADY SHOT function Отключение функции STEADY SHOT – Только CCD-TR720E/TR740E Когда Вы производите съемку, появляется индикатор Ó. Это указывает, что функция устойчивой съемки работает для компенсации дрожания видеокамеры. You can release the SteadyShot function when you do not need
  • Страница 44 из 89
    Superimposing a title You can select from eight preset titles and two titles you made to superimpose it on the picture during recording. Each time you press TITLE, the preset titles appear one by one. To superimpose from the beginning (1) Set the POWER switch to CAMERA. (2) Turn STANDBY up. (3)
  • Страница 45 из 89
    Superimposing a title Наложение надписи Titles cycle as follows Original title 1 n Original title 2 n HELLO! n HAPPY BIRTHDAY n HAPPY HOLIDAYS n CONGRATULATIONS! n OUR SWEET BABY n WEDDING n VACATION n THE END When you press TITLE with “THE END” displayed, the titles disappear. When you press TITLE
  • Страница 46 из 89
    Making your own titles Создание Ваших собственных надписей You can make two titles of up to 22 characters each, and store them in memory. We recommend to eject the cassette before you begin so that the power is not turned off on the way. (1)While the camcorder is in Standby mode, press MENU to
  • Страница 47 из 89
    Making your own titles To erase the title you have made Press MENU, select the title you want to erase, and press the dial. Select ↵ at the leftmost character, then press the dial. Do not select the blank to erase a character. Otherwise, the blank is stored as a title in memory. To change the title
  • Страница 48 из 89
    Editing onto another tape You can create your own video programme by editing with any other h 8 mm, H Hi8, j VHS, k S-VHS,  VHSC, K S-VHSC or l Betamax VCR that has video/audio inputs. After connecting the camcorder to the VCR, (1) Set the POWER switch to PLAYER. (2) Insert a blank tape (or a tape
  • Страница 49 из 89
    Дополнительная информация Additional Information Changing the lithium battery in the camcorder Замена литиевой батарейки в видеокамере Ваша видеокамера снабжена установленной литиевой батарейкой. Если литиевая батарейка станет слабой или полностью разряженной, индикатор I будет мигать в
  • Страница 50 из 89
    Changing the lithium battery in the camcorder WARNING The battery may explode if mistreated. Do not recharge, disassemble, or dispose of in fire. Changing the lithium battery When replacing the lithium battery, keep the battery pack or other power source attached. Otherwise, you will need to reset
  • Страница 51 из 89
    Установка даты и времени Resetting the date and time You can reset the date and time in the menu system. (1) Set the POWER switch to CAMERA. (2) Press MENU to display the menu. (3) Turn the control dial to select CLOCK SET, then press the dial. (4) Turn the control dial to select the desired year,
  • Страница 52 из 89
    Resetting the date and time To correct the date and time setting Repeat steps 4 and 5. Установка даты и времени Для исправления установки даты и времени Повторите пункты 4 и 5. To check the date and time Press DATE to display the date indicator. Press TIME to display the time indicator. When you
  • Страница 53 из 89
    Tips for using the battery pack This section shows you how you can get the most out of your battery pack. Preparing the battery pack Always carry additional batteries Have sufficient battery pack power to do 2 to 3 times as much recording as you have planned. Battery life is shorter in cold
  • Страница 54 из 89
    Tips for using the battery pack Советы по использованию батарейного блока When to replace the battery Когда следует заменять батарею While you are using your camcorder, the remaining battery indicator decreases gradually as battery power is used up. Когда Вы используете видеокамеру, индикатор
  • Страница 55 из 89
    Tips for using the battery pack Советы по использованию батарейного блока The battery heats up Батарейный блок нагревается During charging or recording, the battery pack heats up. This is caused by energy that has been generated and a chemical change that has occurred inside the battery pack. This
  • Страница 56 из 89
    Tips for using the battery pack Советы по использованию батарейного блока Notes on charging Примечание по зарядке A brand-new battery Новый батарейный блок A brand-new battery pack is not charged. Before using the battery pack, charge it completely. Новый батарейный блок не заряжен. Перед
  • Страница 57 из 89
    Maintenance information and precautions Информация по уходу за аппаратом и предосторожности Moisture condensation Конденсация влаги If the camcorder is brought directly from a cold place to a warm place, moisture may condense inside the camcorder, on the surface of the tape, or on the lens. In this
  • Страница 58 из 89
    Maintenance information and precautions Информация по уходу за аппаратом и предосторожности Video head cleaning Очистка головок To ensure normal recording and clear pictures, clean the video heads. When the v indicator and “ CLEANING CASSETTE” message appear one after another in CAMERA mode or
  • Страница 59 из 89
    Maintenance information and precautions Информация по уходу за аппаратом и предосторожности Removing dust from inside the viewfinder Удаление пыли изнутри видоискателя – CCD-TR501E/TR502E only – Только CCD-TR501E/TR502E (1) Remove the screw with a screwdriver (not supplied). Then, while sliding the
  • Страница 60 из 89
    Maintenance information and precautions Информация по уходу за аппаратом и предосторожности Precautions Предосторожности Camcorder operation Работа с видеокамерой •Operate the camcorder using 6.0 V (battery pack), or 7.5 V (AC power adaptor). •For DC or AC operation, use only the recommended
  • Страница 61 из 89
    Maintenance information and precautions •Clean the camcorder body with a soft dry cloth, or a soft cloth lightly moistened with a mild detergent solution. Do not use any type of solvent which may damage the finish. •Do not let sand get into the camcorder. When you use the camcorder on a sandy beach
  • Страница 62 из 89
    Maintenance information and precautions •Do not apply mechanical shock or drop the unit. •While the unit is in use, particularly during charging, keep it away from AM receivers and video equipment because it will disturb AM reception and video operation. •The unit becomes warm while in use. This is
  • Страница 63 из 89
    Using your camcorder abroad Each country or area has its own electricity and TV colour systems. Before using your camcorder abroad, check the following points. Power sources You can use your camcorder in any country or area with the supplied AC power adaptor within 110 V to 240 V AC, 50/60 Hz.
  • Страница 64 из 89
    English Trouble check If you run into any problem using the camcorder, use the following table to troubleshoot the problem. Should the difficulty persist, disconnect the power source and contact your Sony dealer or local authorized Sony service facility. Camcorder Power Symptom The power is not on.
  • Страница 65 из 89
    Trouble check Symptom The date or time indicator disappears. The SteadyShot function does not activate. (CCD-TR720E/TR740E only) The autofocusing function does not work. The title display position shifts. The fader function does not work. Picture Symptom The image on the viewfinder screen is not
  • Страница 66 из 89
    Trouble check Others Symptom The supplied Remote Commander does not work . There is dust in the viewfinder. (CCD-TR501E/TR502E only) The infrared transmission system does not operate. (CCD-TR740E only) 66 Cause and/or Corrective Actions • COMMANDER is set to OFF. m Set it to ON. (p. 28) • Something
  • Страница 67 из 89
    Trouble check AC power adaptor Symptom The POWER lamp does not light. The CHARGE lamp flashes. Cause and/or Corrective Actions • Set the selector to VTR (DC OUT) and disconnect the mains lead. After about one minute, try again. (p. 9) • See the following chart. When the CHARGE lamp flashes Check
  • Страница 68 из 89
    Русский Проверка неисправностей Если у Вас возникла проблема при использовании видеокамеры, воспользуйтесь следующей таблицей для выяснения проблемы. Если трудности все еще остаются, то отсоедините источник питания и свяжитесь с дилером Sony или местным уполномоченным предприятием по обслуживанию
  • Страница 69 из 89
    Проверка неисправностей Признак Исчезает индикатор даты или времени. Не активизируется функция устойчивой съемки (только CCD-TR720E/TR740E) Функция автоматической фокусировки не работает. Сдвинуто положение индикации надписи. Функция плавного введения изображения не работает. Изображение Признак
  • Страница 70 из 89
    Проверка неисправностей Прочее Признак Прилагаемый пульт дистанционного управления не работает. Причина и/или действия по устранению • COMMANDER установлен в положение OFF. m Установите его в положение ON. (стр. 28) • Что-то преграждает путь инфракрасным лучам. m Устраните преграду. • Батарейки
  • Страница 71 из 89
    Проверка неисправностей Сетевой адаптер перемненного тока Признак Лампочка POWER не горит. Мигает лампочка CHARGE. Причина и/или действия по устранению • Установите селектор в положение VTR (DC OUT) и отсоедините сетевой провод. Через одну минуту снова подсоедините сетевой провод. (стр. 9) •
  • Страница 72 из 89
    English Specifications Video camera recorder System Video recording system Two rotary heads, Helical scanning, FM system Audio recording system Illumination range CCD-TR501E/TR502E/ TR503E/TR506E: 0.4 to 100,000 lux CCD-TR720E/TR740E: 0.7 to 100,000 lux Recommended illumination More than 100 lux
  • Страница 73 из 89
    Specifications AC power adaptor Power requirements 110 – 240 V AC, 50/60Hz Power consumption AC-V16/V17: 20 W AC-V16A/V17A: 22 W Output voltage DC OUT in operation mode 7.5 V, 1.8 A Battery charge terminal 10 V, 1.1 A in charge mode Application Operating temperature 0°C to 40°C (32°F to 104°F)
  • Страница 74 из 89
    Русский Технические характеристики Видеокамера Цветовая температура Система Минимальная освещенность Система видеозаписи Две вращающиеся головки, наклонно-строчная развертка, система ЧМ Система аудиозаписи Вращающиеся головки, система ЧМ Видеосигнал Цветовой сигнал PAL, стандарт по МККР
  • Страница 75 из 89
    Технические характеристики Сетевой адаптер Additional information Дополнительная информация Требования к источнику питания 110 – 240 В перем. тока, 50/ 60 Гц Потребляемая мощность AC-V16/V17: 20 Вт AC-V16A/V17A: 22 Вт Выходное напряжение Гнездо DC OUT в рабочем режиме 7,5 В; 1,8 А Гнездо для
  • Страница 76 из 89
    Identifying the parts 1 Tape transport buttons (p. 22, 23) p STOP 0 REW (rewind) ( PLAY (playback) ) FF (fast forward) P PAUSE These buttons will function in PLAYER mode. 2 EDITSEARCH button (p. 18) 3 LASER LINK button (CCD-TR740E only) (p. 21) 4 Lens cover 5 Built-in microphone 6 IR transmitter
  • Страница 77 из 89
    Identifying the parts Опознавание деталей !£ Кнопка TIME (стр. 30) !¢ DATE button (p. 30) !¢ Кнопка DATE (стр. 30) !∞ Accessory shoe !∞ Башмак для установки принадлежностей !§ START/STOP MODE switch (p. 12, 31) !¶ Recording lamp !• Focus dial (p. 39) !§ Переключатель START/STOP MODE (стр. 12, 31)
  • Страница 78 из 89
    Identifying the parts Опознавание деталей @¶ POWER switch (p. 12, 22) @¶ Выключатель POWER (стр. 12, 22) @• Display window (p. 85) @• Окошко дисплея (стр. 85) @ª FADER button (p. 32) @ª Кнопка FADER (стр. 32) #º BACK LIGHT button (p. 42) #¡ PROGRAM AE dial (p. 41) #™ Eyecup #£ Viewfinder adjustment
  • Страница 79 из 89
    Identifying the parts Опознавание деталей #ª EJECT knob (p. 11) $¡ Hooks for shoulder strap $™ Battery mounting surface (p. 10) $£ Grip strap (p. 17) $¢ Cassette compartment (p. 11) $∞ RFU DC OUT (RFU adaptor DC out) jack $§ VIDEO/AUDIO OUT jack (p. 19) $¶ MIC (PLUG IN POWER) jack Connect an
  • Страница 80 из 89
    Identifying the parts AV cordless IR receiver – CCD-TR740E only Опознавание деталей Беспроводный ИК-ресивер аудио-/видеосигнала – Только CCD-TR740E 1 VIDEO/AUDIO OUT jack (p. 20) 1 Гнездо VIDEO/AUDIO OUT (стр. 20) 2 DC IN 6V jack (p. 20) 2 Гнездо DC IN 6V (стр. 20) 3 Infrared sensor (p. 21) 3
  • Страница 81 из 89
    Identifying the parts Remote Commander Using the Remote Commander Make sure that COMMANDER is set to ON in the menu system. The buttons that have the same name on the Remote Commander as on the camcorder function identically. Опознавание деталей Пульт дистанционного управления Использование пульта
  • Страница 82 из 89
    Опознавание деталей Identifying the parts To prepare the Remote Commander Insert two R6 (size AA) batteries by matchingthe + and – on the batteries to the diagram inside the battery compartment. Note on battery life The batteries for the Remote Commander last about 6 months under normal operation.
  • Страница 83 из 89
    Identifying the parts To watch the demonstration You can start the demonstration by setting in the menu system. You can also start the demonstration by the following operation. To exit Demo mode (1) Set the POWER switch to PLAYER. (2) Turn STANDBY up. (3) While holding down p set the POWER switch
  • Страница 84 из 89
    Identifying the parts Operation indicators Опознавание деталей Индикаторы работы In the viewfinder В видоискателе 1 Power zoom indicator (p. 15) 1 Индикатор приводного трансфокатора (стр. 15) 2 Manual focus indicaror (p. 39) 3 PROGRAM AE indicator (p. 41) 4 SteadyShot indicator (CCD-TR720E/TR740E
  • Страница 85 из 89
    Identifying the parts Опознавание деталей !™ Tape counter (p. 14) !™ Счетчик ленты (стр. 14) !£ 5 SEC recording indicator (p. 31) !£ Индикатор записи 5 SEC (стр. 31) !¢ Warning indicator (p. 86) !¢ Предупреждающий индикатор (стр.86) !∞ Remaining battery indicator (p. 54) !∞ Индикатор оставшегося
  • Страница 86 из 89
    Предупреждающие индикаторы Warning indicators The warning indicators and the recording lamp flash to inform you of the following situation. The illustrations below are the warning indicators of the viewfinder. The same indicators flash also in the display window. ≥: You can hear the beep sound when
  • Страница 87 из 89
    Index A M, N, O, P Adjusting viewfinder ............ 14 AUTO DATE .......................... 15 Mains ....................................... 25 Manual focus .......................... 38 PICTURE EFFECT ................. 35 Playback on TV ...................... 22 Playback pause
  • Страница 88 из 89
    Указатель А, Б П Э Автомобильный аккумулятор .................... 26 Пауза воспроизведения .... 23 Перемотка ленты вперед .. 22 Перемотка ленты назад ... 22 Плечевой ремень .............. 79 Приводной трансфокатор .. 15 Прилагаемые принадлежности ................ 6 Проверка неисправностей .. 68
  • Страница 89 из 89