3-859-522-12 (1)
Video Camera
Recorder
©1997 by Sony Corporation
CCD-TR920E
Operating Instructions
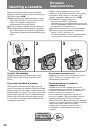
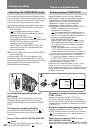
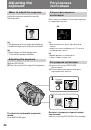
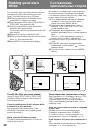
Before operating the unit, please read this manual thoroughly,
and retain it for future reference.
Руководство по эксплуатации
Перед эксплуатацией аппарата рекомендуется внимательно
изучить настоящее руководство и сохранить его у себя для
дальнейших справок.