Инструкция для SONY CCD-TRV14E

(скачивание инструкции бесплатно)
Формат файла: PDF
Доступность: Бесплатно как и все руководства на сайте. Без регистрации и SMS.
Дополнительно: Чтение инструкции онлайн
background image

CCD-TRV14E/TRV24E  3-859-266-12(1).E/R

 1997 by Sony Corporation
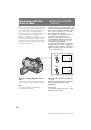
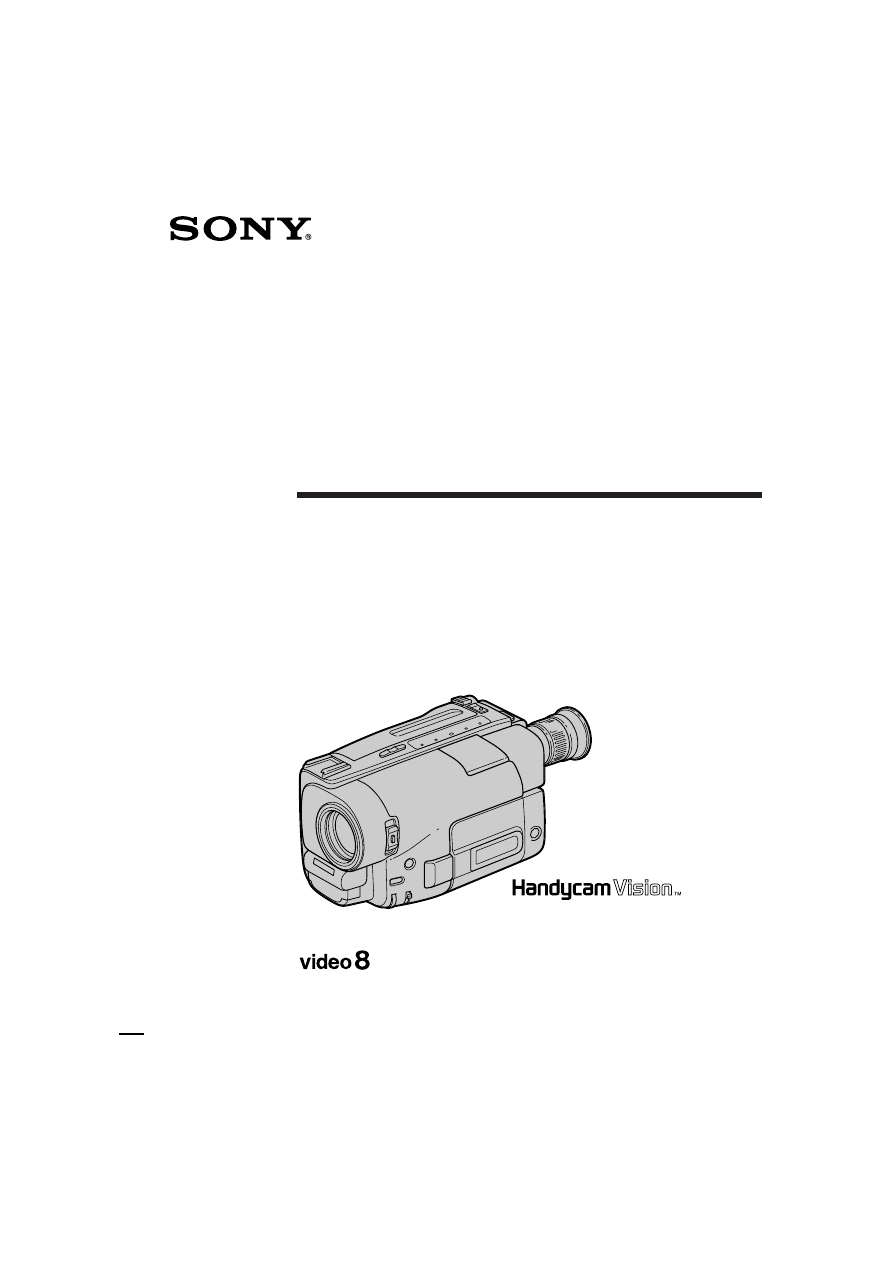
CCD-TRV14E/TRV24E 

h

Video Camera
Recorder

3-859-266-12 (1)

Operating Instructions

Before operating the unit, please read this manual thoroughly,
and retain it for future reference.

àÌÒÚ Û͈Ëfl ÔÓ ˝ÍÒÔÎÛ‡Ú‡ˆËË

è ‰ ̇˜‡ÎÓÏ ˝ÍÒÔÎÛ‡Ú‡ˆËË ‰‡ÌÌÓ„Ó ‡ÔÔ‡ ‡Ú‡ Ô ÓÒËÏ ‚ÌËχÚÂθÌÓ
Ô Ó˜ÂÒÚ¸ ̇ÒÚÓfl˘Â  ÛÍÓ‚Ó‰ÒÚ‚Ó Ë ÓÒÚ‡‚ËÚ¸ Â„Ó ‰Îfl ·Û‰Û˘Ëı ÒÔ ‡‚ÓÍ.

CCD-TRV24E

1
2
3
4
5
6
7
8
9
10
11
12
13
14
15
16
17
18
19
20
21
22
23
24
25
26
27
28
29
30
31
32
33
34
35
36
37
38
39
40
41
42
43
44
45
46
47
48
49
50
51
52
53
54
55
56
57
58
59
60
61
62
63
64
65
66
67
68
69
70
71
72
73
74
75
76
77
78
79
80
81
82
83
84
85
86
87
88
Оглавление инструкции
  • Страница 1 из 89
    3-859-266-12 (1) Video Camera Recorder Operating Instructions Before operating the unit, please read this manual thoroughly, and retain it for future reference. àÌÒÚ Û͈Ëfl ÔÓ ˝ÍÒÔÎÛ‡Ú‡ˆËË è ‰ ̇˜‡ÎÓÏ ˝ÍÒÔÎÛ‡Ú‡ˆËË ‰‡ÌÌÓ„Ó ‡ÔÔ‡ ‡Ú‡ Ô ÓÒËÏ ‚ÌËχÚÂθÌÓ Ô Ó˜ÂÒÚ¸ ̇ÒÚÓfl˘Â ÛÍÓ‚Ó‰ÒÚ‚Ó Ë ÓÒÚ‡‚ËÚ¸ „Ó
  • Страница 2 из 89
    English êÛÒÒÍËÈ Welcome! Congratulations on your purchase of this Sony Handycam Vision camcorder. With your Handycam Vision, you can capture life’s precious moments with superior picture and sound quality. Your Handycam Vision is loaded with advanced features, but at the same time it is very easy
  • Страница 3 из 89
    Table of contents é„·‚ÎÂÌË Getting started Charging and installing the battery pack .......... 7 Inserting a cassette ............................................... 10 èÓ‰„ÓÚӂ͇ Í Ì‡˜‡ÎÛ ‡·ÓÚ˚ ᇠfl‰Í‡ Ë ÛÒÚ‡Ìӂ͇ ·‡Ú‡ ÂÈÌÓ„Ó ·ÎÓ͇ ..... 7 ÇÒÚ‡‚͇ ͇ÒÒÂÚ˚
  • Страница 4 из 89
    è ‰ ̇˜‡ÎÓÏ ‡·Ó ˚ Before you begin Using this manual àÒÔÓθÁÓ‚‡ÌË ‰‡ÌÌÓ„Ó ÛÍÓ‚Ó‰ÒÚ‚‡ The instructions in this manual are for the two models listed below. Before you start reading this manual and operating the unit, check your model number by looking at the bottom of your camcorder. The
  • Страница 5 из 89
    Using this manual Precautions on camcorder care • ùÍ ‡Ì Ò ÜäÑ Ë/ËÎË ˆ‚ÂÚÌÓÈ ‚ˉÓËÒ͇ÚÂθ ‚˚ÔÓÎÌÂÌ˚ Ò Ô ËÏÂÌÂÌËÂÏ ‚˚ÒÓÍÓÔ ÂˆËÁËÓÌÌÓÈ ÚÂıÌÓÎÓ„ËË. é‰Ì‡ÍÓ ‚ ‚ˉÓËÒ͇ÚÂΠËÎË Ì‡ ˝Í ‡ÌÂ Ò ÜäÑ ÏÓ„ÛÚ ÔÓfl‚ÎflÚ¸Òfl Ó˜Â̸ χÎÂ̸ÍË ˜Â Ì˚ Ë/ËÎË fl ÍË ÚÓ˜ÍË (Í ‡ÒÌ˚Â, ÒËÌË ËÎË ÁÂÎÂÌ˚ ÔÓ ˆ‚ÂÚÛ). ùÚË ÚÓ˜ÍË
  • Страница 6 из 89
    Checking supplied accessories Check that the following accessories are supplied with your camcorder. è ӂ ͇ Ô Ë·„‡ÂÏ˚ı Ô Ë̇‰ÎÂÊÌÓÒÚÂÈ è Ó‚Â ¸Ú ̇΢ˠÒÎÂ‰Û˛˘Ëı Ô Ë̇‰ÎÂÊÌÓÒÚÂÈ, Ô Ë·„‡ÂÏ˚ı Í Ç‡¯ÂÈ ‚ˉÂÓ͇Ï Â. 1 2 3 4 5 6 7 1 Wireless Remote Commander (1) (p. 23, 82) 1 ÅÂÒÔ Ó‚Ó‰Ì˚È ÔÛθÚ
  • Страница 7 из 89
    Getting started èÓ‰„ÓÚӂ͇ Í Ì‡˜‡ÎÛ ‡·ÓÚ˚ Charging and installing the battery pack Before using your camcorder, you first need to charge and install the battery pack. To charge the battery pack, use the supplied AC power adaptor. 1 ᇠfl‰Í‡ ·‡Ú‡ ÂÈÌÓ„Ó ·ÎÓ͇ ᇠfl‰ÍÛ ·‡Ú‡ ÂÈÌÓ„Ó ·ÎÓ͇ Ô ÓËÁ‚Ó‰ËÚÂ
  • Страница 8 из 89
    ᇠfl‰Í‡ Ë ÛÒÚ‡Ìӂ͇ ·‡Ú‡ ÂÈÌÓ„Ó ·ÎÓ͇ Charging and installing the battery pack ë ÓÍ ÒÎÛÊ·˚ ·‡Ú‡ ÂÈÌÓ„Ó ·ÎÓ͇ (‚ ÏËÌÛÚ‡ı) Battery life (in minutes) CCD-TRV14E Battery pack NP-33 (supplied) NP-55H While playing LCD close back3) on LCD While recording 1) LCD open2) 80 (45) 95 (50) 100 (55) 120 (65)
  • Страница 9 из 89
    Charging and installing the battery pack ᇠfl‰Í‡ Ë ÛÒÚ‡Ìӂ͇ ·‡Ú‡ ÂÈÌÓ„Ó ·ÎÓ͇ (1) Insert the top of the battery pack into the top of the battery mounting surface. (2) Push the battery pack. Make sure that you hear clicks twice. Attach the battery pack to the camcorder securely. (1) ÇÒÚ‡‚¸Ú ‚Â
  • Страница 10 из 89
    Inserting a cassette Make sure that a power source is installed. (1) While pressing the small blue button, slide EJECT in the direction of the arrow. The cassette compartment automatically opens. (2) Insert a cassette (not supplied) with the window facing out. (3) Press the PUSH mark on the
  • Страница 11 из 89
    Basic operations Camera recording ì·Â‰ËÚ¸Òfl, ËÒÚÓ˜ÌËÍ ÔËÚ‡ÌËfl Ë Í‡ÒÒÂÚ‡ ‚ÒÚ‡‚ÎÂÌ˚ Ë, ˜ÚÓ Ô ÂÍβ˜‡ÚÂθ START/ STOP MODE ̇ Ô‡ÌÂÎË ÜäÑ ÛÒÚ‡ÌÓ‚ÎÂÌ Ì‡ . ÖÒÎË Ç˚ ËÒÔÓθÁÛÂÚ ‚ˉÂÓ͇ÏÂ Û ‚ Ô ‚˚È ‡Á, ÚÓ ‚Íβ˜Ëڠ ÔËÚ‡ÌËÂ Ë ÛÒÚ‡ÌÓ‚ËÚ ‰‡ÚÛ Ë ‚ ÂÏfl ̇ LJ¯Â ‚ ÂÏfl (ÒÚ . 55) Ô ‰ ÚÂÏ, Í‡Í Ç˚ ̇˜ÌÂÚÂ
  • Страница 12 из 89
    á‡ÔËÒ¸ Ò ÔÓÏÓ˘¸˛ ‚ˉÂÓ͇Ï ˚ Camera recording To stop recording momentarily [a] ÑÎfl ‚ ÂÏÂÌÌÓÈ ÓÒÚ‡ÌÓ‚ÍË Á‡ÔËÒË [a] Press START/STOP again. The “REC” indicator in the viewfinder changes to the “STBY” indicator (Standby mode). ç‡ÊÏËÚ ÓÔflÚ¸ START/STOP. Ç ‚ˉÓËÒ͇ÚÂΠË̉Ë͇ÚÓ “REC” ËÁÏÂÌËÚÒfl ̇
  • Страница 13 из 89
    Camera recording To focus the viewfinder lens If the viewfinder is not in focus at all or when you use the camcorder after someone else has used it, focus the viewfinder lens. Turn the viewfinder lens adjustment ring so that the indicators in the viewfinder come into sharp focus. ÖÒÎË ‚ˉÓËÒ͇ÚÂθ
  • Страница 14 из 89
    Camera recording Note on the AUTO DATE feature The clock is set at the factory to Sydney time for Australia and New Zealand models, to Tokyo time for the models sold in Japan and to Hong Kong time for other models. You can reset the clock in the menu system. The AUTO DATE feature shows the date
  • Страница 15 из 89
    á‡ÔËÒ¸ Ò ÔÓÏÓ˘¸˛ ‚ˉÂÓ͇Ï ˚ Camera recording Zooming speed (Variable speed zooming) ëÍÓ ÓÒÚ¸ ̇ÂÁ‰‡ ‚ˉÂÓ͇Ï ˚ (̇ÂÁ‰ Ò ‡ÁÌÓÈ ÒÍÓ ÓÒÚ¸˛) Turn the power zoom lever fully for a highspeed zoom. Turn it lightly for a relatively slow zoom. èÓÎÌÓÒÚ¸˛ ÔÓ‚Â ÌËÚ ˚˜‡„ Ô Ë‚Ó‰ÌÓ„Ó Ú ‡ÌÒÙÓ͇ÚÓ ‡ ‰Îfl ·˚ÒÚ
  • Страница 16 из 89
    Camera recording á‡ÔËÒ¸ Ò ÔÓÏÓ˘¸˛ ‚ˉÂÓ͇Ï ˚ Shooting with the LCD screen ë˙ÂÏ͇ Ò ÔÓÏÓ˘¸˛ ˝Í ‡Ì‡ ÜäÑ You can also record the picture while looking at the LCD screen. When using the LCD screen, the viewfinder turns off automatically. You cannot monitor the sound from the speaker during recording.
  • Страница 17 из 89
    Letting the subject monitor the shot You can turn the LCD panel over so that it faces the other way and you can let the subject monitor the shot while shooting with the viewfinder. Ç˚ ÏÓÊÂÚ Ô ‚ ÌÛÚ¸ Ô‡ÌÂθ ÜäÑ, Ú‡Í, ˜ÚÓ Ó̇ ·Û‰ÂÚ Ó· ‡˘Â̇ ‚ ‰ Û„Û˛ ÒÚÓ ÓÌÛ Ë Ç˚ ÏÓÊÂÚ ‰‡Ú¸ ‚ÓÁÏÓÊÌÓÒÚ¸ ÒÌËχÂÏÓÏÛ
  • Страница 18 из 89
    Hints for better shooting ëÓ‚ÂÚ˚ ‰Îfl ÎÛ˜¯ÂÈ Ò˙ÂÏÍË For hand-held shots, you’ll get better results by holding the camcorder according to the following suggestions: •Hold the camcorder firmly and secure it with the grip strap so that you can easily manipulate the controls with your thumb. ÑÎfl ͇‰
  • Страница 19 из 89
    Hints for better shooting [c] Note on the LCD screen When you use the LCD screen outdoors in direct sunlight, the LCD screen may be difficult to see. If this happens, we recommend that you use the viewfinder. è ‰ÓÒÚ ÂÊÂÌËfl Í ‚ˉÓËÒ͇ÚÂβ Ë ÜäÑ • ç ÔÓ‰ÌËχÈÚ ‚ˉÂÓ͇ÏÂ Û Á‡ ‚ˉÓËÒ͇ÚÂθ ËÎË
  • Страница 20 из 89
    Checking the recorded picture Using EDITSEARCH, you can review the last recorded scene or check the recorded picture in the viewfinder. You can also review the picture on the LCD screen. (1) While pressing the small green button on the POWER switch, set it to CAMERA. (2) Turn STANDBY up. (3) Press
  • Страница 21 из 89
    Checking the recorded picture è ӂ ͇ Á‡ÔËÒ‡ÌÌÓ„Ó ËÁÓ· ‡ÊÂÌËfl To stop playback ÑÎfl ÓÒÚ‡ÌÓ‚ÍË ‚ÓÒÔ ÓËÁ‚‰ÂÌËfl Release EDITSEARCH. ç‡ÊÏËÚ EDITSEARCH. To go back to the last recorded point after edit search ÑÎfl ‚ÓÁ‚ ‡Ú‡ Í ÔÓÒΉÌÂÏÛ Á‡ÔËÒ‡ÌÌÓÏÛ ÏÂÒÚÛ ÔÓÒΠÏÓÌÚ‡ÊÌÓ„Ó ÔÓËÒ͇ To begin re-recording
  • Страница 22 из 89
    ÇÓÒÔ ÓËÁ‚‰ÂÌË ÎÂÌÚ˚ Playing back a tape You can monitor the playback picture on the LCD screen. (1) While pressing the small green button on the POWER switch, set it to PLAYER. (2) Insert the recorded tape with the window facing out. (3) While pressing PUSH OPEN, open the LCD panel. Adjust the
  • Страница 23 из 89
    Playing back a tape ÇÓÒÔ ÓËÁ‚‰ÂÌË ÎÂÌÚ˚ When watching on the LCD screen è Ë Ô ÓÒÏÓÚ Â Ì‡ ˝Í ‡Ì ÜäÑ You can turn the LCD panel over and move back to the camcorder with the LCD screen facing out [a]. You can adjust the angle of the LCD panel up to 30 degrees [b]. Ç˚ ÏÓÊÂÚ Ô ‚ ÛÌÛÚ¸ Ô‡ÌÂθ ÜäÑ
  • Страница 24 из 89
    Playing back a tape Various playback modes To view a still picture (playback pause) Press P during playback. To resume playback, press P or ·. To locate a scene (Picture Search) Keep pressing 0 or ) during playback. To resume normal playback, release the button. To monitor the high-speed picture
  • Страница 25 из 89
    Searching for the end of the picture éÒÌÓ‚Ì˚ ÓÔ ‡ˆËË Ç˚ ÏÓÊÂÚ Ô ÂÈÚË Í ÍÓÌˆÛ Á‡ÔËÒ‡ÌÌÓÈ ˜‡ÒÚËÔÓÒÎÂÁ‡ÔËÒËË‚ÓÒÔ ÓËÁ‚‰ÂÌËfl ÎÂÌÚ˚ ‰Îfl Ó·ÂÒÔ˜ÂÌËfl Ô·‚ÌÓ„Ó Ô ÂıÓ‰‡ ÏÂÊ‰Û ÔÓÒΉÌÂÈ ÒˆÂÌÓÈ, ÍÓÚÓ Û˛ Ç˚ Á‡ÔËÒ‡ÎË, Ë ÒÎÂ‰Û˛˘ÂÈ ÒˆÂÌÓÈ. ãÂÌÚ‡ ̇˜Ë̇ÂÚ ÛÒÍÓ ÂÌÌÓ Ô ÂχÚ˚‚‡Ú¸Òfl ̇Á‡‰ ËÎË ‚Ô ‰. á‡ÚÂÏ
  • Страница 26 из 89
    Advanced operations Using alternative power sources You can choose any of the following power sources for your camcorder: battery pack, the mains, and 12/24 V car battery. Choose the appropriate power source depending on where you want to use your camcorder. Indoors Power source Mains Outdoor
  • Страница 27 из 89
    Using alternative power sources àÒÔÓθÁÓ‚‡ÌË ‡Î¸Ú ̇ÚË‚Ì˚ı ËÒÚÓ˜ÌËÍÓ‚ ÔËÚ‡ÌËfl Using the mains àÒÔÓθÁÓ‚‡ÌË ˝ÎÂÍÚ Ë˜ÂÒÍÓÈ ÒÂÚË ÑÎfl ËÒÔÓθÁÓ‚‡ÌËfl Ô Ë·„‡ÂÏÓ„Ó ÒÂÚÂ‚Ó„Ó ‡‰‡ÔÚ ‡Ô ÂÏ.ÚÓ͇: (1) èÓ‰ÒÓ‰ËÌËÚÂÒÂÚ‚ÓÈÔ Ó‚Ó‰ÍÒÂÚ‚ÓÈ ÓÁÂÚÍÂ. ÇÒÚ‡‚¸Ú ‚ ıÌËÈ ÍÓ̈ ÒÓ‰ËÌËÚÂθÌÓÈ Ô·ÒÚËÌ˚ ÒÂÚ‚ӄÓ
  • Страница 28 из 89
    Using alternative power sources Notes on the POWER lamp •The POWER lamp will remain lit for a while even if the unit is unplugged after use. This is normal. •If the POWER lamp does not light, set the selector to VTR (DC OUT) and disconnect the mains lead. After about one minute, reconnect the mains
  • Страница 29 из 89
    àÁÏÂÌÂÌË ÛÒÚ‡ÌÓ‚ÓÍ Changing the mode settings MENU 3 MENU COMMANDER REC MODE TITLE POS ON MENU COMMANDER REC MODE TITLE POS MENU COMMANDER REC MODE TITLE POS TITLE1 SET TITLE2 SET D ZOOM LCD B.L. SP OFF MENU COMMANDER REC MODE TITLE POS CENTER [MENU] : END MENU COMMANDER REC MODE TITLE POS 4 ON
  • Страница 30 из 89
    Changing the mode setting àÁÏÂÌÂÌË ÂÊËÏÌ˚ı ÛÒÚ‡ÌÓ‚ÓÍ Selecting the mode setting of each item Ç˚·Ó ÛÒÚ‡ÌÓ‚ÍË ÂÊËχ ÔÓ Í‡Ê‰ÓÏÛ ÔÛÌÍÚÛ Items for both CAMERA and PLAYER modes èÛÌÍÚ˚ ‰Îfl ÂÊËÏÓ‚ CAMERA Ë PLAYER COMMANDER <ON/OFF> •Select ON when using the supplied Remote Commander for the camcorder.
  • Страница 31 из 89
    Changing the mode settings REC LAMP* <ON/OFF> •Select OFF when you do not want the camera recording/battery lamp at the front of the unit to light up. •Normally select ON. AUTO DATE* <ON/OFF> •Select ON to record the date for 10 seconds after recording has started. •Select OFF to not record the
  • Страница 32 из 89
    Recording with the date or time Before you start recording or during recording, press DATE or TIME inside the LCD panel. You can record the date or time displayed on the LCD screen or in the viewfinder with the picture. You cannot record the date and time at the same time. Except for the date or
  • Страница 33 из 89
    Selecting the START/STOP mode CK STA ND LO CK STA 5 SEC ANTI GROUND SHOOTING 3 LO START/STOP MODE ìÒÓ‚Â ¯ÂÌÒÚ‚Ó‚‡ÌÌ˚ ÓÔ ‡ˆËË 2 ä ÓÏ ӷ˚˜ÌÓ„Ó ÂÊËχ ÔÛÒ͇/ÓÒÚ‡ÌÓ‚ÍË ‚ ‚ˉÂÓ͇Ï  ËϲÚÒfl ‰‚‡ ‰ Û„Ëı ÂÊËχ. ùÚË ÂÊËÏ˚ ÔÓÁ‚ÓÎfl˛Ú Ç‡Ï ‚˚ÔÓÎÌËÚ¸ Ò ˲ Ò˙ÂÏÓÍ Ë ÒÓÁ‰‡Ú¸ ÓÊË‚ÎÂÌÌ˚È ‚ˉÂÓÒ˛ÊÂÚ. (1)
  • Страница 34 из 89
    Fade-in and fade-out You can fade in or out to give your recording a professional appearance. When fading in, the picture gradually fades in from black while the sound increases. When fading out, the picture gradually fades to black while the sound decreases. When fading in [a] (1) While the
  • Страница 35 из 89
    Fade-in and fade-out ǂ‰ÂÌËÂ Ë ‚˚‚‰ÂÌË ËÁÓ· ‡ÊÂÌËfl To cancel the fade-in/fade-out function ÑÎfl ÓÚÏÂÌ˚ ÙÛÌ͈ËË ‚‚‰ÂÌËfl/ ‚˚‚‰ÂÌËfl ËÁÓ· ‡ÊÂÌËfl Before pressing START/STOP, press FADER to turn off the FADER indicator. è ‰ ÚÂÏ, Í‡Í Ì‡Ê‡Ú¸ ÍÌÓÔÍÛ START/STOP, ̇ÊÏËÚ ÍÌÓÔÍÛ FADER, ˜ÚÓ·˚
  • Страница 36 из 89
    Enjoying picture effect àÒÔÓθÁÓ‚‡ÌË ˝ÙÙÂÍÚÓ‚ ËÁÓ· ‡ÊÂÌËfl Selecting picture effect ë ÔÓÏÓ˘¸˛ ÙÛÌ͈ËË ˝ÙÙÂÍÚ‡ You can make pictures like those of television with the Picture Effect function. [a] Ç˚ ÏÓÊÂÚ ÒÓÁ‰‡‚‡Ú¸ ËÁÓ· ‡ÊÂÌËfl Í‡Í Ì‡ ÚÂ΂ˉÂÌËË. [c] [b] MOSAIC [a] åéáÄàäÄ [a] The picture is
  • Страница 37 из 89
    àÒÔÓθÁÓ‚‡ÌË ˝ÙÙÂÍÚÓ‚ ËÁÓ· ‡ÊÂÌËfl Enjoying picture effect Using picture effect function ä‡Í ÔÓθÁÓ‚‡Ú¸Òfl ÙÛÌ͈ËÂÈ ˝ÙÙÂÍÚÓ‚ ËÁÓ· ‡ÊÂÌËfl (1) While pressing PUSH OPEN, open the LCD panel. (2) While the camcorder is in Standby mode, press PICTURE EFFECT to select the desired Picture Effect mode.
  • Страница 38 из 89
    Using the wide mode function àÒÔÓθÁÓ‚‡ÌË ÙÛÌ͈ËË ¯Ë ÓÍÓÙÓ Ï‡ÚÌÓ„Ó ÂÊËχ – íÓθÍÓ CCD-TRV24E – CCD-TRV24E only Ç˚·Ó Ê·ÂÏÓ„Ó ÂÊËχ Selecting the desired mode You can record a cinemalike picture (CINEMA) or a 16:9 wide picture to watch on the 16:9 widescreen TV (16:9FULL). Ç˚ ÏÓÊÂÚ Á‡ÔËÒ˚‚‡Ú¸
  • Страница 39 из 89
    àÒÔÓθÁÓ‚‡ÌË ÙÛÌ͈ËË ¯Ë ÓÍÓÙÓ Ï‡ÚÌÓ„Ó ÂÊËχ Using the wide mode function àÒÔÓθÁÓ‚‡ÌË ÙÛÌ͈ËË ¯Ë ÓÍÓÙÓ Ï‡ÚÌÓ„Ó ÂÊËχ Using the wide mode function (1) While pressing PUSH OPEN, open the LCD panel. (2) While the camcorder is in Standby mode, press WIDE repeatedly so that the desired mode indicator
  • Страница 40 из 89
    Focusing manually When to use manual focus In the following cases you should obtain better results by adjusting the focus manually. [a] [b] •Insufficient light [a] •Subjects with little contrast — walls, sky, etc. [b] •Too much brightness behind the subject [c] •Horizontal stripes [d] •Subjects
  • Страница 41 из 89
    Focusing manually îÓÍÛÒË Ó‚Í‡ ‚ Û˜ÌÛ˛ Focusing manually îÓÍÛÒË Ó‚Í‡ ‚ Û˜ÌÛ˛ è Ë ÙÓÍÛÒË Ó‚Í ‚ Û˜ÌÛ˛ Ò̇˜‡Î‡ ‚˚ÔÓÎÌËÚ ÙÓÍÛÒË Ó‚ÍÛ ‚ ÔÓÎÓÊÂÌËË ÚÂÎÂÙÓÚÓ Ô ‰ Á‡ÔËÒ¸˛, ‡ ÔÓÚÓÏ ‚˚ÔÓÎÌËÚ ÔÓ‚ÚÓ ÌÛ˛ ÛÒÚ‡ÌÓ‚ÍÛ Ó·ÂÍÚË‚‡ ‰Îfl Ò˙ÂÏÍË. (1) ìÒÚ‡ÌÓ‚ËÚ FOCUS ‚ ÔÓÎÓÊÂÌË MANUAL. èÓfl‚ËÚÒfl Ë̉Ë͇ÚÓ f. (2) èÓ‚Â
  • Страница 42 из 89
    Using the PROGRAM AE function You can select from three PROGRAM AE (Auto Exposure) modes to suit your shooting situation. When you use PROGRAM AE, you can capture high-speed action or night views. Selecting the best mode Select the best mode by using the following examples. àÒÔÓθÁÓ‚‡ÌË ÙÛÌ͈ËË
  • Страница 43 из 89
    Using the PROGRAM AE function àÒÔÓθÁÓ‚‡ÌË ÙÛÌ͈ËË PROGRAM AE Using the PROGRAM AE function àÒÔÓθÁÓ‚‡ÌË ÙÛÌ͈ËË PROGRAM AE While the camcorder is in Standby mode, press PROGRAM AE until the desired PROGRAM AE indicator appears. Ç ÚÓ ‚ ÂÏfl, ÍÓ„‰‡ ‚ˉÂÓ͇Ï ‡ ̇ıÓ‰ËÚÒfl ‚ ÂÊËÏ „ÓÚÓ‚ÌÓÒÚË,
  • Страница 44 из 89
    Shooting with backlighting When you shoot a subject with the light source behind the subject or a subject with a light background, use the BACK LIGHT function. Press BACK LIGHT. The c indicator appears in the viewfinder or on the LCD screen. ë˙ÂÏ͇ Ò Á‡‰ÌÂÈ ÔÓ‰Ò‚ÂÚÍÓÈ ÖÒÎË Ç˚ ÒÌËχÂÚ ӷ˙ÂÍÚ Ò
  • Страница 45 из 89
    Releasing the STEADY SHOT function ÇÍβ˜ÂÌË ÙÛ͈ËË STEADY SHOT — íÓθÍÓ CCD-TRV24E When you shoot, the Ó indicator appears. This indicates that the SteadyShot function is working and the camcorder compensates for camera-shake. è Ë ‚˚ÔÓÎÌÂÌËË Ò˙ÂÏÍË ÔÓfl‚ËÚÒfl Ë̉Ë͇ÚÓ “ Ó”. ùÚÓ ÓÁ̇˜‡ÂÚ, ˜ÚÓ
  • Страница 46 из 89
    Superimposing a title You can select from eight preset titles and two titles you made to superimpose it on the picture during recording. Each time you press TITLE, the preset titles appear one by one. To superimpose from the beginning (1) Set the POWER switch to CAMERA. (2) Turn STANDBY up. (3)
  • Страница 47 из 89
    ç‡ÎÓÊÂÌË ̇‰ÔËÒË Superimposing a title Titles cycle as follows Original title 1 n Original title 2 n HELLO! n HAPPY BIRTHDAY n HAPPY HOLIDAYS n CONGRATULATIONS! n OUR SWEET BABY n WEDDING n VACATION n THE END When you press TITLE with “THE END” displayed, the titles disappear. When you press TITLE
  • Страница 48 из 89
    Making your own titles ëÓÁ‰‡ÌË LJ¯Ëı ÒÓ·ÒÚ‚ÂÌÌ˚ı ̇‰ÔËÒÂÈ You can make two titles of up to 22 characters each, and store them in memory. We recommend to eject the cassette before you begin so that the power is not turned off on the way. (1)While pressing PUSH OPEN, open the LCD panel. (2) While
  • Страница 49 из 89
    Making your own titles To erase the title you have made Press MENU, select the title you want to erase, and press the dial. Select ↵ at the leftmost character, then press the dial. Do not select the blank to erase a character. Otherwise, the blank is stored as a title in memory. To change the title
  • Страница 50 из 89
    è ÓÒÏÓÚ Ì‡ ˝Í ‡Ì ÚÂ΂ËÁÓ ‡ Watching on a TV screen Connect the camcorder to your VCR or TV to watch the playback picture on the TV screen. When monitoring the playback picture by connecting the camcorder to your TV, we recommend you to use mains for the power source. While playing back on a TV
  • Страница 51 из 89
    Watching on a TV screen è ÓÒÏÓÚ Ì‡ ˝Í ‡Ì ÚÂ΂ËÁÓ ‡ If you connect directly to TV ÖÒÎË Ç˚ ÔÓ‰ÒÓ‰ËÌflÂÚÂ Ô flÏÓ Í ÚÂ΂ËÁÓ Û Connect the camcorder to the inputs on the TV by using the supplied A/V connecting cable. Set the TV/VCR selector on the TV to VCR. éÚÍ ÓÈÚÂ Í ˚¯ÍÛ „ÌÂÁ‰‡ Ë ÔÓ‰ÒÓ‰ËÌËÚÂ
  • Страница 52 из 89
    Editing onto another tape You can create your own video programme by editing with any other h 8 mm, H Hi8, j VHS, k S-VHS,  VHSC, K S-VHSC, or l Betamax VCR that has video/audio inputs. Turn down the volume of the camcorder while editing. Otherwise, picture distortion may occur. After connecting
  • Страница 53 из 89
    ÑÓÔÓÎÌËÚÂθ̇fl ËÌÙÓ Ï‡ˆËfl Additional Information Changing the lithium battery in the camcorder á‡ÏÂ̇ ÎËÚË‚ÓÈ ·‡Ú‡ ÂÈÍË ‚ ‚ˉÂÓ͇Ï  LJ¯‡ ‚ˉÂÓ͇Ï ‡ Ò̇·ÊÂ̇ ÛÒÚ‡ÌÓ‚ÎÂÌÌÓÈ ÎËÚË‚ÓÈ ·‡Ú‡ ÂÈÍÓÈ. ÖÒÎË ·‡Ú‡ ÂÈ͇ ÒÚ‡ÌÂÚ Ò··ÓÈ ËÎË ÔÓÎÌÓÒÚ¸˛ ‡Á flÊÂÌÌÓÈ, Ë̉Ë͇ÚÓ I ·Û‰ÂÚ ÏË„‡Ú¸ ‚ ‚ˉÓËÒ͇ÚÂΠËÎË Ì‡
  • Страница 54 из 89
    Changing the lithium battery in the camcorder á‡ÏÂ̇ ÎËÚË‚ÓÈ ·‡Ú‡ ÂÈÍË ‚ ‚ˉÂÓ͇Ï  Changing the lithium battery á‡ÏÂ̇ ÎËÚË‚ÓÈ ·‡Ú‡ ÂÈÍË When replacing the lithium battery, keep the battery pack or other power source attached. Otherwise, you will need to reset the date and time . (1) While
  • Страница 55 из 89
    Resetting the date and time ìÒÚ‡Ìӂ͇ ‰‡Ú˚ Ë ‚ ÂÏÂÌË 1 3,7 POWER MENU 4 MENU MENU D ZOOM LCD B.L. BEEP REC LAMP AUTO DATE CLOCK SET DEMO MODE 2 1997 1 1 1997 12:00:00 1 1 CLOCK SET 12 00 [MENU] : END [MENU] : END 6 5 1997 7 12 00 1997 1 12 00 1 1997 1 1 1997 7 12 00 4 1997 7 17 00 4 1997 7
  • Страница 56 из 89
    Resetting the date and time To correct the date and time setting Repeat steps 5 and 6. ìÒÚ‡Ìӂ͇ ‰‡Ú˚ Ë ‚ ÂÏÂÌË ÑÎfl ÍÓ ÂÍÚË Ó‚ÍË ÛÒÚ‡ÌÓ‚ÍË ‰‡Ú˚ Ë ‚ ÂÏÂÌË èÓ‚ÚÓ ËÚ ÔÛÌÍÚ˚ Ò 5 ÔÓ 6. To check the date and time Press DATE to display the date indicator. Press TIME to display the time indicator. When
  • Страница 57 из 89
    Tips for using the battery pack This section shows you how you can get the most out of your battery pack. ëÓ‚ÂÚ˚ ÔÓ ËÒÔÓθÁÓ‚‡Ì˲ ·‡Ú‡ ÂÈÌÓ„Ó ·ÎÓ͇ Ç ‰‡ÌÌÓÏ ‡Á‰ÂΠÔÓ͇Á‡ÌÓ, Í‡Í Ç˚ ÏÓÊÂÚ ËÒÔÓθÁÓ‚‡Ú¸ ̇ËÎÛ˜¯ËÏ Ó· ‡ÁÓÏ Ç‡¯ ·‡Ú‡ ÂÈÌ˚È ·ÎÓÍ. Preparing the battery pack Always carry additional
  • Страница 58 из 89
    Tips for using the battery pack ëÓ‚ÂÚ˚ ÔÓ ËÒÔÓθÁÓ‚‡Ì˲ ·‡Ú‡ ÂÈÌÓ„Ó ·ÎÓ͇ When to replace the battery äÓ„‰‡ ÒΉÛÂÚ Á‡ÏÂÌflÚ¸ ·‡Ú‡ ² While you are using your camcorder, the remaining battery indicator decreases gradually as battery power is used up. äÓ„‰‡ Ç˚ ËÒÔÓθÁÛÂÚ ‚ˉÂÓ͇Ï Û, Ë̉Ë͇ÚÓ
  • Страница 59 из 89
    Tips for using the battery pack ëÓ‚ÂÚ˚ ÔÓ ËÒÔÓθÁÓ‚‡Ì˲ ·‡Ú‡ ÂÈÌÓ„Ó ·ÎÓ͇ The battery heats up Ňڇ ÂÈÌ˚È ·ÎÓÍ Ì‡„ ‚‡ÂÚÒfl During charging or recording, the battery pack heats up. This is caused by energy that has been generated and a chemical change that has occurred inside the battery pack. This
  • Страница 60 из 89
    Tips for using the battery pack ëÓ‚ÂÚ˚ ÔÓ ËÒÔÓθÁÓ‚‡Ì˲ ·‡Ú‡ ÂÈÌÓ„Ó ·ÎÓ͇ Notes on charging è ËϘ‡ÌË ÔÓ Á‡ fl‰Í A brand-new battery çÓ‚˚È ·‡Ú‡ ÂÈÌ˚È ·ÎÓÍ A brand-new battery pack is not charged. Before using the battery pack, charge it completely. çÓ‚˚È ·‡Ú‡ ÂÈÌ˚È ·ÎÓÍ Ì Á‡ flÊÂÌ. è ‰
  • Страница 61 из 89
    Maintenance information and precautions àÌÙÓ Ï‡ˆËfl ÔÓ ÛıÓ‰Û Á‡ ‡ÔÔ‡‡ÚÓÏËÔ Â‰ÓÒÚÓ ÓÊÌÓÒÚË Moisture condensation äÓ̉ÂÌÒ‡ˆËfl ‚·„Ë If the camcorder is brought directly from a cold place to a warm place, moisture may condense inside the camcorder, on the surface of the tape, or on the lens. In this
  • Страница 62 из 89
    Maintenance information and precautions àÌÙÓ Ï‡ˆËfl ÔÓ ÛıÓ‰Û Á‡ ‡ÔÔ‡ ‡ÚÓÏËÔ Â‰ÓÒÚÓ ÓÊÌÓÒÚË Video head cleaning é˜ËÒÚ͇ „ÓÎÓ‚ÓÍ To ensure normal recording and clear pictures, clean the video heads. When v appears in CAMERA mode or playback pictures are “noisy” or hardly visible, the video heads may
  • Страница 63 из 89
    Maintenance information and precautions àÌÙÓ Ï‡ˆËfl ÔÓ ÛıÓ‰Û Á‡ ‡ÔÔ‡ ‡ÚÓÏËÔ Â‰ÓÒÚÓ ÓÊÌÓÒÚË Removing dust from inside the viewfinder 쉇ÎÂÌË Ô˚ÎË ËÁÌÛÚ Ë ‚ˉÓËÒ͇ÚÂÎfl (1) Remove the screw with a screwdriver (not supplied). Then, while sliding the RELEASE knob, turn the eyecup in the direction of
  • Страница 64 из 89
    Maintenance information and precautions àÌÙÓ Ï‡ˆËfl ÔÓ ÛıÓ‰Û Á‡ ‡ÔÔ‡ ‡ÚÓÏËÔ Â‰ÓÒÚÓ ÓÊÌÓÒÚË Precautions è‰ÓÒÚÓÓÊÌÓÒÚË Camcorder operation ꇷÓÚ‡ Ò ‚ˉÂÓ͇Ï ÓÈ • Operate the camcorder using 6.0 V (battery pack), or 7.5 V (AC power adaptor). • For DC or AC operation, use only the recommended
  • Страница 65 из 89
    Maintenance information and precautions •If there are fingerprints on the LCD screen, remove them using an LCD cleaning kit (not supplied). •Clean the camcorder body with a soft dry cloth, or a soft cloth lightly moistened with a mild detergent solution. Do not use any type of solvent which may
  • Страница 66 из 89
    Maintenance information and precautions •The unit becomes warm while in use. This is normal. •Do not place the unit in locations that are: – Extremely hot or cold – Dusty or dirty – Very humid – Vibrating Notes on the dry batteries To avoid possible damage from battery leakage or corrosion, observe
  • Страница 67 из 89
    Using your camcorder abroad Each country or area has its own electricity and TV colour systems. Before using your camcorder abroad, check the following points: Power sources You can use your camcorder in any country or area with the supplied AC power adaptor within 110 V to 240 V AC, 50/60 Hz.
  • Страница 68 из 89
    English Trouble check If you run into any problem using the camcorder, use the following table to troubleshoot the problem. Should the difficulty persist, disconnect the power source and contact your Sony dealer or local authorized Sony service facility. Camcorder Power Symptom The power is not on.
  • Страница 69 из 89
    Trouble check Symptom Cause and/or Corrective Actions The End Search function does not • The cassette was ejected after you recorded on it. activate. m The End Search function will not activate until you make a new recording after reinserting the cassette. • Reset the date and time. (p. 55) The
  • Страница 70 из 89
    Trouble check Others Symptom The supplied Remote Commander does not work . There is dust in the viewfinder. Cause and/or Corrective Actions • COMMANDER is set to OFF. m Set it to ON in the menu system. (p. 29) • Something is blocking the infrared rays. m Remove the obstacle. • The battery is not
  • Страница 71 из 89
    Trouble check AC power adaptor Symptom The POWER lamp does not light. The CHARGE lamp flashes. Cause and/or Corrective Actions • Set the selector to VTR (DC OUT) and disconnect the mains lead. After about one minute, try again. (p. 9) • See the following chart. When the CHARGE lamp flashes Check
  • Страница 72 из 89
    êÛÒÒÍËÈ è ӂ ͇ ÌÂËÒÔ ‡‚ÌÓÒÚÂÈ ÖÒÎË Û Ç‡Ò ‚ÓÁÌËÍ· Ô Ó·ÎÂχ Ô Ë ËÒÔÓθÁÓ‚‡ÌËË ‚ˉÂÓ͇Ï ˚, ‚ÓÒÔÓθÁÛÈÚÂÒ¸ ÒÎÂ‰Û˛˘ÂÈ Ú‡·ÎˈÂÈ ‰Îfl ‚˚flÒÌÂÌËfl Ô Ó·ÎÂÏ˚. ÖÒÎËÚ Û‰ÌÓÒÚË‚Ò¢ÂÓÒÚ‡˛ÚÒfl,ÚÓÓÚÒÓ‰ËÌËÚÂËÒÚÓ˜ÌËÍÔËÚ‡ÌËflËÒ‚flÊËÚÂÒ¸Ò‰ËΠÓÏ Sony ËÎË ÏÂÒÚÌ˚Ï ÛÔÓÎÌÓÏÓ˜ÂÌÌ˚Ï Ô Â‰Ô ËflÚËÂÏ ÔÓ Ó·ÒÎÛÊË‚‡Ì˲ Sony.
  • Страница 73 из 89
    è ӂ ͇ ÌÂËÒÔ ‡‚ÌÓÒÚÂÈ è ËÁÌ‡Í ç ‡·ÓÚ‡ÂÚ ÙÛÌ͈Ëfl ÔÓËÒ͇ ÍÓˆ‡ àÒ˜ÂÁ‡ÂÚ Ë̉Ë͇ÚÓ ‰‡Ú˚ ËÎË ‚ ÂÏÂÌË. ç ‡·ÓÚ‡ÂÚ ÙÛÌ͈Ëfl ÒÚ‡·ËÎËÁ‡ˆËË ËÁÓ· ‡ÊÂÌËfl SteadyShot. • Ç˚Íβ˜‡ÚÂθ STEADY SHOT ÛÒÚ‡ÌÓ‚ÎÂÌ ‚ ÔÓÎÓÊÂÌË OFF. m ìÒÚ‡ÌÓ‚ËÚ ‚˚Íβ˜‡ÚÂθ STEADY SHOT ‚ ÔÓÎÓÊÂÌË ON. (ÒÚ . 45) • îÛÌ͈Ëfl SteadyShot ÌÂ
  • Страница 74 из 89
    è ӂ ͇ ÌÂËÒÔ ‡‚ÌÓÒÚÂÈ è ËÁÌ‡Í Ç ‚ˉÓËÒ͇ÚÂΠËÎË Ì‡ ˝Í ‡Ì ÜäÑ‚ÓÒÔ ÓËÁ‚Ó‰ËÚÒfl ÌÂËÁ‚ÂÒÚÌÓ ËÁÓ· ‡ÊÂÌËÂ. è ˘Ë̇ Ë/ËÎË ‰ÂÈÒÚ‚Ëfl ÔÓ ÛÒÚ ‡ÌÂÌ˲ • ÖÒÎË Ô Ó¯ÎÓ 10 ÏËÌÛÚ ÔÓÒΠÚÓ„Ó, Í‡Í Ç˚ ÛÒÚ‡ÌÓ‚ËÎË Ô ÂÍβ˜‡ÚÂθ POWER ‚ ÔÓÎÓÊÂÌË CAMERA, Ì ‚ÒÚ‡‚Ë‚ Ô Ë ˝ÚÓÏ Í‡ÒÒÂÚÛ, ‚ˉÂÓ͇Ï ‡ ‡‚ÚÓχÚ˘ÂÒÍË Ì‡˜ÌÂÚ
  • Страница 75 из 89
    è ӂ ͇ ÌÂËÒÔ ‡‚ÌÓÒÚÂÈ ëÂÚ‚ÓÈ ‡‰‡ÔÚ Ô ÂÏÌÂÌÌÓ„Ó ÚÓ͇ è ËÁÌ‡Í ã‡ÏÔӘ͇ POWER Ì „Ó ËÚ. åË„‡ÂÚ Î‡ÏÔӘ͇ CHARGE. è ˘Ë̇ Ë/ËÎË ‰ÂÈÒÚ‚Ëfl ÔÓ ÛÒÚ ‡ÌÂÌ˲ • ìÒÚ‡ÌÓ‚ËÚ ÒÂÎÂÍÚÓ ‚ ÔÓÎÓÊÂÌË VTR (DC OUT) Ë ÓÚÒÓ‰ËÌËÚÂÒÂÚ‚ÓÈÔ Ó‚Ó‰.ó ÂÁÓ‰ÌÛÏËÌÛÚÛÒÌÓ‚‡ ÔÓ‰ÒÓ‰ËÌËÚÂÒÂÚ‚ÓÈÔ Ó‚Ó‰.(ÒÚ 9) . • ëÏÓÚ ËÚÂ
  • Страница 76 из 89
    English Specifications Video camera recorder LCD screen Dimensions System Picture Video recording system Video signal 2.5 inches measured diagonally CCD-TRV14E: 50.2 × 37.1 mm ( 2 x 11⁄2 inches) CCD-TRV24E: 50.3 x 37.4 mm ( 2 x 11⁄2 inches) Approx. 112 x 102 x 201 mm (4 1⁄2 x 4 1⁄8 x 8 inches)
  • Страница 77 из 89
    êÛÒÒÍËÈ íÂıÌ˘ÂÒÍË ı‡ ‡ÍÚ ËÒÚËÍË àÁÓ· ‡ÊÂÌË 2,5 ‰˛Èχ ÔÓ ‰Ë‡„Ó̇ÎË CCD-TRV14E: 50,2 × 37,1 ÏÏ (2,5 ‰˛Èχ) ëëD-TRV24E: 50,3 × 37,4 ÏÏ àÌÙÓ Ï‡ˆËÓÌÌ˚È ˝Í ‡Ì ÄÍÚË‚ÌÓ-Ï‡Ú Ë˜Ì‡fl ÚÂıÌÓÎÓ„Ëfl TN ÜäÑ/TFT (ÚÓÌÍÓÔÎÂÌÓ˜Ì˚È Ú‡ÌÁËÒÚÓ) 鷢 ˜ËÒÎÓ ˝ÎÂÏÂÌÚÓ‚ ËÁÓ· ‡ÊÂÌËfl: 61380 (279 × 220) ÇıÓ‰Ì˚Â Ë ‚˚ıÓ‰Ì˚Â
  • Страница 78 из 89
    Identifying the parts 1 STOP REW PLAY éÔÓÁ̇‚‡ÌË ‰ÂÚ‡ÎÂÈ FF PAUSE 8 9 2 3 !º 4 5 !¡ 6 !™ 7 !£ !¢ 1 Tape transport buttons (p. 22, 24) π STOP 0 REW (rewind) · PLAY (playback) ) FF (fast forward) P PAUSE These buttons will function in PLAYER mode. 1 äÌÓÔÍË Ô ÂÏ¢ÂÌËfl ÎÂÌÚ˚ (ÒÚ . 22, 24) π STOP
  • Страница 79 из 89
    Identifying the parts éÔÓÁ̇‚‡ÌË ‰ÂÚ‡ÎÂÈ !∞ @£ !¶ @¢ !• @∞ !ª @§ @º @¶ @¡ @• @™ @ª !∞äÌÓÔ͇ TIME (ÒÚ . 32) !§ DATE button (p. 32) !§ äÌÓÔ͇ DATE (ÒÚ . 32) !¶ Speaker !¶ É ÓÏÍÓ„Ó‚Ó ËÚÂθ !• Recording lamp !• ã‡ÏÔӘ͇ Á‡ÔËÒË !ª Lithium battery compartment (p. 54) !ª éÚÒÂÍ ÎËÚË‚ÓÈ ·‡Ú‡ ÂÈÍË (ÒÚ .
  • Страница 80 из 89
    Identifying the parts éÔÓÁ̇‚‡ÌË ‰ÂÚ‡ÎÂÈ #§ #¶ #º #• #ª #¡ $º #™ $¡ #£ $™ #¢ $£ #∞ #º POWER switch (p. 11, 22) #º Ç˚Íβ˜‡ÚÂθ POWER (ÒÚ . 11, 22) #¡ PUSH OPEN button (p. 16, 17, 22) #¡ äÌÓÔ͇ PUSH OPEN (ÒÚ . 16, 17, 22) #™ LCD panel (p. 16, 17, 22) #™ è‡ÌÂθ ÜäÑ (ÒÚ . 16, 17, 22) #£ Display window
  • Страница 81 из 89
    Identifying the parts éÔÓÁ̇‚‡ÌË ‰ÂÚ‡ÎÂÈ $ª $¢ %º $∞ %¡ %™ $¶ %£ $• %¢ $¢ ê͇ۘ ÓÒ‚Ó·ÓʉÂÌËfl ÓÍÛÎfl ‡ (ÒÚ . 63) $∞ EJECT knob (p. 10) $∞ ê͇ۘ EJECT (ÒÚ . 10) $§ Hooks for shoulder strap (p. 82) $§ ä ˛˜ÍË ‰Îfl ÔÎÂ˜Â‚Ó„Ó ÂÏÌfl $¶ Battery mounting surface (p. 9) $¶ èÓ‚Â ıÌÓÒÚ¸ ÛÒÚ‡ÌÓ‚ÍË ·‡Ú‡ ÂÈÌÓ„Ó
  • Страница 82 из 89
    Identifying the parts éÔÓÁ̇‚‡ÌË ‰ÂÚ‡ÎÂÈ Attaching the shoulder strap Attach the supplied shoulder strap to the hooks for the shoulder strap $§. 1 2 Remote Commander Using the Remote Commander Make sure that COMMANDER is set to ON in the menu system. The buttons that have the same name on the
  • Страница 83 из 89
    Identifying the parts éÔÓÁ̇‚‡ÌË ‰ÂÚ‡ÎÂÈ To prepare the Remote Commander Insert two R6 (size AA) batteries by matching the + and – on the batteries to the diagram inside the battery compartment. Remote control direction Aim the Remote Commander to the remote sensor within the range as shown below.
  • Страница 84 из 89
    Identifying the parts Notes on the Remote Commander •Keep the remote sensor away from strong light sources such as direct sunlight or illumination. Otherwise, the remote control may not be effective. •Be sure that there is no obstacle between the remote sensor on the camcorder and the Remote
  • Страница 85 из 89
    Identifying the parts éÔÓÁ̇‚‡ÌË ‰ÂÚ‡ÎÂÈ Operation indicators à̉Ë͇ÚÓ ˚ ‡·ÓÚ˚ In the viewfinder and on the LCD screen W FADER CINEMA MOSAIC END SEARCH 2 Manual focus indicaror (p. 41) 3 PROGRAM AE indicator (p. 42) 4 SteadyShot indicator (p. 45) (CCD-TRV24E only) 5 Back light indicator (p. 44) 6
  • Страница 86 из 89
    Identifying the parts !§ 5SEC recording indicator (p. 33) !¶ END SEARCH indicator (p. 25) !• Warning indicators (p. 87) éÔÓÁ̇‚‡ÌË ‰ÂÚ‡ÎÂÈ !§ à̉Ë͇ÚÓ ÔflÚËÒÂÍÛ̉ÌÓÈ Á‡ÔËÒË 5SEC (ÒÚ .33) !¶ à̉Ë͇ÚÓ END SEARCH (ÒÚ . 25) !ª Remaining battery indicator (p. 58) !• è ‰ÛÔ Âʉ‡˛˘Ë Ë̉Ë͇ÚÓ ˚ (ÒÚ .87)
  • Страница 87 из 89
    Warning indicators The warning indicators and the recording lamp flash to inform you of the following situations. The illustrations below are the warning indicators of the viewfinder and the LCD screen. The same indicators flash also in the display window. ≥: You can hear the beep sound when BEEP
  • Страница 88 из 89
    Index A F, G, H Q, R Adjusting viewfinder ........... 13 ANTI GROUND SHOOTING 33 AUTO DATE .......................... 14 Fade-in/Fade-out .................. 34 FADER .................................... 34 Fast-forward ........................... 22 5 sec. recording ...................... 33
  • Страница 89 из 89