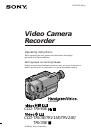
Инструкция для SONY CCD-TRV3E

(скачивание инструкции бесплатно)
Формат файла: PDF
Доступность: Бесплатно как и все руководства на сайте. Без регистрации и SMS.
Дополнительно: Чтение инструкции онлайн
background image

3-861-903-12 (1)

Video Camera
Recorder

Operating Instructions

Before operating the unit, please read this manual thoroughly,
and retain it for future reference.

©1998 by Sony Corporation

CCD-TRV65E 

CCD-TRV3E/TRV15E/TRV23E/

TRV35E 

CCD-TRV65E

Инструкция по эксплуатации

Перед эксплуатацией аппарата внимательно прочтите, пожалуйста,
данное руководство и сохраняйте его для дальнейших справок.

1
2
3
4
5
6
7
8
9
10
11
12
13
14
15
16
17
18
19
20
21
22
23
24
25
26
27
28
29
30
31
32
33
34
35
36
37
38
39
40
41
42
43
44
45
46
47
48
49
50
51
52
53
54
55
56
57
58
59
60
61
62
63
64
65
66
67
68
69
70
71
72
73
74
75
76
77
78
79
80
81
82
83
84
85
86
87
88
89
90
91
92
93
94
95
96
97
98
99
100
101
102
103
104
105
106
107
108
Оглавление инструкции
  • Страница 1 из 109
    3-861-903-12 (1) Video Camera Recorder Operating Instructions Before operating the unit, please read this manual thoroughly, and retain it for future reference. Инструкция по эксплуатации Перед эксплуатацией аппарата внимательно прочтите, пожалуйста, данное руководство и сохраняйте его для
  • Страница 2 из 109
    Русский English Welcome! Добро пожаловать! Congratulations on your purchase of this Sony Handycam Vision™ camcorder. With your Handycam Vision you can capture life’s precious moments with superior picture and sound quality. Your Handycam Vision is loaded with advanced features, but at the same time
  • Страница 3 из 109
    English Table of contents Before you begin Using this manual ................................................... 5 Checking supplied accessories ............................. 7 Getting started Installing and charging the battery pack ............ 8 Inserting a cassette
  • Страница 4 из 109
    Русский Оглавление Перед началом эксплуатации Использование данного руководства ........... 5 Проверка прилагаемых принадлежностей ... 7 Подготовка к эксплуатации Установка и зарядка батарейного блока ..... 8 Вставка кассеты ........................................... 14 Основные операции Запись с
  • Страница 5 из 109
    Before you begin Перед началом эксплуатации Использование данного руководства Using this manual Types of differences Типы различий CCDSystem TRV3E TRV15E TRV23E TRV35E TRV65E Система h h h h H VIDEO/AUDIO IN* — — — — r S VIDEO — — — — r 16x 16x 18x 18x 18x 100x 200x 220x 220x 220x — — r r r — — — r
  • Страница 6 из 109
    Using this manual Note on TV colour systems TV colour systems differ from country to country. To view your recordings on a TV, you need a PAL system-based TV. Precaution on copyright Television programmes, films, video tapes, and other materials may be copyrighted. Unauthorized recording of such
  • Страница 7 из 109
    Checking supplied accessories Check that the following accessories are supplied with your camcorder. 3 2 6 * 7 4 8 or/или 1 Wireless Remote Commander (1) (p. 99) CCD-TRV15E/TRV23E/TRV35E/TRV65E only 2 AC-L10A/L10B/L10C AC power adaptor (1), Mains lead (1) (p. 9, 31) 3 NP-F330 Battery pack (1) (p.
  • Страница 8 из 109
    Подготовка к эксплуатации Getting started Installing and charging the battery pack Before using your camcorder, you first need to install and charge the battery pack. This camcorder operates only with the “InfoLITHIUM” battery. “InfoLITHIUM” is a trademark of Sony Corporation. Уcтaнoвка и зарядка
  • Страница 9 из 109
    Installing and charging the battery pack Уcтaнoвка и зарядка батарейного блока Charging the battery pack Зарядка батарейного блока Подготовка к эксплуатации Заряжайте батарейный блок на плоской поверхности, неподверженной вибрации. Батарейный блок слегка заряжен на заводе. (1) Откройте крышку с
  • Страница 10 из 109
    Installing and charging the battery pack Notes • “– – – min” appears in the display window until the camcorder calculates remaining battery time. • Remaining battery time indication in the display window roughly indicates the recording time with the viewfinder. Use it as a guide. It may differ from
  • Страница 11 из 109
    Installing and charging the battery pack Уcтaнoвка и зарядка батарейного блока Battery life Срок службы заряда батарейного блока Upper numbers are the time when recording with the viewfinder. Lower numbers are the time when recording with the LCD screen. Using both will further reduce recording
  • Страница 12 из 109
    Installing and charging the battery pack CCD-TRV65E Battery pack CCD-TRV65E Continuous Typical recording recording time* time** Playing time on LCD NP-F330 (supplied) 120 (105) 95 (85) 60 (55) 50 (45) 95 (85) NP-F530 205 (180) 160 (145) 105 (95) 85 (75) 155 (140) NP-F550 240 (210) 195 (175) 125
  • Страница 13 из 109
    Installing and charging the battery pack Уcтaнoвка и зарядка батарейного блока To remove the battery pack Для снятия батарейного блока While pressing BATT RELEASE, slide the battery pack in the direction of the arrow. Нажимая BATT RELEASE, передвиньте батарейный блок в направлении стрелки. Вы
  • Страница 14 из 109
    Inserting a cassette Make sure that the power source is installed. When you want to record in the Hi8 system, use Hi8 video cassette H.(CCD-TRV65E only) (1) While pressing the small blue button on the EJECT switch, slide it in the direction of the arrow. The cassette compartment automatically lifts
  • Страница 15 из 109
    Basic operations Основные операции Camera recording POWER CAMERA OFF VTR Основные операции 1 Убедитесь, что источник питания установлен,кассета вставлена и переключатель START/STOP MODE внутри панели ЖКД установлен в положение . Перед тем как Вы начнете запись одноразовых событий, Вы можете
  • Страница 16 из 109
    Запись с помощью видеокамеры Camera recording To stop recording momentarily [a] Для временной остановки записи [a] Press START/STOP again. The “STBY” indicator appears in the viewfinder (Standby mode). Снова нажмите START/STOP. Индикатор “STBY” появляется в видоискателе (режим готовности). To
  • Страница 17 из 109
    Camera recording Note on Standby mode If you leave the camcorder in Standby mode for 5 minutes while the cassette is inserted, the camcorder turns off automatically for saving battery power as well as for preventing the battery and tape from wearing down. To resume Standby mode, turn STANDBY down
  • Страница 18 из 109
    Запись с помощью видеокамеры Camera recording Note on the AUTO DATE feature The clock is set at the factory to Sydney time for Australia and New Zealand models, to Tokyo time for the models sold in Japan, and to Hong Kong time for other models. You can reset the clock in the menu system. You can
  • Страница 19 из 109
    Запись с помощью видеокамеры Camera recording Zooming speed (Variable speed zooming) Скорость наезда видеокамеры (наезд с различной скоростью) Move the power zoom lever a little for a slower zoom, move it further for a faster zoom. Передвиньте рычаг приводного трансфокатора немного для сравнительно
  • Страница 20 из 109
    Camera recording Запись с помощью видеокамеры Selecting the START/STOP mode Выбор режима START/STOP Your camcorder has three modes. These modes enable you to take a series of quick shots resulting in a lively video. (1) While pressing OPEN, open the LCD panel. (2) Set START/STOP MODE to the desired
  • Страница 21 из 109
    Запись с помощью видеокамеры Camera recording Shooting with the LCD screen Основные операции Вы можете также производить запись изображения, глядя на экран ЖКД. При использовании экрана ЖКД экран видоискателя выключается автоматически. Вы не можете слышать звук от громкоговорителя во время записи.
  • Страница 22 из 109
    Camera recording Notes on the LCD panel •When closing the LCD panel, turn it vertically until it clicks [a]. •When turning the LCD panel, turn it always vertically; otherwise, the camcorder body may be damaged or the LCD panel may not close properly [b]. •Close the LCD panel completely when not in
  • Страница 23 из 109
    Hints for better shooting Советы для лучшей съемки For hand-held shots, you’ll get better results by holding the camcorder according to the following suggestions: •Hold the camcorder firmly and secure it with the grip strap so that you can easily manipulate the controls with your thumb. Для кадров
  • Страница 24 из 109
    Hints for better shooting Place the camcorder on a flat surface or use a tripod Try placing the camcorder on a table top or any other flat surface of suitable height. If you have a tripod for a still camera, you can also use it with the camcorder. When attaching a non-Sony tripod, make sure that
  • Страница 25 из 109
    Checking the recorded picture 1 Основные операции Используя EDITSEARCH, Вы можете пересмотреть последнюю записанную сцену или проверить записанное изображение на экране ЖКД. (1) Нажимая маленькую зеленую кнопку на выключателе POWER, установите его в положение CAMERA. (2) Поверните STANDBY вверх в
  • Страница 26 из 109
    Checking the recorded picture To stop playback Release EDITSEARCH. To go back to the last recorded point after edit search Press END SEARCH. The last recorded point is played back for about 5 seconds (10 seconds in LP mode) and stops. Note that this function does not work once you eject the
  • Страница 27 из 109
    Playing back a tape POWER CAMERA OFF VTR 2 4 5 Основные операции 1 Вы можете просматривать изображение на экране ЖКД. (1) Нажимая маленькую зеленую кнопку на выключателе POWER, установите его в положение VTR (CCD-TRV65E) или PLAYER (CCD-TRV3E/TRV15E/TRV23E/ TRV35E). Высветятся рабочие кнопки
  • Страница 28 из 109
    Playing back a tape Воспроизведение ленты When monitoring on the LCD screen При просмотре на экране ЖКД You can turn the LCD panel over and move back to the camcorder with the LCD screen facing out [a]. You can adjust the angle of the LCD screen by turning the LCD screen up to 15 degrees [b]. Вы
  • Страница 29 из 109
    Playing back a tape Воспроизведение ленты Various playback modes Различные режимы воспроизведения You can enjoy clear pictures on the LCD screen during still, slow and picture search. (Crystal-clear still/slow/picture search) Press P during playback. To resume playback, press P or (. Для просмотра
  • Страница 30 из 109
    Searching for the end of the picture You can go to the end of the recorded portion after you record and play back the tape to make the transition between the last scene you recorded and the next scene smooth. The tape starts rewinding or fast-forwarding and the last 5 seconds (10 seconds in LP
  • Страница 31 из 109
    Advanced operations Усовершенствованные операции Using alternative power sources You can choose any of the following power sources for your camcorder: battery pack, the mains, alkaline batteries and 12/24 V car battery. Choose the appropriate power source depending on where you want to use your
  • Страница 32 из 109
    Using alternative power sources WARNING The mains lead must only be changed at a qualified service shop. PRECAUTION The set is not disconnected from the AC power source (mains) as long as it is connected to the mains, even if the set itself has been turned off. Note Keep the AC power adaptor away
  • Страница 33 из 109
    Changing the mode settings MENU CAMERA CAMERA SET D ZOOM 16 : 9WIDE STEADYSHOT N. S. LIGHT WIND [MENU] : END VTR 2 CAMERA SET D ZOOM 16 : 9WIDE OTHERS WORLD TIME BEEP COMMANDER DISPLAY REC LAMP INDICATOR VTR SET H i F i SOUND EDIT TBC DNR NTSC PB PLAYER OTHERS WORLD TIME BEEP COMMANDER DISPLAY REC
  • Страница 34 из 109
    Changing the mode settings Note on the menu display Depending on the model of your camcorder, the menu display may be different from that in this illustration. Notes on changing the mode setting • Menu items differ depending on the setting of the POWER switch to VTR/PLAYER or CAMERA. • When you let
  • Страница 35 из 109
    Changing the mode settings BEEP* <ON/OFF> •Select ON so that beeps sound when you start/ stop recording, etc. •Select OFF when you do not want to hear the beep sound. COMMANDER <ON/OFF> (CCD-TRV15E/ TRV23E/TRV35E/TRV65E only) •Select ON when using the supplied Remote Commander for the camcorder.
  • Страница 36 из 109
    Changing the mode settings Items for CAMERA mode only D ZOOM* <ON/OFF> •Select ON to activate digital zooming. •Select OFF to not use the digital zoom. The camcorder goes back to 16x (CCD-TRV3E/ TRV15E) or 18x (CCD-TRV23E/TRV35E/ TRV65E) zoom. 16:9WIDE* <OFF/CINEMA/16:9FULL> •Normally select OFF.
  • Страница 37 из 109
    Changing the mode settings DEMO MODE* <ON/OFF> •Select ON to make the demonstration appear. •Select OFF to deactivate the demonstration mode. WORLD TIME* Select this item to set the clock by a time difference. REC LAMP* <ON/OFF> •Select OFF when you do not want the camera recording/battery lamp at
  • Страница 38 из 109
    Changing the mode settings Изменение установок режимов Items for VTR/PLAYER mode only Установки только для режима VTR/ PLAYER HiFi SOUND <STEREO/1/2> (CCD-TRV65E only) •Normally select STEREO. •Select 1 or 2 to play back a dual sound track tape. / EDIT <ON/OFF> •Select ON to minimize picture
  • Страница 39 из 109
    Shooting with backlighting When you shoot a subject with the light source behind the subject or a subject with a light background, use the BACK LIGHT function. Press BACK LIGHT. The c indicator appears in the viewfinder or on the LCD screen. Съемка с задней подсветкой Когда Вы снимаете объект с
  • Страница 40 из 109
    Using the FADER function Использование фунции FADER – CCD-TRV23E/TRV35E/TRV65E only Выбор функции введения/ выведения изображения Selecting the fader function You can fade in or out to give your recording a professional appearance. When the picture fades in, the sound gradually increases. When the
  • Страница 41 из 109
    Using the FADER function Использование фунции FADER Using the fader function Использование функции введения/ выведения изображения When fading in [a] (1) While the camcorder is in Standby mode, press FADER until the desired fade indicator flashes. (2) Press START/STOP to start recording. The fade
  • Страница 42 из 109
    Using the FADER function To cancel the fader function Before pressing START/STOP, press FADER until the indicator disappears. When the date, time or title is displayed The date, time and title do not fade in or fade out. When the START/STOP MODE switch is set to 5SEC or You cannot use the fader
  • Страница 43 из 109
    Shooting in the dark (NightShot) Cъемка в темных условиях (Hочная съемка) (1) While the camcorder is in Standby mode, slide NIGHTSHOT to ON. (2) Press START/STOP to start recording. and “NIGHTSHOT” indicators flash. (1) Когда видеокамера находится в режиме готовности передвиньте NIGHTSHOT в
  • Страница 44 из 109
    Using the wide mode function Использование функции широкоформатного режима Selecting the desired mode Выбор желаемого режима You can record a cinemalike picture (CINEMA) or a 16:9 wide picture to watch on the 16:9 widescreen TV (16:9 FULL). Вы можете записывать изображение как в кинотеатре (CINEMA)
  • Страница 45 из 109
    Using the wide mode function Using the wide mode function You can select the wide mode (OFF, CINEMA, 16:9FULL) in the menu system (p. 33). To cancel wide mode Select OFF in the menu system. To watch the tape recorded in wide mode Вы можете выбрать широкоформатный режим (OFF, CINEMA, 16:9FULL) в
  • Страница 46 из 109
    Using the PROGRAM AE function Использование функции PROGRAM AE Selecting the best mode Выбор наилучшего режима You can select one of six PROGRAM AE (Auto Exposure) modes to suit your shooting situation, referring to the following. a A Spotlight mode For subjects in spotlight, such as at the theatre
  • Страница 47 из 109
    Using the PROGRAM AE function Использование функции PROGRAM AE Using the PROGRAM AE function Использование функции PROGRAM AE (1) Нажмите PROGRAM AE. (2) Поверните регулировочный диск для выбора желаемого режима PROGRAM AE, а затем нажмите регулировочный диск. (1) Press PROGRAM AE. (2) Turn the
  • Страница 48 из 109
    Focusing manually Ручная фокусировка – CCD-TRV23E/TRV35E/TRV65E only – Только CCD-TRV23E/TRV35E/TRV65E When to use manual focus In the following cases you should obtain better results by adjusting the focus manually. [a] [b] • Insufficient light [a] • Subjects with little contrast - walls, sky,
  • Страница 49 из 109
    Focusing manually Ручная фокусировка Focusing manually Ручная фокусировка 1 При ручной фокусировке сперва выполняйте фокусировку в режиме телефото перед записью, а затем установите расстояние съемки. (1) Установите FOCUS на MANUAL. Индикатор f появляется в видоискателе или на экране ЖКД. (2)
  • Страница 50 из 109
    Enjoying picture effect Наслаждение эффектами изображений Selecting picture effect Выбор эффекта изображения You can make pictures like those of television with the Picture Effect function. [a] [b] [c] Вы можете сделать изображение похожим на те, что передают по телевидению с помощью функции
  • Страница 51 из 109
    Наслаждение эффектами изображений Enjoying picture effect Using picture effect function Использование функции эффектов изображения (1) Press PICTURE EFFECT. (2) Turn the control dial to select the desired picture effect mode. 2 Advanced operations 1 (1) Нажмите PICTURE EFFECT. (2) Поверните
  • Страница 52 из 109
    Adjusting the exposure – CCD-TRV23E/TRV35E/TRV65E only When to adjust the exposure Adjust the exposure manually under the following cases. Регулировка экспозиции – Только CCD-TRV23E/TRV35E/TRV65E Когда требуется регулировать экспозицию Отрегулируйте экспозицию вручную в следующих случаях. [a] [a] •
  • Страница 53 из 109
    Adjusting the exposure Shooting with the sun behind you If the light source is behind your subject, or in the following situations, the subject will be recorded too dark. •The subject is indoors and there is a window behind the subject. •Bright light sources are included in the scene. •When
  • Страница 54 из 109
    Superimposing a title Наложение надписи You can select one of eight preset titles and two custom titles. You can also select the language, colour, size and position of titles. Вы можете выбирать из восьми предварительно установленных надписей и двух совбственных надписей. Вы можете также выбирать
  • Страница 55 из 109
    Superimposing a title To superimpose the title from beginning After step 7, press START/STOP to start recording. To superimpose the title while you are recording After pressing START/STOP to start recording, start from step 1. In this case, beep is not heard. When you want to select the language,
  • Страница 56 из 109
    Making your own titles You can make up to two titles and store them in the camcorder. We recommend to set the POWER switch to VTR/PLAYER or eject the cassette before you begin. Your title can have up to 20 characters. (1) Press TITLE to display the title menu. (2) Turn the control dial to select ,
  • Страница 57 из 109
    Making your own titles To edit a title you have stored In step 3, select CUSTOM1 or CUSTOM2, depending on which title you want to edit, then change the title. Note You can not enter over 20 characters title. To delete a title In step 4, turn the control dial to select [M] then press the dial. The
  • Страница 58 из 109
    Recording with the date/time Запись с датой/ временем Before you start recording or during recording, press DATE or TIME. You can record the date or time displayed in the viewfinder or on the LCD screen with the picture. Press DATE (or TIME), then press TIME (or DATE) to display the date and time
  • Страница 59 из 109
    Optimizing the recording condition Оптимизация состояния записи MENU 2 TAPE SET SP REC MODE ORC TO SET REMAIN RETURN TAPE SET REC MODE ORC TO SET REMAIN 3 TAPE SET REC MODE ORC TO SET REMAIN RETURN 4 START/STOP KEY STBY 0:00:00 CK LO ORC STA ND Усовершенствованные операции 1 Используйте данную
  • Страница 60 из 109
    Releasing the STEADY SHOT function – CCD-TRV35E/TRV65E only – Только CCD-TRV35E/TRV65E When the Steady Shot function is working, the camcorder compensates for camera-shake. Когда работает функция устойчивой съемки, видеокамера осуществляет компенсацию дрожания видеокамеры. You can release the
  • Страница 61 из 109
    Watching on a TV screen Просмотр на экране телевизора Connecting directly to a TV/VCR with Video/Audio input jacks Подсоединение прямо к телевизору/КВМ с входными гнездами аудио/видео При подсоединении соединительного кабеля аудио/видео убедитесь, что Вы подсоединяете штекеры к гнездам одинакового
  • Страница 62 из 109
    Watching on a TV screen – CCD-TRV65E only If your TV or VCR has an S video jack, connect using the S video cable (not supplied) [a] to obtain a high quality picture . If you are going to connect the camcorder using the S video cable (not supplied) [a], you do not need to connect the yellow (video)
  • Страница 63 из 109
    Editing onto another tape You can create your own video programme by editing with any other h 8 mm, H Hi8, j VHS, k S-VHS,  VHSC, K S-VHSC or l Betamax VCR that has video/audio inputs. Монтаж на другую ленту Вы можете создать Вашу собственную видеопрограмму путем монтажа с помощью другого КВМ типа
  • Страница 64 из 109
    Recording from a VCR or TV Запись с КВМ или телевизора – CCD-TRV65E only – Только CCD-TRV65E You can record a tape from another VCR or a TV programme from a TV that has video/audio outputs. Connect the camcorder to the VCR or TV using the supplied A/V cable. Turn down the volume of the camcorder
  • Страница 65 из 109
    Additional information Changing the lithium battery in the camcorder Замена литиевой батарейки в видеокамере Ваша видеокамера снабжена установленной литиевой батарейкой. Если батарейка станет слабой или полностью разрядится, индикатор I будет мигать в видоискателе приблизительно в течение 5 секунд,
  • Страница 66 из 109
    Changing the lithium battery in the camcorder Замена литиевой батарейки в видеокамере WARNING The battery may explode if mistreated. Do not recharge, disassemble, or dispose of in fire. ПРЕДУПРЕЖДЕНИЕ При неправильном обращении батарейка может взорваться. Не перезаряжайте, не разбирайте и не
  • Страница 67 из 109
    Resetting the date and time 1, 6 MENU Вы можете установить дату и время в системе меню. (1) Когда видеокамера будет находится в режиме готовности нажмите MENU для отображения меню. (2) Поверните регулировочный диск для выбора , а затем нажмите диск. (3) Поверните регулировочный диск для выбора
  • Страница 68 из 109
    Simple setting of clock by time difference You can easily set the clock for a local time by a time difference in the menu system. (1) While the camcorder is the standby mode, press MENU to display the menu. (2) Turn the control dial to select , then press the dial. (3) Turn the control dial to
  • Страница 69 из 109
    Usable cassettes and playback modes Используемые кассеты и режимы воспроизведения Selecting cassette types Выбор типа кассеты – Только CCD-TRV65E This Hi8 system is an extension of the standard 8 mm system, and was developed to realize higher picture quality. You can use either Hi8 or standard 8 mm
  • Страница 70 из 109
    Usable cassettes and playback modes Note on AFM HiFi stereo – CCD-TRV65E only When you play back a tape, the sound will be in monaural if: • You record the tape using this camcorder, then play it back on an AFM HiFi monaural video recorder/player. • You record the tape on an AFM HiFi monaural video
  • Страница 71 из 109
    Tips for using the battery pack This section shows you how you can get the most out of your battery pack. Preparing the battery pack Always carry additional batteries Советы по использованию батарейного блока Данный раздел показывает, как Вы можете получить наибольшую отдачу от Вашего батарейного
  • Страница 72 из 109
    Tips for using the battery pack Советы по использованию батарейного блока Notes on the rechargeable battery pack Примечания к перезаряжаемому батарейному блоку Caution Предостережение Never leave the battery pack in temperatures above 60°C (140°F), such as in a car parked in the sun or under direct
  • Страница 73 из 109
    Tips for using the battery pack Советы по использованию батарейного блока Notes on the “InfoLITHIUM” battery pack Примечания к батарейному блоку “InfoLITHIUM” “InfoLITHIUM” является литиево-ионным батарейным блоком, который может обмениваться данными с совместимой видеоаппаратурой относительно
  • Страница 74 из 109
    Советы по использованию батарейного блока Tips for using the battery pack To obtain more accurate remaining battery indication Set the camcorder to recording standby mode and point towards a stationary object. Do not move the camcorder for 30 seconds or more. • If the indication seems incorrect,
  • Страница 75 из 109
    Maintenance information and precautions Информация по уходу за аппаратом и предосторожности Moisture condensation Конденсация влаги If the camcorder is brought directly from a cold place to a warm place, moisture may condense inside the camcorder, on the surface of the tape, or on the lens. In this
  • Страница 76 из 109
    Maintenance information and precautions Информация по уходу за аппаратом и предосторожности Video head cleaning Очистка видеоголовок To ensure normal recording and clear pictures, clean the video heads. When the v˚ indicator and “ CLEANING CASSETTE” message appear one after another or playback
  • Страница 77 из 109
    Maintenance information and precautions Информация по уходу за аппаратом и предосторожности Removing dust from inside the viewfinder Удаление пыли из видоискателя (1) Remove the screw with a screwdriver (not supplied). Then, while sliding the RELEASE knob, turn the eyecup in the direction of the
  • Страница 78 из 109
    Maintenance information and precautions Информация по уходу за аппаратом и предосторожности Precautions Предосторожности Camcorder operation Эксплуатация видеокамеры • Operate the camcorder on 7.2 V (battery pack) or 8.4 V (AC power adaptor). • For DC or AC operation, use the accessories
  • Страница 79 из 109
    Maintenance information and precautions Информация по уходу за аппаратом и предосторожности • Когда видеокамера не используется в течение длительного времени, удалите ленту. Периодически включайте питание, работайте с секциями камеры и плейера и воспроизводите ленту приблизительно в течение 3-х
  • Страница 80 из 109
    Maintenance information and precautions Информация по уходу за аппаратом и предосторожности • Do not apply mechanical shock or drop the unit. • While the unit is in use, particularly during charging, keep it away from AM receivers and video equipment because it will disturb AM reception and video
  • Страница 81 из 109
    Using your camcorder abroad Each country or area has its own electric and TV colour systems. Before using your camcorder abroad, check the following points. Power sources You can use your camcorder in any country or area with the supplied AC power adaptor within 100 V to 240 V AC, 50/60 Hz.
  • Страница 82 из 109
    English Trouble check If you run into any problem using the camcorder, use the following table to troubleshoot the problem. Should the difficulty persist, disconnect the power source and contact your Sony dealer or local authorized Sony service facility. Camcorder Power Symptom Cause and/or
  • Страница 83 из 109
    Trouble check Symptom Cause and/or Corrective Actions • The START/STOP MODE switch is set to 5SEC or . . (p. 20) m Set it to The cassette cannot be removed from • The battery is dead. the holder. m Use a charged battery pack or the AC power adaptor. (p. 9, 31) { and 6 indicators flash and no •
  • Страница 84 из 109
    Trouble check Symptom A vertical band appears when a subject such as lights or a candle flame is shot against a dark background. Cause and/or Corrective Actions • The contrast between the subject and background is too high. The camcorder is not malfunctioning. m Change locations. A vertical band
  • Страница 85 из 109
    Русский Проверка неисправностей Если у Вас возникла какая-либо проблема при использовании видеокамеры, воспользуйтесь следующей таблицей для отыскания и устранения проблемы. Если трудности все еще остаются, то отсоедините источник питания и обратитесь к Вашему дилеру Sony или на местное
  • Страница 86 из 109
    Проверка неисправностей Признак Причина и/или действия по устранению • Переключатель START/STOP MODE установлен в положение 5SEC или . . (стр. 20) m Установите его в положение • Батарейный блок полностью разряжен. Кассета не может быть вынута из держателя. m Используйте заряженный батарейный блок
  • Страница 87 из 109
    Проверка неисправностей Признак Вертикальная полоса появляется, если такие объекты, как источники света или пламя свечи, снимаются на темном фоне. Причина и/или действия по устранению • Слишком высокий контраст между объектом и фоном. Видеокамера не является неисправной. m Измените позицию съемки.
  • Страница 88 из 109
    English Self-diagnosis display The camcorder has a self-diagnosis display. This function displays the camcorder’s condition with five digits (a combination of a letter and figures) in the viewfinder, on the LCD screen or in the display window. If this occurs, check the following code chart. The
  • Страница 89 из 109
    Русский Дисплей самодиагностики Пятизначный дисплей C:22:ππ C:23:ππ C:31:ππ C:32:ππ E:61:ππ E:62:ππ C:21:00 Дисплей самодиагностики •C:ππ:ππ Вы можете выполнить техническое обслуживание видеокамеры самостоятельно. •E:ππ:ππ Свяжитесь с Вашим дилером Sony или местным уполномоченным предприятием Sony.
  • Страница 90 из 109
    English Specifications Video camera recorder System Video recording system 2 rotary heads Helical scanning FM system Audio recording system Rotary heads, FM system Video signal PAL colour, CCIR standards Usable cassette 8mm video format cassette CCD-TRV3E/TRV15E/TRV23E/ TRV35E: Standard 8
  • Страница 91 из 109
    Specifications AC power adaptor Design and specifications are subject to change without notice. Additional information Power requirements 100 - 240 V AC, 50/60 Hz Power consumption 23 W Output voltage DC OUT: 8.4 V, 1.5 A in operating mode Operating temperature 0°C to 40°C (32°F to 104°F) Storage
  • Страница 92 из 109
    Русский Технические характеристики Видеокамера Система Система видеозаписи 2 вращающиеся головки Система ЧМ наклонной механической развертки Система аудиозаписи Вращающиеся головки, система ЧМ Видеосигнал Цветовой сигнал PAL, стандарт CCIR Используемые кассеты Кассеты 8-мм видеоформата
  • Страница 93 из 109
    Технические характеристики Общее Сетевой адаптер перем. тока Требования к питанию 100 - 240 В перем. тока, 50/60 Гц Потребляемая мощность 23 Вт Выходное напряжение DC OUT: 8,4 В, 1,5 А в рабочем режиме Рабочая температура От 0° С до 40° С (от 32° F до 104° F) Температура хранения От -20° С до +60°
  • Страница 94 из 109
    Identifying the parts 1 Опознавание частей 7 8 2 3 9 4 0 !¡ 5 6 1 EDITSEARCH button (p. 25) 1 Кнопка EDITSEARCH (стр. 25) 2 Intelligent accessory shoe (CCD-TRV65E only) (p. 98)/Accessory shoe (CCD-TRV23E/ TRV35E only) 3 Lens cover 2 Башмак для установки вспомогательного оборудования (только
  • Страница 95 из 109
    Identifying the parts Опознавание частей !£ @¡ !¢ @™ !∞ !§ @£ !¶ !• @∞ !ª @§ @º @¶ !£ Видоискатель (стр. 16) !¢ Speaker (p. 28) !¢ Громкоговоритель (стр. 28) !∞ LCD screen (p. 21) !∞ Экран ЖКД (стр. 21) !§ LCD BRIGHT buttons (p. 21) !§ Кнопки LCD BRIGHT (стр. 21) !¶ OPEN button (p. 20) !¶ Кнопка
  • Страница 96 из 109
    Identifying the parts Опознавание частей #∞ @• @ª #º #§ #¡ #¶ #™ #• #£ #ª #¢ @• COUNTER RESET button (p. 17) @• Кнопка COUNTER RESET (стр. 17) @ª TIME button (p. 58) @ª Кнопка TIME (стр. 58) #º DATE button (p. 58) #º Кнопка DATE (стр. 58) #¡ DISPLAY button (p. 28) #¡ Кнопка DISPLAY (стр. 28) #™
  • Страница 97 из 109
    Identifying the parts Опознавание частей $¶ $¡ $™ $£ $¢ $• $ª $§ %º $¡ Ручка окуляра RELEASE (стр. 77) $™ EJECT switch (p. 14) $™ Выключатель EJECT (стр. 14) $£ LANC l control jack l stands for Local Application Control Bus System. The l control jack is used for controlling the tape transport of
  • Страница 98 из 109
    Identifying the parts Опознавание частей %™ %£ %¡ %¢ %∞ %¡ MIC jack (PLUG IN POWER) Connect an external microphone (not supplied). This jack also accepts a “plug-inpower” microphone. %™ Camera recording/battery lamp (p. 15) %£ NightShot Light emitter (CCD-TRV23E/ TRV35E/TRV65E only) (p. 43) %¢
  • Страница 99 из 109
    Identifying the parts Опознавание частей Remote Commander Пульт дистанционного управления – CCD-TRV15E/TRV23E/TRV35E/TRV65E only The buttons that have the same name on the Remote Commander as on the camcorder function identically. – Только CCD-TRV15E/TRV23E/TRV35E/ TRV65E Кнопки пульта
  • Страница 100 из 109
    Identifying the parts Опознавание частей Notes on the Remote Commander •Keep the remote sensor away from strong light sources such as direct sunlight or illumination. Otherwise, the remote control may not be effective. •Be sure that there is no obstacle between the remote sensor on the camcorder
  • Страница 101 из 109
    Identifying the parts Опознавание частей Attaching the shoulder strap Прикрепление плечевого ремня Attach the supplied shoulder strap to the hooks for the shoulder strap. 1 2 Прикрепите прилагаемый плечевой ремень к скобам для плечевого ремня. 3 Additional information Для просмотра демонстрации You
  • Страница 102 из 109
    Identifying the parts Опознавание частей Operation indicators Рабочие индикаторы Viewfinder/Видоискатель 1 2 3 4 5 6 7 8 9 0 !¡ !™ Display window/Окошко дисплея !¢ @¡ 2 W 40min H SP STBY 0:00:00 !∞ END SEARCH !§ @¢ T M.FADER CINEMA SEPIA c„ f AUTO DATE 12:00:00 !¶ 1 !• @£ 3 !ª @º @¡ @™ !£ 1
  • Страница 103 из 109
    Identifying the parts Опознавание частей !¡ WIND indicator (CCD-TRV65E only) (p. 36) !™ Steady Shot off indicator (CCD-TRV35E/ TRV65E only) (p. 60) !£ Manual focusing (CCD-TRV23E/TRV35E/ TRV65E only) (p. 49) !¢ Video control mode (p. 15) !∞ Tape counter (p. 17)/Self-diagnosis functions indicator
  • Страница 104 из 109
    Предупреждающие индикаторы Warning indicators If indicators flash in the viewfinder or in the display window, check the following: ≥≥... : you can hear the beep sound when the BEEP is set to ON. 1 Если индикаторы мигают или предупреждающие сообщения появляются на экране ЖКД или в видоискателе, то
  • Страница 105 из 109
    Warning indicators Предупреждающие индикаторы 6 Moisture condensation has occurred. 6 Произошла конденсация влаги. 7 The video heads may be contaminated. 7 Видеоголовки возможно загрязнены. 8 Some other trouble has occurred. Use the self-diagnosis function (p. 88). If the display does not disappear
  • Страница 106 из 109
    Index A, B Q, R Adjusting viewfinder ................ 16 AFM HiFi Sound ................. 38, 70 ANTI GROUND SHOOTING .. 20 Auto focus ................................... 49 Backlight ..................................... 39 Beep ............................................. 17 Rec review
  • Страница 107 из 109
    Алфавитный указатель А, Б, В Ф-Я Автоматическая фокусировка . 49 Автомобильный аккумулятор ... 32 Цифровой трансфокатор ..... 19 Экспозиция. ........................... 52 Электрическая сеть ............. 31 Г, Д, Е, Ж,З И, К, Л, М Источники питания ............... 31 Литивая батарейка
  • Страница 108 из 109
    Sony Corporation Printed in Japan
  • Страница 109 из 109