Доступность: Бесплатно как и все руководства на сайте. Без регистрации и SMS.
Дополнительно: Чтение инструкции онлайн
SM-CMMD7001
DVD-
7” TFT-
Multimedia DVD receiver with motorized 7” TFT display and TV tuner
Instruction manual
Страница: (1 из 70)
навигация
1
2
3
4
5
6
7
8
9
10
11
12
13
14
15
16
17
18
19
20
21
22
23
24
25
26
27
28
29
30
31
32
33
34
35
36
37
38
39
40
41
42
43
44
45
46
47
48
49
50
51
52
53
54
55
56
57
58
59
60
61
62
63
64
65
66
67
68
69
70
Оглавление инструкции
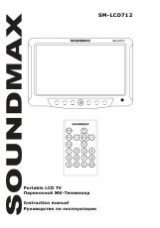
Страница 1 из 71 SM-CMMD7001 DVD- 7” TFT- Multimedia DVD receiver with motorized 7” TFT display and TV tuner Instruction manual
Страница 2 из 71 Dear customer! Thank you for purchasing our product. For safety, it is strongly recommended to read this manual carefully before connecting, operating and/or adjusting the product and keep the manual for reference in the future. Table of contents TABLE OF CONTENTS
Страница 3 из 71 Important safeguards Read carefully through the manual to familiarize yourself with this unit. Keep this manual handy as a reference for operating procedures and precautions. Do not allow persons who have not read through this manual to use this unit. “CLASS 1 LASER PRODUCT” This product contains a
Страница 4 из 71 Accessories 1. 2. 3. 4. 5. 6. Receiver Front panel Protective case Remote controller ISO connector Mounting parts: Nut Washer Screw Metal strap Release key Rubber 7. Instruction manual 8. Warranty card 9. Consumer information 1 1 1 1 1 pc pc pc pc pc 1 1 6 1 2 1 1 1 1 pc pc pcs pc pcs pc pc pc pc 4
Страница 5 из 71 Installation/Connections Choose the mounting location where the unit will not interfere with the normal driving function of the driver. Before finally installing the unit, connect the wiring and make sure that the unit works properly. Consult with your nearest dealer if installation requires the
Страница 6 из 71 Dismantling the unit Turn off the device. Remove the front panel and place it into the case. First remove the front frame of the device by inserting a flat object (e.g. the back of the disassembly key) between the device and the panel to the right and left of the short side of the frame and
Страница 7 из 71 Connection diagram Connector Connector wires 1. 2. Rear left - speaker (green/black) 3. Reverse (pink) 7
Страница 8 из 71 4. Rear left + speaker (green) 5. Parking wire (brown) 6. Front left - speaker (white/black) 7. 8. Front left + speaker (white) 9. Acc (red)/Fuse 1 A 10. Front right + speaker (grey) 11. Auto antenna (blue) 12. Front right - speaker (grey/black) 13. Ground (black) 14. Rear right + speaker (purple)
Страница 9 из 71 Reverse driving cable connection If the rear view video camera is connected, the unit automatically switches to camera picture during reverse driving. The unit returns to the original work mode after the reverse driving is done. 9
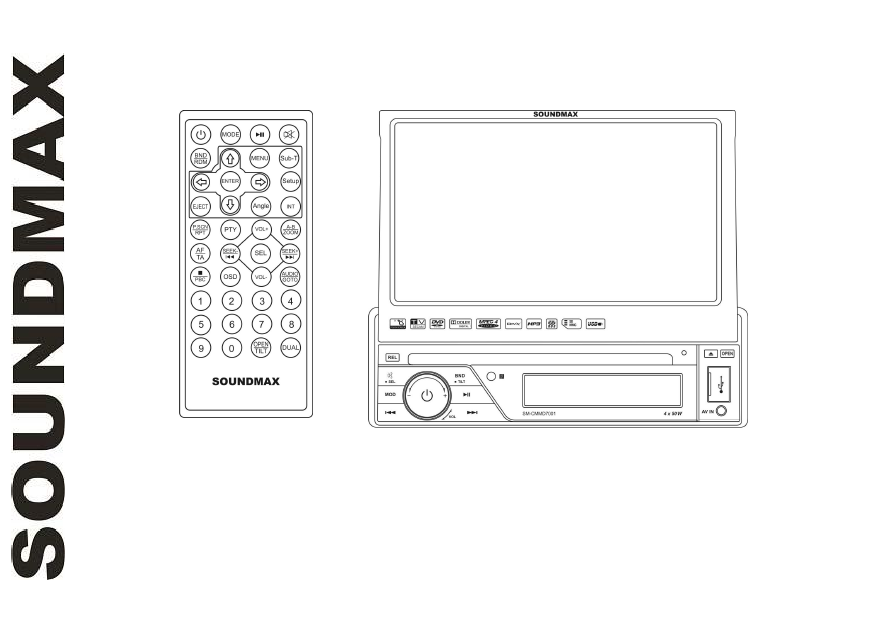
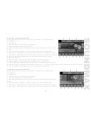
Страница 10 из 71 Panel controls Front panel 1. 2. 3. 4. 5. 6. 7. 8. MUTE/SEL button REL button POWER button/VOL regulator BND/TILT button PLAY/PAUSE button IR sensor Disc slot LCD display 9. EJECT button 10. OPEN button 11. MOD button 12. PREVIOUS button 13. NEXT button 14. USB port 15. AV input 10
Страница 11 из 71 Inner panel 1. Panel status indicator 2. RESET button (hole) 3. SD/MMC memory card slot Pressing RESET hole will erase the clock setting and stored stations. Panel status indicator lights up when you slide the panel down, flashes when you remove the panel. 11
Страница 12 из 71 Remote controller 1. MODE button 2. POWER button 3. UP cursor button 4. BND/RDM button 5. ENTER button 6. LEFT cursor button 7. DOWN cursor button 8. EJECT button 9. PTY/PROG button 10. P.SCN/RPT button 11. SEEK-/PREVIOUS button 12. AF/TA button 13. OSD button 14. STOP/PBC button 15. Digit buttons
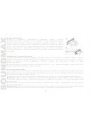
Страница 13 из 71 Changing the battery 1. Press the catch and at the same time pull out the battery tray (pic. 1). 2. Insert the 1 lithium battery, type CR2025 (3V) battery with the stamped (+) mark facing upward. Insert the battery tray into the remote controller (pic.2). Pic. 1 Pic. 2 Warning: Store the battery
Страница 14 из 71 LCD layout 1. Subwoofer indicator 2. TA function indicator 3. TP function indicator 4. AF function indicator 5. PTY function indicator 6. POP equalizer mode indicator 7. ROCK equalizer mode indicator 8. CLASS equalizer mode indicator 9. FLAT equalizer mode indicator 10. Intro playback indicator 11.
Страница 15 из 71 General operations Touch screen Due to the touch screen, you can fulfill most functions not only by pressing buttons but also by touching the options you need. Turning the unit on/off Press any button (except REL button and EJECT button) to switch the unit on. Press POWER button on the RC or on the
Страница 16 из 71 Mode selection Repeatedly press MODE button on the RC or MOD button on the panel to select a mode: Radio => Disc => USB => CARD => TV => AV-in. In any mode touch MENU (in the right top corner of the screen) or press MENU button on the RC to display the Main menu as shown in the picture. In the
Страница 17 из 71 MODE button on the RC or MOD button on the panel can switch all modes of the main unit, but the external monitor is showing DVD/USB/SD mode only. D-Dual on: When D-Dual is on, all buttons are working regularly except VOL+/- buttons on the RC or VOL regulator on the panel for the external monitor
Страница 18 из 71 System setup When you select SETTINGS mode or press SETUP button on the RC, the menu will be displayed, in which you can touch any item to select or adjust it. You can also navigate in the menu and perform adjustment by pressing cursor buttons on the RC and confirm your selection by pressing ENTER
Страница 19 из 71 PI: Mute/Sound. PI sound refers to the reception noise when the AF function tries to scan alternative frequency. REGION: REG ON (the receiver accepts regional variants of the tuned station with REG icon turned on), and REG OFF (the receiver ignores regional variants). Mask: DPI/ALL. During MASK DPI
Страница 20 из 71 Note: if you forget your password, there is no possibility to reset the password again. Do not forget your password and write it down or store the password in a safe place. Rating: The Rating control level is for parents to control playing content and protect your children from violence and erotic.
Страница 21 из 71 Radio operations User interface of Radio mode When the unit is switched to Radio mode, the touchable interface will be displayed on the display. 1. PTY button. Touch to enable/disable PTY function. In the PTY list, touch a program type to start its search. 2. TA button. Touch to enable/disable TA
Страница 22 из 71 Manual/automatic tuning Manual tuning: press PREVIOUS/NEXT buttons on the panel or SEEK-/PREVIOUS and SEEK+/NEXT buttons on the RC and hold for 2 seconds to enter the manual tuning mode. Press these buttons repeatedly to select a frequency downward or upward step by step. Automatic tuning: press
Страница 23 из 71 TA (Traffic alarm) function Press AF/TA button on the RC to switch on the TA function. When TA is on, the TA displays on TFT, or else, if there is no TP information, the mode will search TP station automatically. When TA is playing, the volume will be adjusted to a TA level automatically. When
Страница 24 из 71 TV operations Connect a TV antenna to the TV antenna jack of the unit. Select TV mode. Select TV mode, then press PLAY/PAUSE button on the RC or front panel, or touch the screen, then touch TV MENU item to show the TV Menu. To select a menu page (Auto Program or Manual Program) press UP/DOWN cursor
Страница 25 из 71 Disc/USB/SD/MMC operations USB/SD/MMC notes USB format supports 1.1. Capacity: up to 16 Gb. For correct and satisfactory operation, licensed SD/MMC memory cards of famous brands should be used with this unit. Avoid using memory cards of unknown brands. Capacity: up to 16 Gb. Insert/Eject disc
Страница 26 из 71 9. SUBT button. Touch to select disc subtitle language. 10. AUD button. Touch to select disc audio language. 11. MENU button. Touch to go to the disc root menu. You can also touch and icons to adjust the monitor tilt and title. and VCD touch interface When a VCD is played, touch the center of the
Страница 27 из 71 7. Touch to go to the next file list page. 8. MDC button. Touch to go to folder selection. 9. Mute button; touch to switch sound on/off. 10. Volume down button. Touch to decrease volume. 11. Volume level. 12. Volume up button. Touch to increase volume. 13. STOP button. Touch to stop playback. 14.
Страница 28 из 71 Fast forward/rewind Press and hold repeatedly SEEK-/PREVIOUS or SEEK+/NEXT buttons on the RC or PREVIOUS or NEXT buttons on the panel or corresponding buttons on the screen for fast backward or forward playing correspondingly. With each pressing playback speed will increase. While fast playback,
Страница 29 из 71 OSD setting (for DVD) When video is played, press and hold OSD button to access the on-screen menu in which you can adjust color parameters (brightness, contrast etc.) of the image by touching corresponding item. Zooming in/out During playback of video or images on disc/USB/SD/MMC, press and hold
Страница 30 из 71 Menu navigation (for DVD only) Press and hold MENU button on the RC to activate the disc menu list on the screen. Choose the desired item. Press ENTER button or PLAY/PAUSE button on the RC or on the panel or touch corresponding button on the screen to confirm the selected item and start playing.
Страница 31 из 71 Handling compact discs Do not insert anything other than a CD into the CD loading slot. Do not use cracked, chipped, warped, or otherwise damaged discs as they may cause skipping or noise damage the player. Handle the disc only by the edges (as shown in the picture). To keep discs clean do not
Страница 32 из 71 Troubleshooting guide Below is a table describing simple measures that can help you eliminate most problems likely to emerge when this unit is in use. If below measures do not help, turn to a service center or to the nearest dealer. Symptom Cause Solution No power The car ignition is not on. If the
Страница 33 из 71 Temperature inside the car is too high. Cool off until the ambient temperature returns to normal. The built-in microcomputer is not operating properly. Reset the unit with the help of RESET button. Front panel is not properly fix into its place. Install the front panel properly. The radio does not
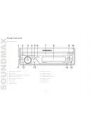
Страница 34 из 71 Specification General Nominal power supply: Maximum power output: Unit dimensions Net/Gross weight Mounting angle Working temperature range Display Display Resolution: Aspect ratio: Contrast ratio: Brightness: View angle: FM Stereo Radio Frequency range: Preset memory stations: MW Radio Frequency
Страница 52 из 71 SETTINGS , , - EQ ( Bass ( Treble ( Balance ( Fader ( Beep ( Area: Stereo: ). Local: ): ): ): Flat, Classic, Pop, Rock . ): ON (“ (Display) ): ”). ): RDS ON ( . User . . ALL ( ”) ) . . 16:9, 4:3 (RDS and Radio) : , , ON ( . . ): ), 2ND ( ). ): ): , ENTER (Sound) ): OFF ( Loud ( Subwoofer ( Screen (
Страница 53 из 71 TA volume: . Retune: Retune-S Seek. Retune S: , Retune-L – , TA SEEK 90 PI: PI sound: . AF Dual ( , MASK ALL. TA SEEK, TA ALARM, , (General) ): . REG OFF ( . , , ): PI, , , ): ): , ; PI . TA AF, , MASK DPI. , , , EON TA: DX/Local. EON TA LOCAL ( TA: Seek/Alarm. TA , Retune L: PI, . PI mute: REGION:
Страница 55 из 71 (System info) . , Calibration ( ): : “Carefully press and briefly hold stylus on the center of the target longer than 1 second” (« , 1 »). 1 , . . 55
Страница 58 из 71 AF ( AF/TA ) AF. , : RDS , . AF AF. TA (Traffic Alarm) AF/ , TA. TP ( ). . , TA . , . , RDS. ( ) TA. , , , ; TP, TP, TA, PTY . TP TA, , . PTY ( , , . ) PTY , (PTY), . . OSD 58 . . ,
Страница 59 из 71 . PLAY/PAUSE , MENU. , (Auto Program . , . ENTER BACK . ) (SECAM/NTSC/PAL). (DK/BG/I). , PAL (SECAM/NTSC/PAL). (DK/BG/I). . ON ( 59 ; PLAY/PAUSE NTSC ) TV ENTER . , . AUTO PROGRAM ( System: Audio: Search: MANUAL PROGRAM ( Storage: System: Audio: Channel: Fine: Memory: Manual Program) . M/N. . PAL .