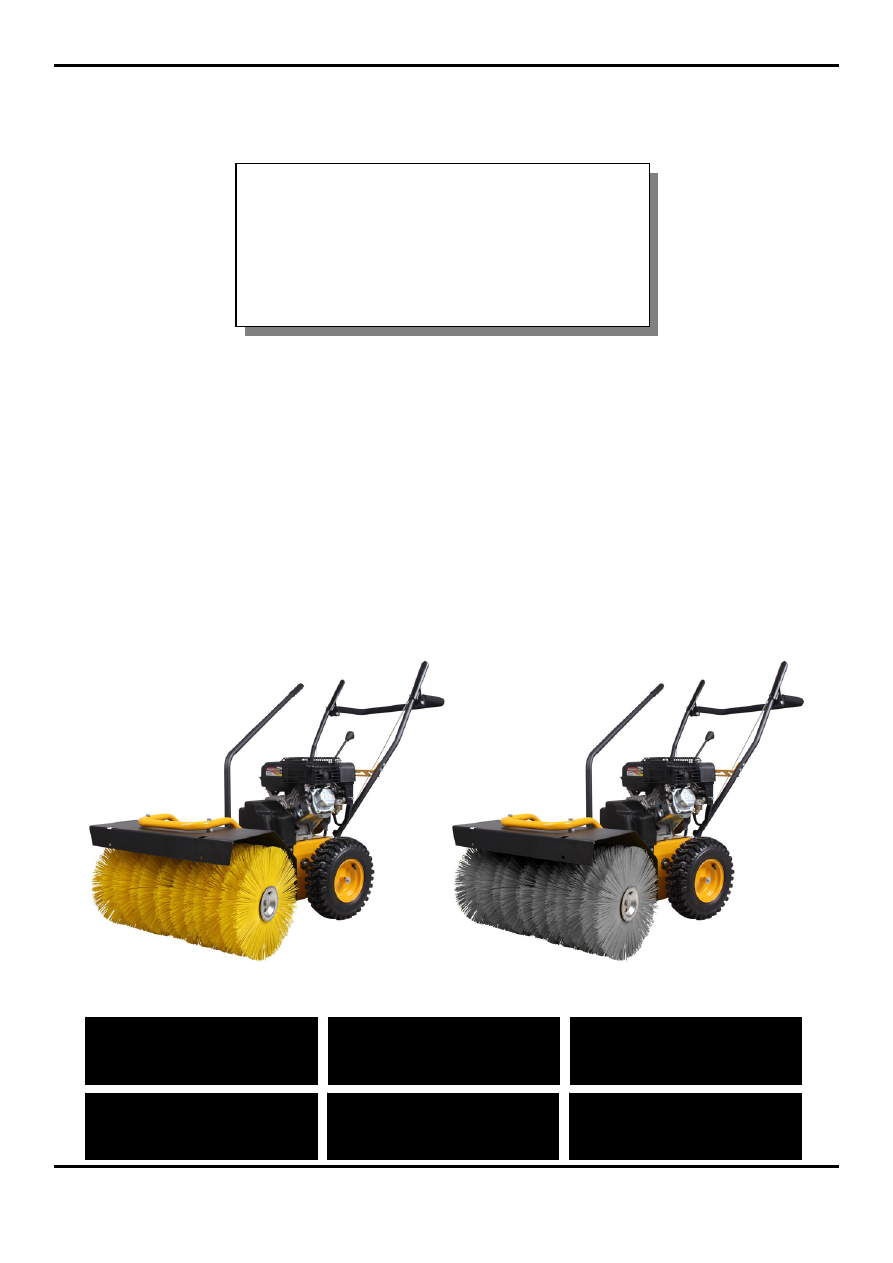
Инструкция для Texas Handy Sweep 650TG

(скачивание инструкции бесплатно)
Формат файла: PDF
Доступность: Бесплатно как и все руководства на сайте. Без регистрации и SMS.
Дополнительно: Чтение инструкции онлайн
background image


Handy Sweep 


HS619TG - HS650TG - HS650TGE 


HS710TG - HS710B - HS710TGE 


DK Betjeningsvejledning 
GB User 

Manual 

DE Bedienungsanleitung 
FR Manuel 

d'utilisation 

РУС


Руководство


пользователя


PL Podr

ę

cznik u

ż

ytkownika 

Texas A/S - Knullen 22 - DK-5260 Odense S - Denmark                                                                               Version 14.1
Tel. +45 6395 5555 - www.texas.dk - post@texas.dk 

ACHTUNG - VOR INBETRIEBNAHME ! 


DENKEN SIE DARAN, MOTORÖL 

AUFZUFÜLLEN! 

IMPORTANT - BEFORE START!


REMEMBER TO FILL ENGINE OIL 


IMPORTANT- AVANT LE DEMARRAGE! 


NE PAS OUBLIER DE REMPLIR DE 

L'HUILE DE MOTEUR 

VIGTIGT - FØR START!


HUSK AT PÅFYLDE MOTOROLIE  

ВАЖНО

 - 

ПРЕЖДЕ


ЧЕМ


НАЧАТЬ


НЕ


ЗАбУДЬТЕ


ЗАПОЛНИТЬ


МОТОРНЫМ

 OIL

WA

Ż

NE - PRZED PRZYST

Ą

PIENIEM! 


NIE ZAPOMNIJ WYPE OLEJU 

1
2
3
4
5
6
7
8
9
10
11
12
13
14
15
16
17
18
19
20
21
22
23
24
25
26
27
28
29
30
31
Оглавление инструкции
  • Страница 1 из 32
    DK GB DE FR РУС PL Betjeningsvejledning User Manual Bedienungsanleitung Manuel d'utilisation Руководство пользователя Podręcznik użytkownika Handy Sweep HS619TG - HS650TG - HS650TGE HS710TG - HS710B - HS710TGE VIGTIGT - FØR START! IMPORTANT - BEFORE START! ACHTUNG - VOR INBETRIEBNAHME ! HUSK AT
  • Страница 2 из 32
    Illustrationer / Illustrations / Abbildungen / Illustration / Иллюстрации / Ilustracje Figur / Figure / Abbildung / Изображение/ Ilustracja / C E B D A 1 F G Handy Sweep 710 E F H K D I G J 2 A C B 2 Actual model may vary from the illustration shown - Faktiske model kan variere fra de viste
  • Страница 3 из 32
    3 4 5 3 Actual model may vary from the illustration shown - Faktiske model kan variere fra de viste illustrationer Ihr Modell kann von der Abbildung abweichen - Votre modèle actuel peut être différent des illustrations
  • Страница 4 из 32
    6 7 8 4 Actual model may vary from the illustration shown - Faktiske model kan variere fra de viste illustrationer Ihr Modell kann von der Abbildung abweichen - Votre modèle actuel peut être différent des illustrations
  • Страница 5 из 32
    ********** HandySweep 710 ********** 9 ********** HandySweep 710 ********** 10 5 Actual model may vary from the illustration shown - Faktiske model kan variere fra de viste illustrationer Ihr Modell kann von der Abbildung abweichen - Votre modèle actuel peut être différent des illustrations
  • Страница 6 из 32
    B A 11 12 13 14 6 Actual model may vary from the illustration shown - Faktiske model kan variere fra de viste illustrationer Ihr Modell kann von der Abbildung abweichen - Votre modèle actuel peut être différent des illustrations
  • Страница 7 из 32
    DK - Original brugsanvisning Find ud af, hvordan du standser enheden Tillykke med din nye fejemaskine. Læs venligst denne brugsanvisning grundigt, især de sikkerhedsmæssige advarsler markeret med symbolet: Lad aldrig børn eller personer, der ikke har læst denne brugsanvisning, bruge maskinen.
  • Страница 8 из 32
    Vedligeholdelse og opbevaring Undlad at køre med passagerer. Stop motoren ved udførelse af vedligeholdelsesarbejde og rengøring, ved udskiftning af værktøj og under transport på andre måder end ved egen kraft. Vær opmærksom, når maskinen er i bakgear. Tillad aldrig tilskuere at opholde sig foran
  • Страница 9 из 32
    3. Åben for fuld gas dvs. sæt gashåndtag på ”start” 4. Træk forsigtigt i rekylstarteren, indtil der mærkes modstand. Træk derefter kraftigt i rekylstarteren for at starte motoren. Lad startsnoren forsigtigt glide tilbage i startposition. 5. Ved 230V, elektrisk starter. Tilslut ledning i stikkontakt
  • Страница 10 из 32
    Højdejustering af børste Fejlfinding Når børsterne begynder at blive slidte, er det nødvendigt at efterjustere hvor tæt børsterne skal gå på underlaget. For at højdejustere kosten gør som vist i figur 7: 1. Fjern låsesplit 2. Løft maskinen så kosten går fri og træk støttehjul ud 3. Fjern eller
  • Страница 11 из 32
    GB - Original instructions If you feel unwell, tired or have consumed alcohol or drugs, do not operate the machine. Congratulations on purchasing your new sweeper. Please read this instruction manual carefully, especially the safety warnings marked with the symbol: Always inspect the machine before
  • Страница 12 из 32
    Maintenance and storage Always disengage the rotary brush, if not in use. The engine shall be stopped when carrying out maintenance and cleaning operations, when changing tools and when being transported by means other than under its own power. Only operate the machine at daylight or in fully
  • Страница 13 из 32
    4. Pull the recoil starter gently until you feel resistance in the rope. Then pull quickly and energetic. Do not at any time let go of the recoil starter but glide it gently back and pull again. 5. 230V electric starter (HS650TGE / HS710TGE only). Plug the cord into electrical outlet and press the
  • Страница 14 из 32
    Height adjustment of brush Troubleshooting When the brushes become worn it might be necessary to adjust the proximity of brushes to the working surface. To adjust the height of the brushes follow figure 7: Problem Solution The engine won't start: 1. Check sparkplug. 2. Check that the spark plug cap
  • Страница 15 из 32
    DE - Übersetzung der Originalbetriebsanleitung Bedienen Sie die Maschine nicht wenn Sie sich unwohl fühlen, müde sind oder Alkohol oder Drogen konsumiert haben. Herzlichen Glückwunsch zum Kauf Ihrer neuen Kehrmaschine. Bitte lesen Sie diese Gebrauchsanweisung sorgfältig durch, insbesondere die
  • Страница 16 из 32
    Überlasten Sie die Kapazität der Maschine nicht durch den Versuch, zu schnell zu arbeiten. Betanken Sie niemals innerhalb von Gebäuden oder wo Benzindämpfe auf eine Zündquelle treffen können. Nehmen Sie keine Passagiere mit. Seien Sie vorsichtig, wenn die Maschine im Rückwärtsgang ist. Halten Sie
  • Страница 17 из 32
    6. Montieren Sie das Schutzblech mit der beigelegten Schraube, scheiben und Mutter. Folgen Sie den Schritt 1-5 in Abbildung 10. NB: Das Schutzblech muss unter der Haupt schirm montiert werden. Identifizierung der Teile Abbildung 2 A. Bürste B. Stützrad für Bürste / Einstellung der Kehrhöhe C. Räder
  • Страница 18 из 32
    Seien Sie achtsam beim Reversieren. Der Bereich muss vor dem Reversieren von jeglichen Hindernissen befreit werden. Reversieren Sie die Kehrmaschine nie gegen eine Wand, einen Baum oder ein anderes festes Hindernis. Technische Spezifikationen Modell Kupplungsgriff B - Aktivieren der Bürste. Zur
  • Страница 19 из 32
    FR - Traduction de la notice originale N'utilisez pas la machine si vous vous sentez mal, êtes fatigué ou avez consommé de l'alcool ou des drogues. Nous vous félicitons pour l’achat de votre nouvelle balayeuse. Veuillez lire attentivement ce manuel d’instructions et notamment les avertissements de
  • Страница 20 из 32
    d'essence pourraient entrer en contact avec une source d'inflammation. Ne transportez pas de passagers. Faites preuve d'attention lorsque la machine est en marche arrière. Conservez l'essence et le moteur à l'écart des appareils, lampes témoin, barbecues, appareils électriques, outils électriques,
  • Страница 21 из 32
    6. Montez la protection en utilisant le boulon, la rondelle et l’écrou fournis. Suivez les étapes 1-5 de la figure 10. NB: les protections latérales doivent être montées sous la protection principale. Identification des pièces Figure 2: A. Brosse B. Roue de support de la brosse/réglage de la
  • Страница 22 из 32
    Il est recommandé de porter une attention particulière lors des manœuvres en marche arrière. Il est important de bien faire attention à la présence éventuelle d'obstacles sur le parcours lors des manœuvres en marche arrière. Ne jamais enclencher la marche arrière lorsque la balayeuse se trouve
  • Страница 23 из 32
    данными инструкциями. Внимание. Местным законодательством может быть ограничен возраст оператора. RU - Руководство пользователя Поздравляем с покупкой уборочной машины. Мы уверены, что вы останетесь довольны! Прежде чем приступить к эксплуатации, внимательно прочитайте данное руководство. Следуя
  • Страница 24 из 32
    Будьте предельно осторожны во время работы на склонах. заливного отверстия, так как бензин может расширяться. Никогда не эксплуатируйте машину с высоким темпом. После заправки убедитесь, что крышка надежно закрыта. Не превышайте допустимую нагрузку на машину, пытаясь работать с высокой скоростью.
  • Страница 25 из 32
    Только Модель HandySweep 710 5. Закрепите щетку на каждой из сторон, как показано на иллюстрации, используя метод 1 или метод 2. См. рис. 9 (M1 или M2) Содержимое упаковки Рис. 1 A. B. C. D. E. Машина руль велосипеда Рычаг переключения передач Ручка поворота Руководство по двигателю и руководство
  • Страница 26 из 32
    Технические характеристики ВСЕГДА отпускайте рычаг сцепления при переключении передач! Модель Ручка сцепления A - передний и задний ход. Для использования черной ручки сцепления A, см. рис. 11, необходимо активировать ручку, уборочная машина будет двигаться вперед или назад. Для смены передачи
  • Страница 27 из 32
    PL - Tłumaczenie instrukcji oryginalnej Nie obsługiwać urządzenia w razie złego samopoczucia, zmęczenia, po spożyciu alkoholu lub leków. Gratulujemy zakupu urządzenia zamiatarka. Bardzo ważne jest, aby przed przystąpieniem do pracy zapoznać się z treścią niniejszego podręcznika. Szczególną uwagę
  • Страница 28 из 32
    Konserwacja i przechowywanie Nie pozwalać osobom postronnym stawać przed urządzeniem. Silnik należy zatrzymać przed przeprowadzaniem czyszczenia, zmianą narzędzi, transportem urządzenia. Zawsze odłączać Szczotka obrotowa, jeśli nie są używane Pracować tylko w dzień lub przy dobrym oświetleniu.
  • Страница 29 из 32
    Tylko Handy Sweep 710 5. Zamocować szczotkę po każdej stronie zgodnie z procedure montażu metoda 1 lub 2. Patrz rysunek 9 (M1 lub M2) Zawartość opakowania Rysunek 1: A. Urządzenie B. Uchwytem C. Dźwignia zmiany biegów D. Dźwignia przegubu E. Instrukcja obsługi silnika i podręcznik użytkownika F.
  • Страница 30 из 32
    Dźwignia sprzęgła A - do przodu oraz do tyłu Aby uruchomić czarny uchwyt sprzęgła A na rys. 11, włącz uchwyt, aby zamiatarka poruszała się do przodu lub do tyłu. Aby zmienić bieg, puść uchwyt sprzęgła i wybierz żądany bieg za pomocą dźwigni zmiany biegów. Dane techniczne Model Zachowaj ostrożność
  • Страница 31 из 32
    CE-Overensstemmelseserklæring CE-Declaration of conformity CE-Konformitätserklärung CE Certificat de conformité Декларация соответствия ЕС Deklaracja zgodności CE DK GB D FR RUS PL EU-importør • EU-importer • EU-importeur • Importateur UE •Importer UE • Dovozce do EU • ЕС импортеров • UE importer
  • Страница 32 из 32