1
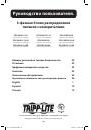
Owner’s Manual
3-Phase Metered
Power Distribution Units
Important Safety Insructions
2
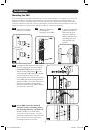
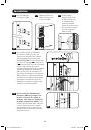
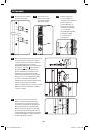
Installation 3
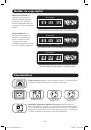
Digital Load Meter
6
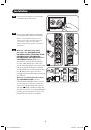
Features 7
Service 8
Warranty and Product Registration
9
Español 10
Français 19
28
1111 W. 35th Street, Chicago, IL 60609 USA • www.tripplite.com/support
Copyright © 2015 Tripp Lite. All rights reserved.
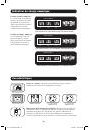
PDU3MV6L2120
(Series Number: AGPD8414)
PDU3MV6L2120LV
(Series Number: AGPD8414)
PDU3MV6L2120B
(Series Number: AGPD8414)
PDU3MV6L2130
(Series Number: AGPD8415)
PDU3MV6H50
(Series Number: AGPD8416)
PDU3MV6H50A
(Series Number: AGPD8417)
PDU3XMV6G20
(Series Number: AGPD8420)
PDU3XMV6L2220
(Series Number: AGPD8420)
PDU3MV6L2130A
(Series Number: AG-00E3)
15-07-049-933145.indb 1
8/7/2015 1:58:11 PM