26
=>
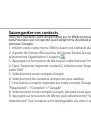
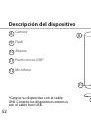
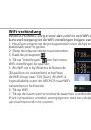
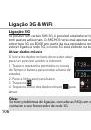
Connexions 3G & WiFi
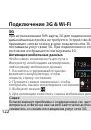
Connexion 3G
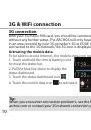
Avec votre carte SIM 3G, vous devrez pouvoir vous connecter à Internet
sans aucun paramètrage supplémentaire. Votre téléphone n’aura de
signal que si vous êtes dans une zone de réseau 3G/EDGE couverte par
votre opérateur 3G. Lorsque vous êtes connectés au réseau 3G, l’icône
3G est affichée dans la barre de statuts.
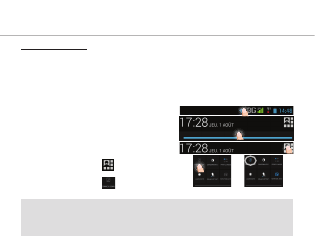
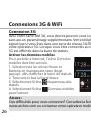
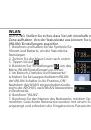
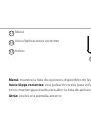
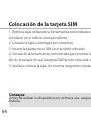
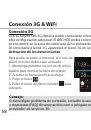
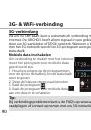
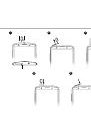
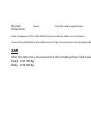
Activer les données mobiles
Pour accéder à Internet, l’icône Données
mobiles doit être activée.
1. Sélectionnez les icônes Heure et
Batterie en maintenant votre doigt
appuyé afin d’afficher la barre de statuts.
2. Tirez vers le bas la barre bleue.
3. Sélectionnez l’icône
du panneau des
statuts.
4. Sélectionnez l’icône
Données mobiles
pour l’activer.
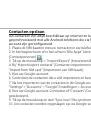
Astuce :
Des difficultés pour vous connecter? Consultez la foire aux questions sur
www.archos.com ou contactez votre opérateur mobile.
 1
1
 2
2
 3
3
 4
4
 5
5
 6
6
 7
7
 8
8
 9
9
 10
10
 11
11
 12
12
 13
13
 14
14
 15
15
 16
16
 17
17
 18
18
 19
19
 20
20
 21
21
 22
22
 23
23
 24
24
 25
25
 26
26
 27
27
 28
28
 29
29
 30
30
 31
31
 32
32
 33
33
 34
34
 35
35
 36
36
 37
37
 38
38
 39
39
 40
40
 41
41
 42
42
 43
43
 44
44
 45
45
 46
46
 47
47
 48
48
 49
49
 50
50
 51
51
 52
52
 53
53
 54
54
 55
55
 56
56
 57
57
 58
58
 59
59
 60
60
 61
61
 62
62
 63
63
 64
64
 65
65
 66
66
 67
67
 68
68
 69
69
 70
70
 71
71
 72
72
 73
73
 74
74
 75
75
 76
76
 77
77
 78
78
 79
79
 80
80
 81
81
 82
82
 83
83
 84
84
 85
85
 86
86
 87
87
 88
88
 89
89
 90
90
 91
91
 92
92
 93
93
 94
94
 95
95
 96
96
 97
97
 98
98
 99
99
 100
100
 101
101
 102
102
 103
103
 104
104
 105
105
 106
106
 107
107
 108
108
 109
109
 110
110
 111
111
 112
112
 113
113
 114
114
 115
115
 116
116
 117
117
 118
118
 119
119
 120
120
 121
121
 122
122
 123
123
 124
124
 125
125
 126
126
 127
127
 128
128
 129
129
 130
130
 131
131