32
10
6
7
scale 1:1
mm
05-04-2013
last modification:
NEW
Rev O
AC53PL
CONFIDENTIAL
DRAWING
scale 1:1
mm
05-04-2013
last modification:
NEW
Rev O
AC53PL
CONFIDENTIAL
DRAWING
8
9
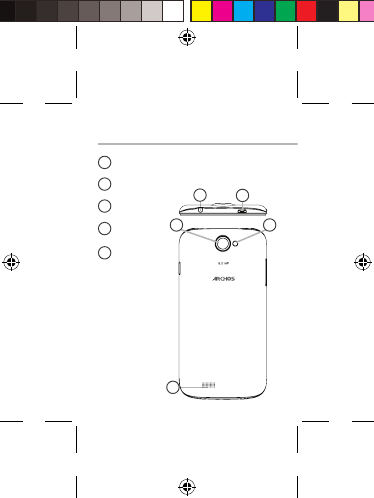
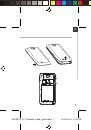
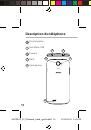
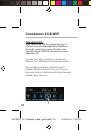
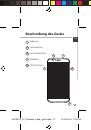
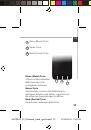
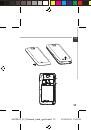
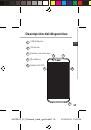
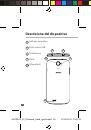
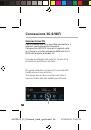
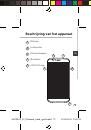
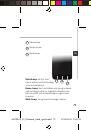
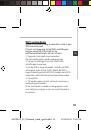
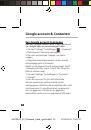
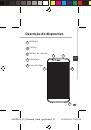
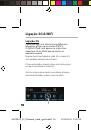
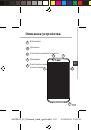
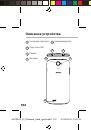
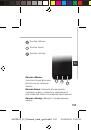
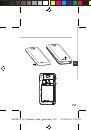
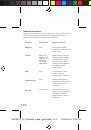
Kopfhöreranschluss
Micro-USB-Anschluss
Kamera
Blitzlicht
Lautsprecher
6
9
8
7
9
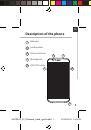
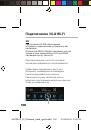
Beschreibung des Geräts
ARCHOS_53_Platinum_book_quick.indd 32
23/04/2013 18:15:05
 1
1
 2
2
 3
3
 4
4
 5
5
 6
6
 7
7
 8
8
 9
9
 10
10
 11
11
 12
12
 13
13
 14
14
 15
15
 16
16
 17
17
 18
18
 19
19
 20
20
 21
21
 22
22
 23
23
 24
24
 25
25
 26
26
 27
27
 28
28
 29
29
 30
30
 31
31
 32
32
 33
33
 34
34
 35
35
 36
36
 37
37
 38
38
 39
39
 40
40
 41
41
 42
42
 43
43
 44
44
 45
45
 46
46
 47
47
 48
48
 49
49
 50
50
 51
51
 52
52
 53
53
 54
54
 55
55
 56
56
 57
57
 58
58
 59
59
 60
60
 61
61
 62
62
 63
63
 64
64
 65
65
 66
66
 67
67
 68
68
 69
69
 70
70
 71
71
 72
72
 73
73
 74
74
 75
75
 76
76
 77
77
 78
78
 79
79
 80
80
 81
81
 82
82
 83
83
 84
84
 85
85
 86
86
 87
87
 88
88
 89
89
 90
90
 91
91
 92
92
 93
93
 94
94
 95
95
 96
96
 97
97
 98
98
 99
99
 100
100
 101
101
 102
102
 103
103
 104
104
 105
105
 106
106
 107
107
 108
108
 109
109
 110
110
 111
111
 112
112
 113
113
 114
114
 115
115