60
17
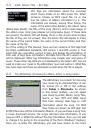
Troubleshooting
17.1
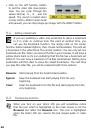
USB Connection issues
Problem
: I cannot get my Gmini 400 to be recognized by the computer.
Solutions
:
• Shut off and reboot the computer and the Gmini 400 and then try
connecting again in the preferred order mentioned in section 13.1.
• Only if using Windows 98SE, you must first install the Windows98SE
drivers.
• If you installed the Windows 98SE driver on your Windows
®
XP, 2000,
or ME edition, this could cause problems. Uninstall that driver and then
reinstall the generic Windows
®
Mass Storage Device driver.
• If using a USB hub, try connecting without using the hub (some hubs
are not powered and may not work with the Gmini 400).
• If using a USB port in the front of your computer, try a USB port in the
back. Front USB ports are often from non-powered hubs.
• Do not connect to a USB port repeated through a keyboard.
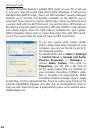
• On old computers, the USB driver software on your computer may be
out of date. Find your USB chipset type by going to My Computer >
Properties > Device Driver > Universal Serial Bus (USB) Controllers >
Host Controller. You may have a chipset VIA, Intel, SIS or another. It
is possible that you do not have the latest software drivers for these
chipsets. For VIA updates, check out www.viaarena.com. For Intel
check out www.intel.com. For SIS, uninstall the driver and reinstall the
Windows default USB controller drivers.
• If using a laptop computer and a docking station, try connecting
without the docking station.
• If Macintosh
®
OS 10.1.x says it cannot mount the volume, you can use
Disk Utility to reformat the Jukebox hard disk to type MS DOS FAT32.
However, files will only be readable from a Macintosh
®
, not a Windows
®
machine. You should update to version 10.2.4 or better.
• On older computers, make sure in your system BIOS the USB port is
checked “ON” not “Off”. Usually this just happens on old machines.
• On older Win98SE computers, if there is a line “lastdrive=” in the
config.sys file, make sure that it is “lastdrive=z”.
• If the Files Allocation Table (FAT) gets corrupted, the Gmini 400 may