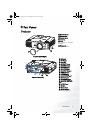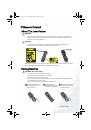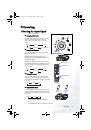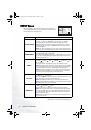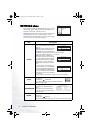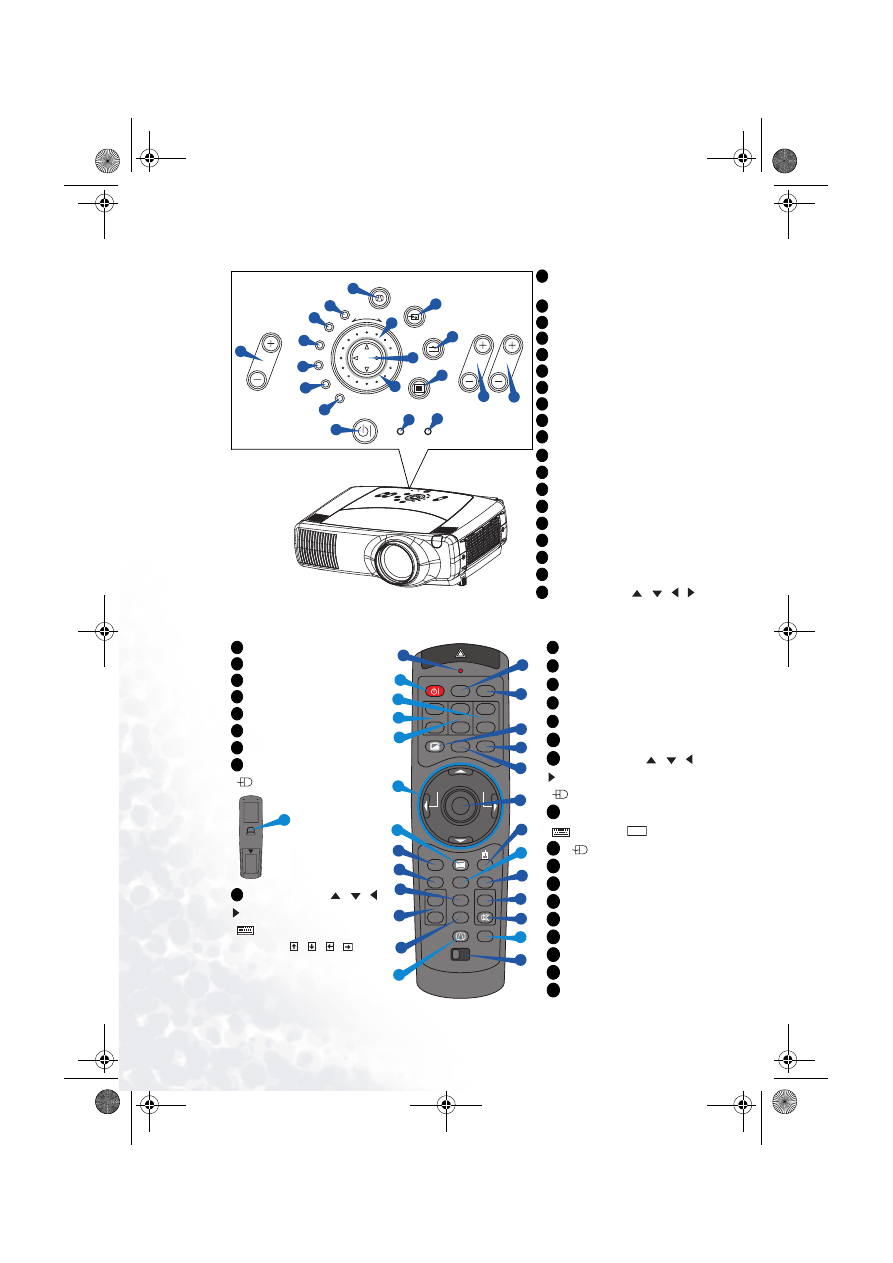
Part Names
4
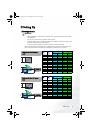
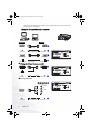
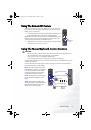
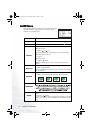
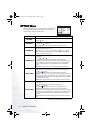
Control Buttons
STANDBY/ON button and
STANDBY/ON indicator
TEMP indicator
LAMP indicator
LENS SHIFT buttons
INPUT dial
SEARCH button
M1-D indicator
RGB indicator
BNC indicator
COMPONENT indicator
S-VIDEO indicator
VIDEO indicator
ZOOM buttons
FOCUS buttons
KEYSTONE button
MENU button
RESET button
ENTER button
Cursor buttons
/
/ /
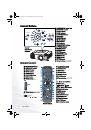
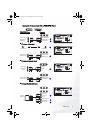
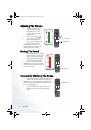
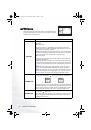
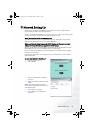
Remote Control
ENTER
INPUT
M1-D
RGB
BNC
S-VIDEO
STANDBY/ON
TEMP
VIDEO
COMPONENT
LAMP
KEYSTONE
SEARCH
RESET
MENU
FOCUS
LENS SHIFT
ZOOM
3
2
17
13
14
16
6
7
8
9
1
4
5
18
19
15
10
11
12
INTER
INPUT
M1-D
RGB
BNG
S-VI
DEO
ST
ANDBY
/ON
TEMP
VIDEO
COMPONENT
LAMP
KE
YS
TO
NE
SEA
RCH
RESET
MENU
FOCUS
LEN
S S
HIFT
ZOOM
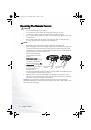
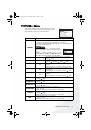
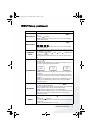
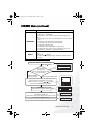
Control
Panel on the
Projector
1
2
3
4
5
6
7
8
9
10
11
12
13
14
15
16
17
18
19
STANDBY/ON button
LENS SHIFT buttons
SEARCH button
ZOOM buttons
FOCUS buttons
KEYSTONE button
MENU button
ENTER button
(
Mouse left button)
Cursor buttons
/
/ /
(
Keyboard
Arrow keys
/
/
/
)
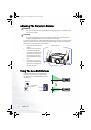
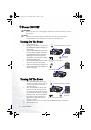
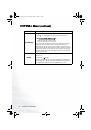
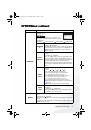
LASER INDICATOR
VIDEO button
RGB button
BLANK button
ASPECT button
LASER button
Cursor buttons
/
/ /
(
Mouse move pointer)
ESC button
(
Keyboard
key)
(
Mouse right button)
POSITION button
AUTO button
PinP button
MAGNIFY buttons
FREEZE button
VOLUME button
MUTE button
ID CHANGE switch
1
4
6
13
14
15
16
18
18
19
STANDBY/ON
VIDEO
LASER INDICATOR
ESC
MENU
POSITION
RESET
AUTO
KEYSTONE
1 2 3
ID CHANGE
SEARCH
ON
OFF
FREEZE
MUTE
MAGNFY
PinP
VOLUME
RGB
BLANK
PREVIOUS
NEXT
ASPECT
MOUSE
LASER
LENS SHIFT
+
–
–
–
+
+
FOCUS
ZOOM
21
22
23
25
24
26
28
30
34
35
36
33
32
31
29
27
20
1
13
4
14
19
16
15
6
17
20
21
22
23
24
25
26
27
ESC
28
29
30
31
32
33
34
35
36
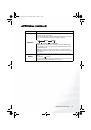
Remote Control
PB9200-e.book Page 4 Thursday, May 27, 2004 2:15 PM