Инструкция для BEST Polar Black

(скачивание инструкции бесплатно)
Формат файла: PDF
Доступность: Бесплатно как и все руководства на сайте. Без регистрации и SMS.
Дополнительно: Чтение инструкции онлайн
background image

12

eN

english

!

 The appliance must be installed by a qualified person 

in compliance with the instructions provided.

!

 Wear gloves when carrying out installation and 

maintenance operations.

AIr VeNT

(for ducting versions)

!

  Prepare the hole and the air vent duct (150 mm dia-

meter).

!

  Use a duct of the minimum indispensible length.

!

  Use a duct with as few elbows as possible (maximum 

elbow angle: 90°).

!

  Avoid drastic changes in the duct cross-section.

!

  Use a duct with an as smooth as possible inside.

!

  The duct must be made of certified material.

!

  Do not connect the hood to smoke exhaust ducts 

for the products of combustion (boilers, fireplaces, 

stoves, etc).

!

  For the air vents comply with the provisions laid down 

by the competent authorities.


In addition, the air must not be evacuated through a 

hole in the wall unless specifically intended for this 

purpose.

!

  Fit air intakes in the room to prevent the hood from 

creating a negative pressure in the room (which must 

not exceed 0.04 mbar); if the hood is used at the 

same time as non-electrical equipment (gas-, oil- and 

charcoal-fired stoves, etc.) the exhaust gas may be 

sucked in by the heat source.

FIlTerING or dUcTING VerSIoN ?

The hood may be in filtering or in ducting version.  Deci

-

de from the outset which type is to be installed.

For better efficiency, we recommend installing the hood 

in the ducting version (if possible).

 ducting version

The hood purifies the air and evacuates it to the outside 

through an exhaust duct (diameter 150 mm).

 Filtering version

The hood purifies the air and recycles  the clean air 

back into the room.

coNTrolS

P1

P2

P3

P4

L

1

P

5

P1:

  5’ TIMER

P2:

  Filter alarm reset  

P3:

  Motor off / speed decrease – .

        - holding down the button, the motor turns off sto-

ring the current speed

P4:

  Motor on / speed  increase

P5:

  Lights on/off  

l1

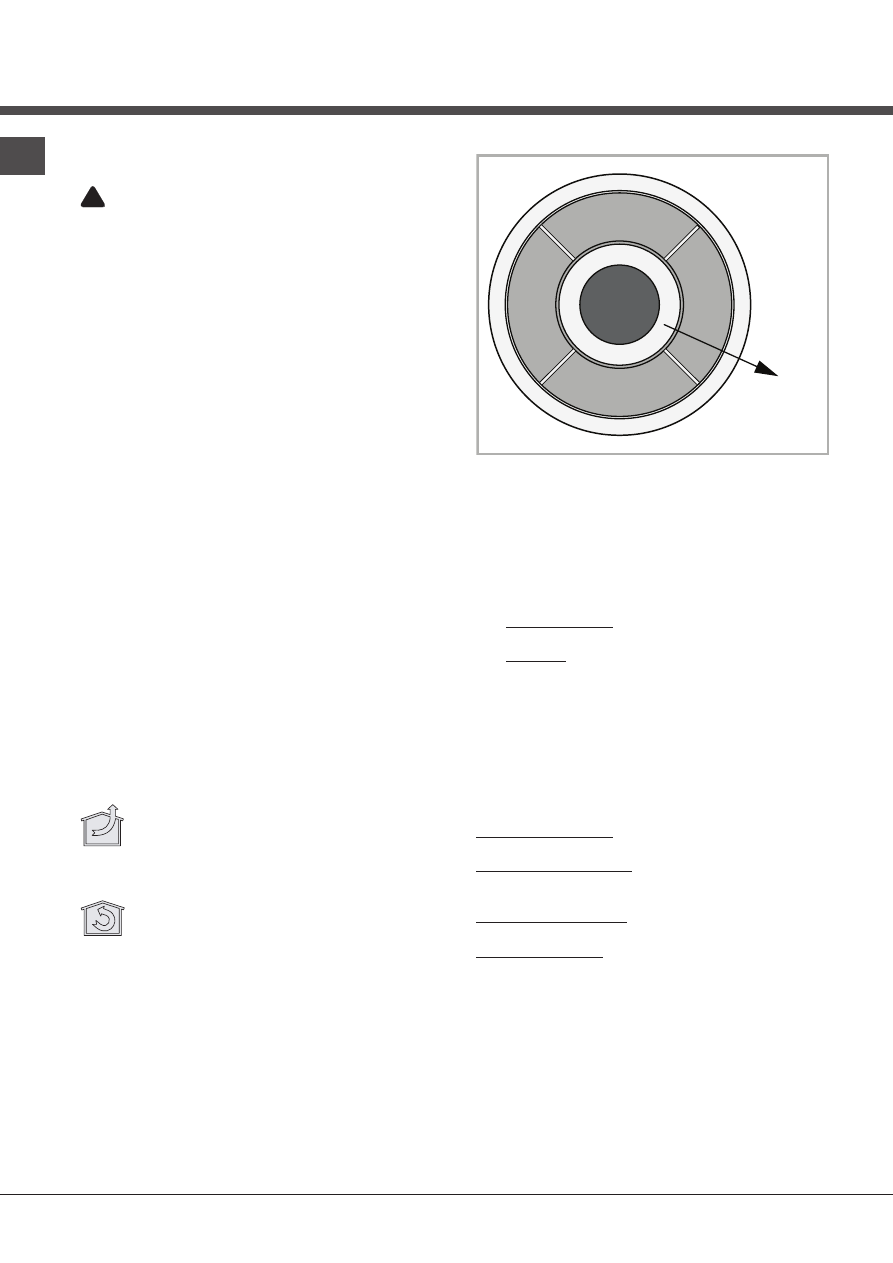
  Signalling crown: 

Hood in standby:

 lights up amber-orange. 30” after 

the last key has been pressed the crown turns off 

Motor on:

 L1 lights up turquoise flashing. The 

flashing frequency is proportional to the speed 

5’ TIMer function :

 L1 lights up turquoise fixed

Filter alarm active:

 L1 lights up red fixed (30h); L2 

lights up red flashing (120h) 

MAINTeNANce

!

  Before cleaning or maintenance cut the power.

cleaning the hood

WHEN TO CLEAN IT: clean it at least every 2 months 

to prevent the risk of fire.

EXTERNAL CLEANING: use a cloth moistened in luke-
warm water and neutral detergent (for painted hoods); 

use specific products for steel, copper or brass hoods.

INTERNAL CLEANING: use a cloth (or brush) soaked 

in denatured ethyl alcohol.

WHAT NOT TO DO: do not use abrasive or corrosi-

ve products (e.g. metal sponges, brushes, too hard 

brushes, very aggressive detergents, etc.)

1
2
3
4
5
6
7
8
9
10
11
12
13
14
15
16
17
18
19
20
21
22
23
24
25
26
27
28
29
30
31
32
33
34
35
36
37
38
39
40
Оглавление инструкции
  • Страница 1 из 41
    Polar Italiano, 10 English, 12 Deutsch, 14 Français, 16 Español, 18 Português, 20 Nederlands, 22 Ðóññêèé, 24 Dansk, 26 Suomi, 28 Svenska, 30 ÅëëçíéêÜ, 32 Română, 34 Čeština, 36 Slovensky, 38 Istruzioni per l’uso Instructions for use Betriebsanleitung Mode d’emploi Instrucciones de uso Instruções de
  • Страница 2 из 41
    1x 1x 4x 3.9x6mm 2x 1x ø 15cm ø 12.5cm 1x 2x 8x 8x 4.8x38mm 1x 1x 1x 1x 1x 2x 3.9 x 6mm 2 1x
  • Страница 3 из 41
    ! ! L = 65 cm min. 1A Ø150mm Ø150mm 1B Ø125 Ø125 Ø150 3
  • Страница 4 из 41
    2 5 4.8 x 38 mm 6 3 55 mm MIN. 1215mm. 4 4 7
  • Страница 5 из 41
    8 11 9 12 10 13 Ø 8 mm 4.8 x 38 mm 5
  • Страница 6 из 41
    17 14 3.9 x 6 mm Ø 8 mm 325 mm 15 18 = 16 = 19 4.8 x 38 mm 6
  • Страница 7 из 41
    20A 23A 21A 24A 3.9 x 6 mm 22A 20B 7
  • Страница 8 из 41
    21B 24B 3.9 x 6 mm 8 22B 25B 23B 26B
  • Страница 9 из 41
    27B 30B 28B 31B 29B 32B 9
  • Страница 10 из 41
    Italiano IT ! L’installazione va effettuata secondo queste istruzioni e da personale professionalmente qualificato. COMANDI ! Utilizzare dei guanti nelle operazioni di installazione e di manutenzione. P1 Scarico dell’aria (Per le versioni aspiranti) ! Predisporre il foro ed il condotto di scarico
  • Страница 11 из 41
    Pulizia dei filtri antigrasso QUANDO PULIRE: pulire almeno ogni 2 mesi per evitare rischi di incendio. COME TOGLIERE I FILTRI: in corrispondenza della maniglia spingere il fermo verso il retro e tirare il filtro verso il basso. COME PULIRE I FILTRI: lavare con detersivo neutro a mano o in
  • Страница 12 из 41
    English EN ! The appliance must be installed by a qualified person in compliance with the instructions provided. CONTROLS ! P1 Wear gloves when carrying out installation and maintenance operations. AIR VENT (for ducting versions) ! Prepare the hole and the air vent duct (150 mm diameter). ! Use a
  • Страница 13 из 41
    Cleaning the grease filters WHEN TO CLEAN IT: clean it at least every 2 months to prevent the risk of fire. HOW TO REMOVE THE FILTERS: push the catch near the handle towards the rear of the hood and pull the filter downwards HOW TO CLEAN THE FILTERS: hand wash or in the dishwasher using a neutral
  • Страница 14 из 41
    Deutsch DE ! Die Installation ist gemäß den vorliegenden Anweisungen und von Fachpersonal durchzuführen. Monteurhinweis Bevor das Gerät montiert wird ist eine Funktionsprüfung (Lüftung und Beleuchtung) vorzunehmen. Ebenso muss die Geräteoberfläche auf ästhetische Mängel bzw. Beschädigungen der
  • Страница 15 из 41
    WARTUNG ! Vor dem Reinigen oder Warten die Spannungszufuhr ausschalten. Reinigung der Abzugshaube WIE OFT: Um ein Brandrisiko zu vermeiden, die Haube mindestens alle 2 Monate reinigen. AUSSENREINIGUNG: Für die äußere Reinigung (von lackierten Geräten) ein mit lauwarmem Wasser und neutralem Reiniger
  • Страница 16 из 41
    Français FR ! L’installation doit être effectuée par un professionnel du secteur conformément aux instructions du fabricant. COMMANDES ! P1 Faire usage de gants lors des opérations d’installation et d’entretien. ÉVACUATION DE L’AIR (pour les versions aspirantes) ! Réaliser le trou et installer la
  • Страница 17 из 41
    Nettoyage des filtres à graisse QUAND NETTOYER LA HOTTE? la nettoyer au moins une fois tous les 2 mois pour prévenir le risque d’incendie. DÉMONTAGE DES FILTRES: Pousser le blocage à hauteur de la poignée, vers l’intérieur et tirer le filtre vers le bas. NETTOYAGE DES FILTRES: laver les filtres
  • Страница 18 из 41
    Español ES ! Utilice guantes durante las operaciones de instalación y mantenimiento. MANDOS P1 EXTRACCIÓN DE AIRE (Para las versiones aspiradoras) ! Prepare el agujero y el conducto de extracción de aire (diámetro 150 mm). ! Utilice un conducto cuya longitud sea la mínima indispensable. ! Utilice
  • Страница 19 из 41
    Limpieza de los filtros antigrasa CUÁNDO LIMPIAR: limpie por lo menos cada 2 meses para evitar los riesgos de incendio. CÓMO QUITAR LOS FILTROS: en correspondencia con el tirador, tire del retén hacia la parte posterior de la campana y tire del filtro hacia abajo. CÓMO LIMPIAR LOS FILTROS: lave con
  • Страница 20 из 41
    Português PT ! A instalação deve ser realizada segundo estas instruções e por pessoal profissional qualificado. COMANDOS ! P1 Utilizar luvas nas operações de instalação e manutenção. SAÍDA DO AR (Para as versões aspirantes) ! Preparar o furo e a conduta para exaustão do ar (diâmetro 150mm). !
  • Страница 21 из 41
    Limpeza dos filtros antigordura QUANDO EFECTUAR A LIMPEZA: limpar pelo menos cada 2 meses para evitar riscos de incêndio. COMO REMOVER OS FILTROS: Na correspondência da pega, empurrar o bloqueador para o interior e puxar o filtro para baixo; COMO LIMPAR OS FILTROS: lavar com detergente neutro à mão
  • Страница 22 из 41
    Nederlands NL ! De installatie moet worden uitgevoerd door een bevoegde installateur en volgens de instructies van de fabrikant. BEDIENINGSELEMENTEN P1 ! Gebruik altijd handschoenen tijdens alle installatieen onderhoudswerkzaamheden. LUCHTAFVOER (Voor afvoer afzuigkappen) ! Opening en afvoerbuis
  • Страница 23 из 41
    Reiniging van de vetfilters WANNEER: minstens 1 keer in de 2 maanden reinigen om brandgevaar te vermijden. AFNEMEN VAN DE FILTERS: ter hoogte van de handgreep, de grendel naar achteren duwen en de filter naar beneden trekken. REINIGING VAN DE FILTERS: Was de filters met de hand of in de vaatwasser
  • Страница 24 из 41
    ÐÓÑÑÊÈÉ RU ! Ìîíòàæ ïðîèçâîäèòñÿ â ñîîòâåòñòâèè ñ íàñòîÿùèìè èíñòðóêöèÿìè ïðîôåññèîíàëüíî êâàëèôèöèðîâàííûìè ñïåöèàëèñòàìè. ÎÐÃÀÍÛ ÓÏÐÀÂËÅÍÈSS P1 ! Èñïîëüçîâàòü ïåð÷àòêè âî âðåìÿ óñòàíîâêè è òåõîáñëóæèâàíèÿ. ÎÒÂÎÄ ÂÎÇÄÓÕÀ (Äëÿ âñàñûâàþùèõ ìîäåëåé) ! Ïðåäóñìîòðåòü îòâåðñòèå è òðóáó äëÿ îòâîäà
  • Страница 25 из 41
    àáðàçèâíûå èëè êîððîçèéíûå ñðåäñòâà (íàïðèìåð, ìåòàëëè÷åñêèå ãóáêè, ñëèøêîì æåñòêèå ùåòêè, î÷åíü àãðåññèâíûå ìîþùèå ñðåäñòâà, è ò. ä.). ×èñòêà æèðîóëàâëèâàþùèõ ôèëüòðîâ ÊÎÃÄÀ ÏÐÎÈÇÂÎÄÈÒÜ ×ÈÑÒÊÓ: ÷èñòèòü íå ðåæå, ÷åì ðàç â 2 ìåñÿöà, ÷òîáû èçáåæàòü ðèñêà âîçãîðàíèÿ. ÊÀÊ ÂÛÍÓÒÜ ÔÈËÜÒÐÛ: â ìåñòå
  • Страница 26 из 41
    Dansk DK ! Installationen skal udføres i overensstemmelse med instruktionerne og af en kvalificeret tekniker. ! se. BETJENING P1 Anvend handsker ved montering og vedligeholdel- UDLUFTNING AF LUFTEN (til modellerne med udluftning) ! Lav et hul til udluftningsrøret (diameter 150mm). ! Anvend ikke et
  • Страница 27 из 41
    Rengøring af fedtfiltret HVORNÅR SKAL DET RENGØRES: rengør mindst hver anden måned for at undgå brandfare. SÅDAN TAGES FILTRENE UD: tryk fastgøringsmekanismen der sidder ud for håndtaget bagud, og træk samtidig filteret nedad. SÅDAN RENGØRES FILTRENE: vask med et neutralt rengøringsmiddel i hånden
  • Страница 28 из 41
    Suomi FI ! Asennus tulee suorittaa näiden ohjeiden mukaisesti pätevän henkilöstön avulla. ! na. OHJAIMET P1 Käytä suojakäsineitä asennus- ja huoltotöiden aika- ILMANPOISTO (Imuversiot) ! Valmistele aukko ja ilmanpoistoputki (halkaisija 150 mm). ! Käytä mahdollisimman lyhyttä putkea. ! Käytä
  • Страница 29 из 41
    Rasvasuodatinten puhdistus KOSKA PUHDISTAA: puhdista vähintään kahden kuukauden välein tulipalovaaran ehkäisemiseksi. IRROTA SUODATTIMET SEURAAVASTI: paina salpaa kahvansuuntaisesti taaksepäin ja vedä suodatin pois alakautta. SUODATINTEN PUHDISTUS: puhdista käsin tai astianpesukoneessa miedolla
  • Страница 30 из 41
    Svenska SV ! Installationen ska ske enligt dessa anvisningar och av behörig personal. KOMMANDON ! P1 Använd handskar vid åtgärder för installation och underhåll. LUFTUTLOPP (För de insugande versionerna) ! Förbered hålet och ledningen för ett luftutlopp (diameter 150mm). ! Använd en ledning som är
  • Страница 31 из 41
    Rengöring av fettfilter NÄR SKA DE RENGÖRAS: rengör åtminstone en gång varannan månad för att undvika brandrisk. HUR KAN MAN TA BORT FILTREN: tryck spärren bakåt i anslutning till handtaget och dra filtret nedåt. HUR SKA MAN RENGÖRA FILTREN: tvätta för hand eller i diskmaskin med milt
  • Страница 32 из 41
    ÅëëçíéêÜ GR ! Ç åãêáôÜóôáóç äéåíåñãåßôáé óýìöùíá ìå ôéò ïäçãßåò áõôÝò êáé áðü ðñïóùðéêü åðáããåëìáôéêÜ åéäéêåõìÝíï. ! åðáíåéóÜãåé êáèáñü óôï äùìÜôéï. ×ÅÉÑÉÓÔÇÑÉÁ ×ñçóéìïðïéåßôå ãÜíôéá óôéò åñãáóßåò åãêáôÜóôáóçò êáé óõíôÞñçóçò. P1 ÅÊÊÅÍÙÓÇ ÔÏÕ ÁÅÑÁ (Ãéá ôéò åêäüóåéò áðïññüöçóçò) ! ÐñïåôïéìÜóôå ôçí
  • Страница 33 из 41
    ðñïúüíôá äéáâñùôéêÜ Þ áðïîõóôéêÜ (ãéá ðáñÜäåéãìá ìåôáëëéêÜ óöïõããáñÜêéá, âïýñôóåò ðïëý óêëçñÝò, áðïññõðáíôéêÜ ðïëý âßáéá, êëð.) Êáèáñéóìüò ôùí ößëôñùí óõãêñÜôçóçò ëßðïõò ÐÏÔÅ ÊÁÈÁÑÉÆÅÔÁÉ: ôï êáèáñßæåôå ôïõëÜ÷éóôïí êÜèå 2 ìÞíåò ãéá íá áðïóïâçèïýí êßíäõíïé ðõñêáãéÜò. ÐÙÓ ÁÖÁÉÑÏÕÍÔÁÉ ÔÁ ÖÉËÔÑÁ:
  • Страница 34 из 41
    Română RO ! Instalarea se va face conform prezentelor instrucţiuni, numai de persoane calificate. COMENZI ! Utilizaţi mănuşi pe parcursul operaţiunilor de instalare şi întreţinere. P1 Evacuarea aerului (Pentru versiunile cu aspirare) ! Pregătiţi orificiul şi conducta de evacuare a aerului
  • Страница 35 из 41
    Curăţarea filtrelor anti-grăsime CÂND TREBUIE CURĂŢATE: curăţaţi cel puţin o dată la 2 luni pentru a evita riscul de incendiu. CUM SE SCOT FILTRELE: cu mânerul corespunzător împingeţi dispozitivul de prindere în spate şi trageţi filtrul în jos. CUM SE CURĂŢĂ FILTRELE: spălaţi-le cu un detergent
  • Страница 36 из 41
    Čeština CZ ! Instalace musí být provedena podle uvedených pokynů odborně kvalifikovaným personálem. příkazy ! Při provádění operací instalace a údržby používejte rukavice. P1 odtah vzduchu (pro sací verze) ! Připravte otvor a trubici odtahu vzduchu (průměr 150 mm). ! Použijte trubici o nejkratší
  • Страница 37 из 41
    Čištění tukových filtrů KDY ČISTIT: Čistit alespoň každé 2 měsíce, abyste zabránili riziku vzniku požáru. JAK VYJMOUT FILTRY: Stlačte zarážku v místě držadla směrem dozadu a vytáhněte filtr směrem dolů. JAK ČISTIT FILTRY: Omýt ručně neutrálním čisticím prostředkem nebo v myčce. V případě mytí v
  • Страница 38 из 41
    Slovensky SK ! Napravo sme v skladu s temi navodili namestiti samo usposobljeno osebje. OVLÁDAČE ! Pri vykonávaní inštalácie a údržby používajte rukavice. P1 ODVOD VZDUCHU (Pri verziách s odvodom vzduchu) ! Pripravte otvor a rúrku na odvod vzduchu (priemer 150mm). ! Použite rúrku s minimálnou
  • Страница 39 из 41
    Čistenie filtrov na zachytávanie tukov KEDY ČISTIŤ: aby sa predišlo riziku požiaru, čistite odsávač aspoň každé 2 mesiace. AKO VYBRAŤ FILTRE: treba zatlačiť dozadu úchytku nachádzajúcu sa vedľa rukoväte a potiahnuť filter smerom dolu. AKO ČISTIŤ FILTRE: umyte ich neutrálnym čistiacim prostriedkom
  • Страница 40 из 41
    04308192/2 - PolAr
  • Страница 41 из 41