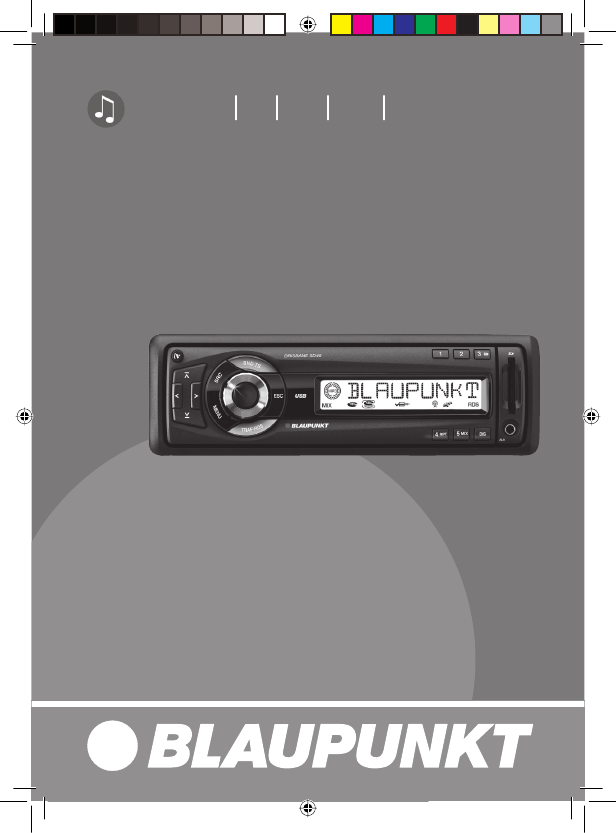
Инструкция для BLAUPUNKT BRISBANE SD48 7 648 001 310, BRISBANE SD48 7 648 000 310

(скачивание инструкции бесплатно)
Формат файла: PDF
Доступность: Бесплатно как и все руководства на сайте. Без регистрации и SMS.
Дополнительно: Чтение инструкции онлайн
background image

Car Radio   SD   USB   MP3   WMA

Brisbane SD48


7 648 000 310

Victoria SD48


7 648 001 310

Bedienungs- und Einbauanleitung 
Operating and installation instructions
Mode d’emploi et de montage
Istruzioni d’uso e di installazione
Gebruiksaanwijzing en inbouwhandleiding
Bruks- och monteringsanvisning 
Instrucciones de manejo e instalación 
Instruções de serviço e de montagem 
Betjenings- og monteringsvejledning
Instrukcja obsługi i montażowa
Návod k obsluze a k montáži 
Návod na obsluhu a inštaláciu
Инструкция по эксплуатации и установке

www.blaupunkt.com

01_Brisb_VictoriaSD48_de.indd   1

01_Brisb_VictoriaSD48_de.indd   1

23.11.2007   16:12:19 Uhr

23.11.2007   16:12:19 Uhr

1
2
3
4
5
6
7
8
9
10
11
12
13
14
15
16
17
18
19
20
21
22
23
24
25
26
27
28
29
30
31
32
33
34
35
36
37
38
39
40
41
42
43
44
45
46
47
48
49
50
51
52
53
54
Оглавление инструкции
  • Страница 1 из 55
    www.blaupunkt.com Car Radio SD USB MP3 WMA Brisbane SD48 Victoria SD48 7 648 000 310 7 648 001 310 Bedienungs- und Einbauanleitung Operating and installation instructions Mode d’emploi et de montage Istruzioni d’uso e di installazione Gebruiksaanwijzing en inbouwhandleiding Bruks- och
  • Страница 2 из 55
    1 2 3 14 5 6 13 12 4 7 9 8 11 10 2 01_Brisb_VictoriaSD48_de.indd 2 23.11.2007 16:12:21 Uhr
  • Страница 3 из 55
    Controls 1 button for removing the control panel (release panel) 2 Arrow buttons 3 SRC button for source selection between Radio, SD, USB and CD changer or AUX and FRONT-AUX (if connected). 4 Button to switch the device on/off and operate the volume mute feature. 5 BND•TS button Short press:
  • Страница 4 из 55
    About these instructions .................. 43 Symbols used................................ 43 Use as directed.............................. 43 Declaration of conformity................ 43 For your safety ................................ 44 If you are installing device yourself.... 44 Observe the
  • Страница 5 из 55
    Contents CD-changer mode ............................ 62 Switching to CD-changer mode ........ 62 Selecting CDs................................ 62 Selecting tracks ............................. 62 Fast searching (audible).................. 62 Configuring the display ................... 62 Repeating
  • Страница 6 из 55
    About these instructions Use as directed These instructions contain important information to easily and safely install and operate the device. • Read these instructions carefully and completely before using the device. • Keep the instructions at a location so that they are always accessible to all
  • Страница 7 из 55
    For your safety For your safety The device was manufactured according to the state of the art and established safety guidelines. Even so, dangers may occur if you do not observe the safety notes in these instructions. If you are installing device yourself You may only install the device yourself if
  • Страница 8 из 55
    iPod/USB interface The iPod interface or iPod/USB interface allows connecting the iPod or iPod Mini to the radio device and conveniently controlling the playback via the radio device. The iPod/USB interface provides an additional USB connection. Scope of delivery The scope of delivery includes: 1
  • Страница 9 из 55
    Warranty Service Warranty Service We provide a manufacturer's warranty for products bought within the European Union. For devices purchased outside the European Union, the warranty terms issued by our respective responsible domestic agency are valid. The warranty terms can be called up under
  • Страница 10 из 55
    Detachable control panel Theft protection The device is equipped with a detachable control panel (flip-release panel) to protect your equipment against theft. The device is worthless to a thief without this control panel. Protect your device against theft by taking the control panel with you
  • Страница 11 из 55
    Switching on/off Timeout function Switching on/off Timeout function There are various ways of switching the device on/off: The device features a time-out function (time window). For example, if you press the MENU button > and select a menu item, the device switches back after approx. 8 seconds
  • Страница 12 из 55
    Adjusting the volume You can adjust the volume in steps from 0 (off) to 50 (maximum). To increase the volume, u turn the volume control 6 clockwise. To decrease the volume, u turn the volume control 6 counterclockwise. Setting the power-on volume Note: To protect your hearing, the power-on volume
  • Страница 13 из 55
    Adjusting the volume When you have finished making your changes, u press the MENU button >. To exit the menu, u press the ESC button <. Switching the confirmation beep on/off (BEEP) The system will output a confirmation beep for some functions if you keep a button pressed down for longer than two
  • Страница 14 из 55
    Adjusting the volume Radio mode Radio mode u press the MENU button >. To exit the menu, Adjusting the tuner u press the ESC button <. Notes: • If the volume listened to is higher than the set "TEL VOL" value, telephone calls or navigation announcements are played back at the volume listened to. •
  • Страница 15 из 55
    Radio mode Convenient RDS functions To deactivate, This device is equipped with an RDS (Radio Data System) radio receiver. Many FM stations broadcast a signal that not only carries the programme but also additional information such as the station name and programme type (PTY). The station name
  • Страница 16 из 55
    Radio mode There are various ways of tuning into a station: Automatic station seek tuning u Press the or button 2. The radio tunes into the next receivable station. Tuning into stations manually You can also tune into stations manually. Note: You can only tune into stations manually if the
  • Страница 17 из 55
    Radio mode u Press and hold down one of the station buttons 1 - 5 8 for longer than two seconds to assign the station to that button. Storing stations automatically (Travelstore) You can automatically store the five stations offering the strongest reception in the region (only FM). The stations are
  • Страница 18 из 55
    Radio mode Besides transmitting the station name, some FM stations also provide information on the type of programme that they are broadcasting. Your car radio can receive and display this information. For example, the programme types can be: CULTURE TRAVEL JAZZ SPORT NEWS POP ROCK CLASSICS You can
  • Страница 19 из 55
    Radio mode To exit the menu, u press the ESC button <. Selecting a programme type and starting seek tuning PTY must be activated (ON). u Press the or button 2. The current programme type appears briefly on the display. u During the display time, press the or button 2 to change to a different
  • Страница 20 из 55
    If you hear the warning beep, you can either switch off traffic information priority or tune into a station that broadcasts traffic information. Skipping a traffic announcement "TRAFFIC" is displayed during a traffic announcement. To cancel a traffic announcement without switching off the priority of
  • Страница 21 из 55
    MP3/WMA mode MP3/WMA mode You can play files with music data stored on SD/MMC cards (Secure Digital or Multimedia Card) and USB data carriers in MP3 or WMA format using this car sound system. The operation for playing MP3 and WMA files is identical. Notes: • WMA files with Digital Rights Management
  • Страница 22 из 55
    MP3/WMA mode A D02 D03 T001 T002 T003 T004 T005 T001 T002 T003 T004 T005 T006 D04 T001 T002 T003 T004 T005 T006 T007 T008 T009 T010 T011 B A Directories B Tracks · Files Preparing a USB data carrier For the device to recognise a USB data carrier, it must be specified as mass storage device and
  • Страница 23 из 55
    MP3/WMA mode As soon as a USB data carrier is connected, it can be selected with the SRC button 3. The display shows "USB". Configuring the display Selecting a directory To move up or down to another directory, u press the or 2 button once or several times. You can display various types of
  • Страница 24 из 55
    MP3/WMA mode You can play either all tracks in the current directory or all tracks on the MP3 data carrier in random order. u Press the 5 MIX button 8 repeatedly until the desired function appears on the display: • "MIX DIR" (all tracks in the current directory) • "MIX ALL" (all tracks on the MP3
  • Страница 25 из 55
    CD-changer mode CD-changer mode Notes: • Information about handling CDs, inserting CDs and operating the CD changer can be found in the operating instructions supplied with your CD changer. • Before connecting a CD changer, check whether the "CDC ON" setting has been select in the menu. For further
  • Страница 26 из 55
    CD-changer mode Random track play (MIX) You can play either all tracks on the current CD or all CDs in the magazine in random order. u Press the 5 MIX button 8 repeatedly until the desired function appears on the display: • "MIX CD" (all tracks on the current CD) • "MIX ALL" (all CDs in the
  • Страница 27 из 55
    Clock Time Clock Time Selecting 12/24-hour clock mode Displaying the time u Press the MENU button >. The display shows "MENU". u Press the or button 2 repeatedly until "24 H MODE" or "12 H MODE" appears on the display. u Press the button 2 to call up the submenu. u Press the button 2 to switch
  • Страница 28 из 55
    Sound For every source (radio, SD, USB, CD changer or AUX-IN), you can perform individual and separate settings for the sound (bass, middle and treble) and the equalizer. The X-Bass and volume distribution settings (balance and fader) apply to all the audio sources. Equalizer This device features a
  • Страница 29 из 55
    Sound u Press the or button 2 to change the value. When you have finished making your changes, u press the MENU button >. To exit the menu, u press the ESC button <. Adjusting TREBLE To adjust the level of the treble, u press the MENU button >. The display shows "MENU". u Press the or button 2
  • Страница 30 из 55
    Adjusting E-TREBLE To adjust the frequency of the treble, u press the MENU button >. The display shows "MENU". u Press the or button 2 repeatedly until "AUDIO" appears on the display. u Press the button 2 to call up the audio menu. "BASS" appears on the display. u Press the or button 2 repeatedly
  • Страница 31 из 55
    Sound Setting the left/right volume distribution (BALANCE) u press the MENU button >. The display shows "MENU". u Press the or button 2 repeatedly until "AUDIO" appears on the display. u Press the button 2 to call up the audio menu. "BASS" appears on the display. u Press the or button 2 repeatedly
  • Страница 32 из 55
    Sound X-BASS X-BASS allows you to increase the bass at low volume. The selected X-Bass settings are effective for all audio sources (radio, SD, USB, CD changer or AUX-IN). You have two options of adjusting X-BASS: You can adjust the X-BASS boost and the cut-off frequency to be boosted. The XBASS
  • Страница 33 из 55
    X-Bass u Press the or button 2 repeatedly until "X-BASS" appears on the display. u Press the button 2 to call up the submenu. "X-BASS" and the currently set value are displayed. u Press the or button 2 repeatedly until the desired setting appears on the display. When you have finished making your
  • Страница 34 из 55
    Display If you switch on the vehicle illumination, the display brightness switches day mode to night mode. This requires that your car sound system is connected as described in the installation instructions. Your vehicle must feature the corresponding connection option. Adjusting the display
  • Страница 35 из 55
    Display u Press the or button 2 to switch between the colour components. u Press the or button 2 to adjust the value of a colour component. When you have finished making your changes, u press the MENU button >. To exit the menu, u press the ESC button <. Selecting the colour of the display
  • Страница 36 из 55
    External audio sources External audio sources, such as portable CD players, MiniDisc players or MP3 players, can be connected to the device in two ways. 1. To the rear AUX-IN input (if no CD changer is connected to the device). 2. To the front AUX-IN socket. Note: The Blaupunkt Bluetooth/USB
  • Страница 37 из 55
    External audio sources When you have finished making your changes, u press the MENU button >. To exit the menu, u press the ESC button <. Front AUX-IN socket For the settings "FRONT AUX" and "REAR AUX", the audio source connected via the Front-AUX-IN socket or the rear AUX-IN input is played back
  • Страница 38 из 55
    Factory settings You can reset the device to the factory settings. Notes: • Your personal settings are deleted during reset (Normset). • The setting "CDC ON" or "CDC OFF" is not changed by the reset. u Press the MENU button >. The display shows "MENU". u Press the or button 2 repeatedly until
  • Страница 39 из 55
    Technical data Input sensitivity Technical data Amplifier Output power: 4 x 26 watt sine according to DIN 45 324 at 14.4 V 4 x 50 watt max. power AUX-IN input (rear): AUX-IN input (front): Tel./Navi input: 2 V / 6 kΩ 500 mV / 6 kΩ 10 V / 1 kΩ Weight 0.8 kg Tuner Wavebands in Europe: FM: 87.5 - 108
  • Страница 40 из 55
    Einbauanleitung • Installation instructions • Notice de montage • Istruzioni di installazione • Inbowhandleiding • Monteringsanvisning • Instrucciones de instalación • Instruções de montagem • Monteringsvejledning • Instrukcja montażowa • Návod k montáži • Montážny návod • Инструкция по установке
  • Страница 41 из 55
    If the information provided here is not suitable for your specific installation requirements, please contact your Blaupunkt dealer, your vehicle manufacturer or our telephone hotline. When installing an amplifier or changer, you must first connect the device earth connections before connecting the
  • Страница 42 из 55
    di adattamento richiesto per il vostro modello di autovettura. • A seconda del modello il Suo veicolo può differire da questa descrizione. Non forniamo garanzia per danni derivanti da errori di montaggio o di collegamento e per danni conseguenti. Se le indicazioni qui elencate non sono adatte al
  • Страница 43 из 55
    • Se till att inga av fordonets komponenter skadas i samband med borrning av hål. • Plus- och minuskabelns ledningsarea måste vara minst 1,5 mm2. • Fordonets stickkontakt får inte anslutas till radion! Din BLAUPUNKT fackhandel tillhandahåller för resp fordonstyp erforderlig adapterkabel. • Beroende
  • Страница 44 из 55
    Instruções de montagem Instruçõesdesegurança Durante a montagem e a ligação do aparelho, queira respeitar as seguintes instruções de segurança. • Separar o pólo negativo da bateria! Respeitar ao mesmo tempo as instruções de segurança do fabricante do automóvel. • Quando se procede à furagem de
  • Страница 45 из 55
    først tilsluttes, før stikkene for tilslutningerne Line-In eller Line-Out sættes i. Eksterne enheders stelforbindelse må ikke sluttes til bilradioens stelforbindelse (kabinet). Instrukcja montażowa Wskazówki bezpieczeństwa Podczas montażu i podłączania należy przestrzegać poniższych wskazówek
  • Страница 46 из 55
    Pokud zde uvedené pokyny pro montáž neodpovídají vašemu vozidla, obraťte se na specializovaného prodejce Blaupunkt, výrobce vozidla nebo naši horkou linku. Při montáži zesilovače nebo měničů, předtím než budou konektory zapojeny do zdířek Line-in nebo Line-out, musí být nejprve bezpodmínečně
  • Страница 47 из 55
    • Не включайте в аудиосистему автомобильные штекеры! Необходимые для Вашего типа автомобиля адаптерные кабели Вы можете приобрести в авторизованном сервисном центре Blaupunkt. • Ваш автомобиль может - в зависимости от конструкции - отклоняться от данного описания. Завод-изготовитель аудиосистемы не
  • Страница 48 из 55
    Mitgelieferte Montage- und Anschlussteile Supplied Mounting Hardware Materiel de montage fourni Componenti di fissaggio comprese nella fornitura Meegeleverde montagematerialen Medföljande monteringsdetaljer Ferretería de montaje suministrada Elementos de fixação fornecidos Medleverede monterings- og
  • Страница 49 из 55
    Einbausätze Installation kits Kits de montage Set di montaggio Inbouwsets Monteringssatser Juegos de montaje Kits de montagem Indbygningssæt Zestawy montażowe Montážní soupravy Montážne súpravy Установочные комплекты 1. 12V 2. ca. 10 mm 7 608 . . . . . . 3. 0°- 30° +/– 10° +/– 10° 493
  • Страница 50 из 55
    4. 6. Ausbau / Removal / Démontage / Smontaggio / Demontage / Urmontering / Desmontaje / Desmontagem / Udbygning / Demontaż / Demontáž / Demontáž / Демонтаж USB connection antenna connection 1. USB cable 5. 2. 182 165 53 2. B 8 613 150 002 1-20 A 3. 7. 12V 494 14_EA_BrisbVictoSD48_eu.indd 494
  • Страница 51 из 55
    8. C-1 6 3 2 10 7 4 1 C C-2 8 11 * 13 16 19 12 9 5 Aut. antenna C-3 15 18 Summe Sum Somme Somma Som Summa Suma Soma Celkem Súčet Сумма 14 17 20 B 1 3 5 7 2 4 6 8 A 1 3 5 7 2 4 6 8 10 Ampere A B 1 2 3 4 5 6 7 NC Radio Mute NC Permanent +12V Aut. antenna * Illumination Kl.15/Ignition 1 2 3 4 5 6 7
  • Страница 52 из 55
    9. Preamp./Sub./Center - out cable 7 607 001 512 Relais +12V Amplifier A +12V 7 1 35 Kl. 15 +12V 8 24 6 Radio Mute RadioMute LR F LF RR R + + + + - 4 Ohm 4 Ohm 4 Ohm 4 Ohm Änderungen vorbehalten! Subject to changes! Sous réserve de modifications! Modifiche riservate! Wijzigingen voorbehouden!
  • Страница 53 из 55
    © 2007 All rights reserved by Blaupunkt. This material may be reproduced, copied or distributed for personal use only. This product is protected by certain intellectual property rights of Microsoft. Use or distribution of such technology outside of this product is prohibited without a license from
  • Страница 54 из 55
    Germany Austria Belgium Denmark Finland France Great Britain Greece Ireland Italy Luxembourg Netherlands Norway Portugal Spain Sweden Switzerland Czech. Rep. Hungary Poland Turkey USA Brasil (Mercosur) Malaysia (Asia Pacific) Phone: Fax: (D) (A) (B) (DK) (FIN) (F) (GB) (GR) (IRL) (I) (L) (NL) (N)
  • Страница 55 из 55