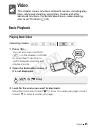
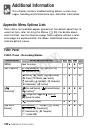
Video
109
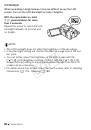
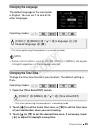
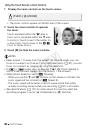
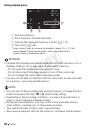
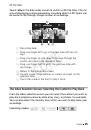
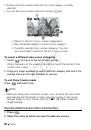
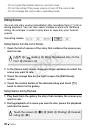
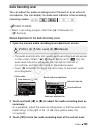
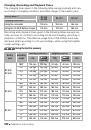
• If necessary, activate and adjust the audio mix balance with the
7
8
[Audio Mix] setting.
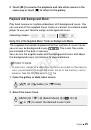
NOTES
• When an external microphone is connected to the camcorder,
7
8
[Wind Screen] will automatically be set to [
B
Off
Z
].
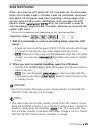
• If the audio level is too high and the sound gets distorted, adjust the
audio recording level manually (
0
101) or activate the microphone
attenuator with the
7
8
[Microphone Attenuator] setting.
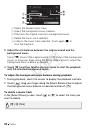
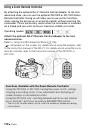
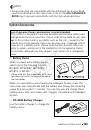
• When using the optional SM-V1 Surround Microphone:
- Change the microphone’s directionality mode with the
7
8
[Surround Mic Directionality] setting.
- If the sound gets distorted, activate the microphone attenuator with
the
7
8
[Surround Mic Attenuator] setting.
- You can enjoy the full effect of recordings made with 5.1ch surround
sound on HDTVs compatible with 5.1ch surround sound connected
to the camcorder using the supplied HDMI cable. Audio output from
the AV OUT/
X
terminal (including headphone output) will be
converted to 2ch stereo. The camcorder’s built-in speaker is
monaural.
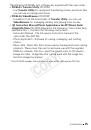
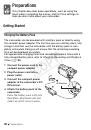
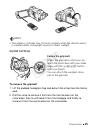
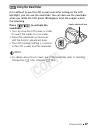
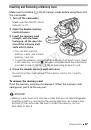
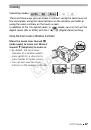
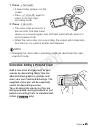
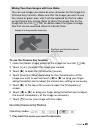
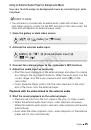
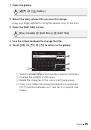
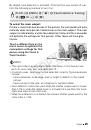
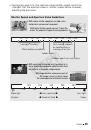
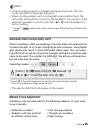
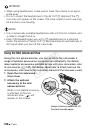
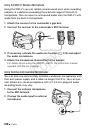
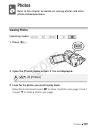
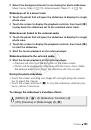
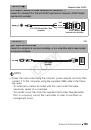
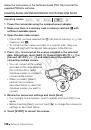
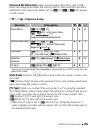
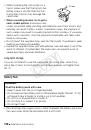
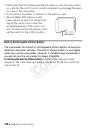
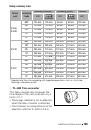
Using an External Video Light
You can use the optional VL-5 Video Light or VFL-2 Video Flash Light
when you need to record movies in dark locations.
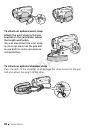
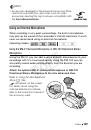
Attach the optional video light to the mini advanced shoe.
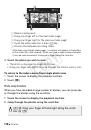
• Refer to
Using the Mini Advanced Shoe
(
0
•
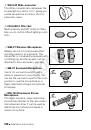
will appear on the screen when you turn on the optional video light
(ON or AUTO). For details about using the optional video light, refer to
the instruction manual of the accessory used.
• The optional VFL-2 Video Flash Light cannot be used as a flash with this
camcorder.
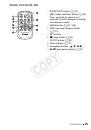
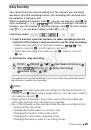
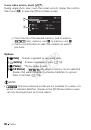
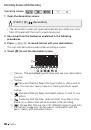
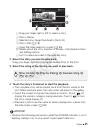
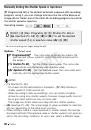
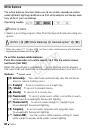
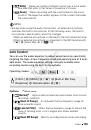
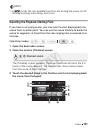
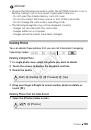
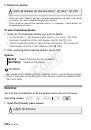
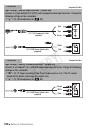
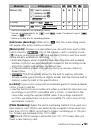
[FUNC.]
8
[MENU]
8
7
8
[MIC Terminal Input]
8
[Microphone]
8
[
a
]
COP
Y
 1
1
 2
2
 3
3
 4
4
 5
5
 6
6
 7
7
 8
8
 9
9
 10
10
 11
11
 12
12
 13
13
 14
14
 15
15
 16
16
 17
17
 18
18
 19
19
 20
20
 21
21
 22
22
 23
23
 24
24
 25
25
 26
26
 27
27
 28
28
 29
29
 30
30
 31
31
 32
32
 33
33
 34
34
 35
35
 36
36
 37
37
 38
38
 39
39
 40
40
 41
41
 42
42
 43
43
 44
44
 45
45
 46
46
 47
47
 48
48
 49
49
 50
50
 51
51
 52
52
 53
53
 54
54
 55
55
 56
56
 57
57
 58
58
 59
59
 60
60
 61
61
 62
62
 63
63
 64
64
 65
65
 66
66
 67
67
 68
68
 69
69
 70
70
 71
71
 72
72
 73
73
 74
74
 75
75
 76
76
 77
77
 78
78
 79
79
 80
80
 81
81
 82
82
 83
83
 84
84
 85
85
 86
86
 87
87
 88
88
 89
89
 90
90
 91
91
 92
92
 93
93
 94
94
 95
95
 96
96
 97
97
 98
98
 99
99
 100
100
 101
101
 102
102
 103
103
 104
104
 105
105
 106
106
 107
107
 108
108
 109
109
 110
110
 111
111
 112
112
 113
113
 114
114
 115
115
 116
116
 117
117
 118
118
 119
119
 120
120
 121
121
 122
122
 123
123
 124
124
 125
125
 126
126
 127
127
 128
128
 129
129
 130
130
 131
131
 132
132
 133
133
 134
134
 135
135
 136
136
 137
137
 138
138
 139
139
 140
140
 141
141
 142
142
 143
143
 144
144
 145
145
 146
146
 147
147
 148
148
 149
149
 150
150
 151
151
 152
152
 153
153
 154
154
 155
155
 156
156
 157
157
 158
158
 159
159
 160
160
 161
161
 162
162
 163
163
 164
164
 165
165
 166
166
 167
167
 168
168
 169
169
 170
170
 171
171
 172
172
 173
173
 174
174
 175
175
 176
176
 177
177
 178
178
 179
179
 180
180
 181
181
 182
182
 183
183
 184
184
 185
185
 186
186
 187
187
 188
188
 189
189
 190
190
 191
191
 192
192
 193
193
 194
194
 195
195
 196
196