8
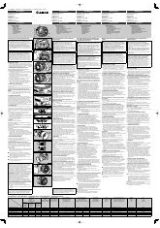
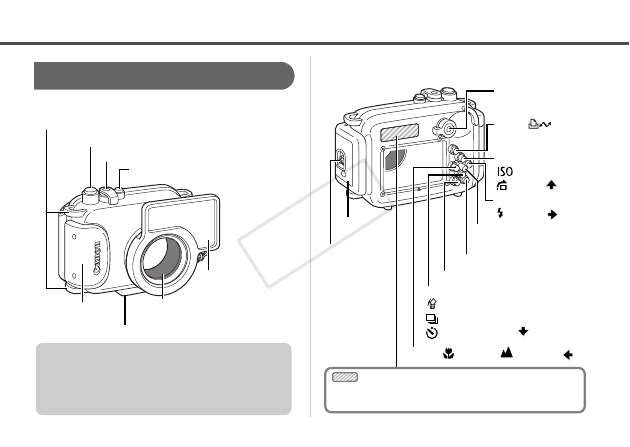
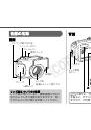
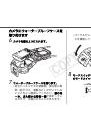
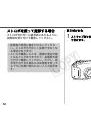
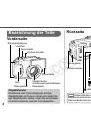
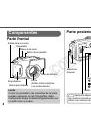
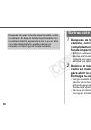
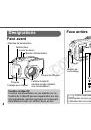
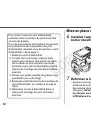
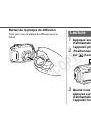
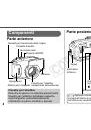
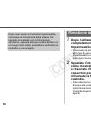
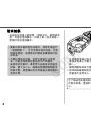
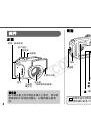
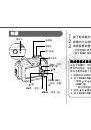
Parte frontal
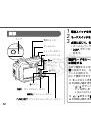
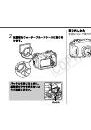
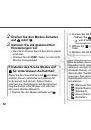
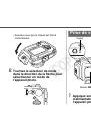
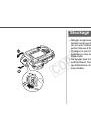
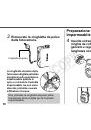
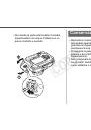
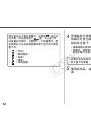
Parte posterior
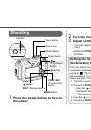
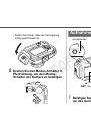
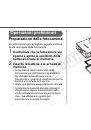
Componentes
Anillas para la correa
Disparador
Palanca de zoom
Rosca para trípode
Lente
(Doble cristal resistente
a la condensación)
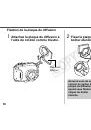
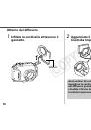
Placa de difusión
Botón de encendido
Empuñadura
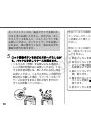
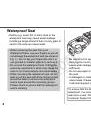
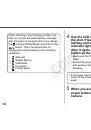
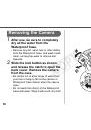
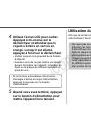
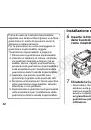
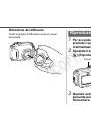
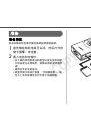
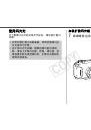
Lente
Como la suciedad o las manchas de la lente
pueden aparecer en las fotografías, debe
mantenerla limpia frotándola ligeramente con
un paño seco y suave.
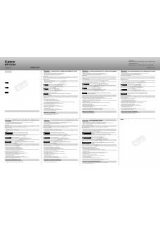
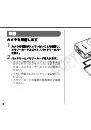
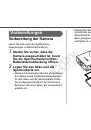
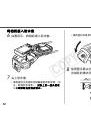
Botón
(Borrado de una sola imagen)/
(Disparo continuo)/
(Temporizador)/
Conmutador de
modo
Botón
(Velocidad ISO)/
(Salto)/
Botón
(Flash)/
Botón
FUNC./SET
(Función/ajuste)
Botón
MENU
(Menú)
Botón
DISP.
(Pantalla)
Botón
(Macro)/
(Infinito)/
Botón
(Imprimir/Compartir)
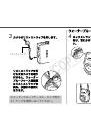
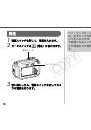
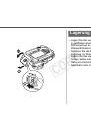
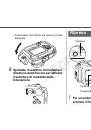
Cierre
Mando de
bloqueo
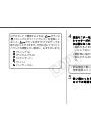
Aplique la etiqueta adhesiva de disposición de
los controles incluida en esta área como ayuda para
utilizar los controles de la cámara.
COP
Y
 1
1
 2
2
 3
3
 4
4
 5
5
 6
6
 7
7
 8
8
 9
9
 10
10
 11
11
 12
12
 13
13
 14
14
 15
15
 16
16
 17
17
 18
18
 19
19
 20
20
 21
21
 22
22
 23
23
 24
24
 25
25
 26
26
 27
27
 28
28
 29
29
 30
30
 31
31
 32
32
 33
33
 34
34
 35
35
 36
36
 37
37
 38
38
 39
39
 40
40
 41
41
 42
42
 43
43
 44
44
 45
45
 46
46
 47
47
 48
48
 49
49
 50
50
 51
51
 52
52
 53
53
 54
54
 55
55
 56
56
 57
57
 58
58
 59
59
 60
60
 61
61
 62
62
 63
63
 64
64
 65
65
 66
66
 67
67
 68
68
 69
69
 70
70
 71
71
 72
72
 73
73
 74
74
 75
75
 76
76
 77
77
 78
78
 79
79
 80
80
 81
81
 82
82
 83
83
 84
84
 85
85
 86
86
 87
87
 88
88
 89
89
 90
90
 91
91
 92
92
 93
93
 94
94
 95
95
 96
96
 97
97
 98
98
 99
99
 100
100
 101
101
 102
102
 103
103
 104
104
 105
105
 106
106
 107
107
 108
108
 109
109
 110
110
 111
111
 112
112
 113
113
 114
114
 115
115
 116
116
 117
117
 118
118
 119
119
 120
120
 121
121
 122
122
 123
123
 124
124
 125
125
 126
126
 127
127
 128
128
 129
129
 130
130
 131
131
 132
132
 133
133
 134
134
 135
135
 136
136
 137
137
 138
138
 139
139
 140
140
 141
141
 142
142
 143
143
 144
144
 145
145
 146
146