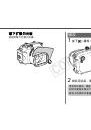
Страница 8 из 139 各部の名称 背面 前面 ストラップ取り付け部 シャッターボタン ズーム レバー 電源ボタン 露出補正 ダイヤル 拡散板 C Y P O ロック解除 レンズ窓 ボタン (結露しにくい二重ガラス) バックル 三脚ねじ穴 レンズ窓についてのご注意 レンズ窓が汚れていると、 撮影画像に汚れが写 り込んでしまう場合がありますので、 乾いたや わらかい布で軽く拭き取ってください。 モードダイヤル ISO ダイヤル (AE ロック /FE ロック)ボタン (ショートカット) ボタン 再生ボタン (AF フレーム選択)/ (1 画像消去)ボタン (測光) / (ジャンプ) ボタン (マニュアル
Страница 9 из 139 準備 3 カメラのストラップを外します。 カメラを準備します 1 カメラの電源が入っていないことを確認 し、カード / バッテリー収納部ふたを開き ます。 Y P O 2 バッテリーとメモリーカードを入れます。 ・ カメラで使用するバッテリーの型番およ びバッテリーとメモリーカードの入れか たは、 カメラユーザーガイドでご確認く ださい。 ・ 十分に充電されたバッテリーをお使いく ださい。 ・ メモリーカードの撮影可能枚数をご確認 ください。 C 8 メモリー カード ストラップ
Страница 10 из 139 ストラップを付けたま まカメラを取り付ける と、 ウ ォータ ープル ー フケース開閉部にスト ラ ップを 挟み、 水漏 れ の原因となります。 ウォータープルーフケースに、 カメラ用のスト ラップを使用しないでください。 Y P O ウォータープルーフケースを準備 します C 4 ネックストラップを図のように 2ヶ所に リストストラップ を取り付ける場合 取り付け、首にかけやすい長さに調節して ください。 ネックストラップは、海辺でカメラを首にかける ときにお使いください。水中では、ネックストラッ プを外して、リストストラップをお使いください。 ネックストラップをお使いになると、首に巻きつ
Страница 11 из 139 5 ロック解除ボタンを矢印の方向へずらしな がら、 バックルを外してケースを開きます。 ・ くもり止め (市販) をお使いになる場合 は、 レンズ窓の内側のみにお使いくださ い。 くもり止めを塗る際には、 乾いたやわ らかい布をお使いください。 くもり止め がレンズ窓の内側以外に付着した場合、 ウォータープルーフケースの劣化をまね く恐れがありますので、 すぐに拭き取っ てください。 ① C ③ 防水パッキンの摩耗や劣化を防ぐためウォー タープルーフケースを使用する前に、 パッキン 全面にごく薄くシリコングリースを塗ってく ださい。 防水パッキンの取り扱い上の注意について は、
Страница 12 из 139 カメラにウォータープルーフケース を取り付けます 6 カメラを図のように入れます。 C 7 ウォータープルーフケースを閉じます。 ・ 防水パッキンやその接触面、 接点部に異 物 (砂やゴミ、 頭髪など) が付いていない ことをよく確認してください。 髪の毛一 本、 また微小な砂粒一個が挟まっている だけで、 水漏れすることがあります。 ・ バックルがしっかりロックされているこ とを確認してください。 Y P O ① ② 11
Страница 13 из 139 撮影 ランプ 3 必要に応じて、各設定を行います。 モードダイヤル ズームレバー シャッターボタン 電源ボタン ・ DISPLAY ボタンを押して液晶モニター をつけます。 ・ ズームレバーで画角を調整できます。 Y P O 撮影モードをスペシャルシーンモードの (水中)に設定して撮影する ボタン ボタン C DISPLAY (ディスプレイ) ボタン (ショートカット)ボタン 1 電源ボタンを押して、電源を入れます。 2 モードダイヤルを任意の位置に合わせます。 12 水中で撮影するときに、 スペシャルシーンモー ドの に設定すると、 水中に最適なホワイト バランスに設定され、
Страница 14 из 139 、 、 、 、 で撮影するとき FUNC. メニューでホワイトバランスを (水 中) に設定できます。 また、 ボタンに また は (マニュアルホワイトバランス1または2) を登録しておくと、 ボタンを押すだけで白 データを取り込むことができます。 状況に応じ てホワイトバランスを調整したい場合に、 おす すめします。 ・ ファインダーを使っての撮影はできません。 コントローラーホイールの使いかた コントローラーホイールの使いかたは、 カメラ 本体での操作方法と異なります。 Y P O 4 液晶モニターを見ながら構図を決めます。 C ・ 節電機能が働いて電源が切れたときは、
Страница 15 из 139 取り付け方 ストロボを使って撮影する場合 ストロボ光が均一に被写体にあたるように、 拡散板を取り付けて撮影してください。 1 ストラップ取り付け部に、拡散板のひもを取 り付けます。 ・ 拡散板の表面に傷を付けないでください。 ストロボ光が正しく拡散できなくなる場合 があります。 ・ ストロボ撮影したとき、画像の周辺が暗く なることがありますので、拡散板を取り付 けて撮影してください。ただし、被写体が近 すぎる場合には拡散板を使っても十分に効 果が表われないことがあります。 C Y P O2 拡散板の先端を、 溝に差し込んで装着します。 溝 14 拡散板
Страница 16 из 139 取り外し方 再生 拡散板を持ち上げて取り外します。 1 (再生) ボタンを押します。 電源ボタン C Y P O 再生ボタン 2 使い終わったら、カメラの電源を切ります。 ウォータープルーフケースを使用したあとは、 必ずカメラを取り出してください。 カメラを入 れたまま、 直射日光のあたる場所や高温になる ところに放置しておくと、 発火や破裂などの原 因になることがあります。 15
Страница 17 из 139 カメラを取り出す 1 使用後は、ウォータープルーフケースに付 いている水滴を十分に拭き取ります。 ・ ウォータープルーフケースに付いている ゴミや砂、 頭髪などは取り除いてくださ い。 また、 真水でよく洗い流して、 塩分な どが残らないようにしてください。 2 ロック解除ボタンを矢印の方向へずらし C Y P O ながらバックルを外し、後部カバーを開 け、カメラを取り出します。 ・ ウォータープルーフケースを開ける際 に、 体や頭髪から、 ケース内またはカメラ に水滴が落ちないように注意してくださ い。 ・ ウォータープルーフケース内部は、 乾い た布で拭き、 水洗いしないでください。
Страница 18 из 139 主な仕様 保管するときは ●防水パッキンの変形を防いだり、防水効果 を保つため、ウォータープルーフケースを 開いた状態で保管してください。 ●防水パッキンにほこりや傷を付けないよう に保管してください。 ●高温、低温、多湿な場所や、 ナフタリンなど 防虫剤のある所での保管は避けてくださ い。 C 耐圧水深:40m (JIS保護等級8 (水中型) 準拠) 防水構造:パッキン、O リングなど 主要材質:ポリカーボネート、ABS、 白板ガラス、EPDM カメラ性能保証温度範囲:0 ~ 40 ℃ Y P O 大きさ:150.0 × 106.3 × 116.6mm (突起部を除く) 体積:約
Страница 20 из 139 English Disclaimer • While every effort has been made to ensure that the information contained in this guide is accurate and complete, no liability can be accepted for any errors or omissions. Canon reserves the right to change the specifications of the hardware and software described herein at any
Страница 21 из 139 Please read this manual carefully to operate the Waterproof Case correctly. Store this manual in a safe place for further reference once you have read it. Introduction • Thank you for purchasing this Waterproof Case. Once installed in the Waterproof Case, you can use your Canon Digital Camera in
Страница 22 из 139 Unpacking Sold Separately The Waterproof Case is shipped with the items listed below. Please check your package now to confirm that it is complete. Contact your Canon dealer if anything is missing. • Waterproof Case • Neck Strap • Wrist Strap • Diffusion Plate • Silicone Grease for the Waterproof
Страница 23 из 139 Safety Precautions Before you use the Waterproof Case, thoroughly read these precautions to ensure correct use. The precautions described below are for ensuring safe use of the Waterproof Case and for preventing danger and damage to yourself and others. Thoroughly understand the details of these
Страница 24 из 139 Handling Precautions • Do not drop or throw the Waterproof Case. • Use only the supplied silicone grease. Use of other waterproofing products may impair the strength of the Waterproof Case. If any other waterproofing product is mistakenly applied, wipe it off immediately. • Avoid opening or closing
Страница 25 из 139 About Water Leakage Waterproof Seal Stop shooting immediately if the Waterproof Case leaks. If you use the camera in this state, this may cause a fire or electric shocks. Never use it in this state. Thoroughly wipe the Waterproof Case interior and the camera dry. Please contact your Canon Customer
Страница 26 из 139 Care and Maintenance Fig. 1 Waterproof Seal • Be careful not to apply too much grease. Applying too much grease to the seal may cause water leakage (about a droplet is sufficient). • Do not use paper or cloth to apply the grease to the seal. • A damaged or cracked waterproof seal may cause leaks.
Страница 27 из 139 Components Front Back Strap Mounts Shutter Button Power Button Zoom Lever Lock Button Catch Tripod Socket Diffusion Plate C Since dirt or smudges on the lens window may show in photographs, keep the lens window clean by wiping it gently with a soft, dry cloth. 8 Y P O Lens Window
Страница 28 из 139 Preparations Preparing the Camera that the camera’s power is 1 Confirm off and open the memory card slot/ 2 battery cover. Insert the battery, and the memory card. • Please refer to the Camera User Guide for information regarding the type of battery to use with the camera and installation methods
Страница 29 из 139 Inserting the camera while the strap is attached could trap the strap in the Waterproof Case closure and cause leaks. Do not use the camera’s strap as a strap for the Waterproof Case. C Preparing the Waterproof Case both ends of the neck strap 4 Fasten to the strap mounts as shown, and Y P O When
Страница 30 из 139 the lock button as shown, 5 Slide and release the catch to open the back cover. • When using commercially available anticondensation products, the anticondensation solution should only be applied to the inside surface of the lens window using a soft cloth. If anticondensation solution comes in
Страница 31 из 139 the Waterproof Case. 7 Close • Make sure that the waterproof seal and its Installing the Camera 6 Insert the camera into the Waterproof Case as shown. contact surfaces are free of debris (e.g. sand, dirt or hair). Catching a single strand of hair or a tiny grain of sand in the seal can cause leaks.
Страница 32 из 139 Shooting Indicator the mode dial to any desired 2 Set position. settings as required. 3 Adjust • Press the DISPLAY button to turn on the Mode Dial Zoom Lever Shutter Button Power Button Button DISPLAY Button C Button (Shortcut) Button the power button to turn on 1 Press the power. LCD monitor. •
Страница 33 из 139 Shooting when the mode dial is set to , , or , You can set the white balance to (Underwater) using the FUNC. menu for the above modes. Please note that you can set the white balance manually with the press of a single button if you assign the or (Custom White Balance 1 or 2) function to the button.
Страница 34 из 139 Using the Flash Attaching the Diffusion Plate In order to evenly distribute light from the flash, please attach the diffusion plate. the cord through the strap 1 Thread mount. • Do not scratch the surface of the diffusion plate, as this may prevent flash light from being diffused properly. • When
Страница 35 из 139 Removing the Diffusion Plate Lift and remove the diffusion plate. Playback 1 Press the (Playback) button. Power Button C Y P O (Playback) Button When you have finished using the 2 camera, turn the camera off. After you use the Waterproof Case, be sure to remove the camera from it. If you leave the
Страница 36 из 139 Removing the Camera use, be sure to completely 1 After dry all the water from the Waterproof Case. • Remove any dirt, sand, hair or other debris from the Waterproof Case, and wash it with clean, running tap water to remove salt deposits. the lock button as shown, 2 Slide and release the catch to
Страница 37 из 139 Storage • Store your Waterproof Case carefully, in an opened state to prevent the waterproof seal from deforming and to maintain its waterproof effect. • Protect the waterproof seal from dust or scratches during storage. • Do not store the Waterproof Case in hot, cold or humid places, or near
Страница 38 из 139 Specifications Maximum Depth: 40 m (130 ft.) (Meets JIS protection class 8 for waterproofing.) Number of Separately Sold Waterproof Case Weights (WW-DC1) Recommended for Mounting: 4 weights Waterproofing: Seal, O-ring, etc. * Including diffusion plate Main Materials: Polycarbonate, ABS, clear plate
Страница 40 из 139 Deutsch Haftungsausschluss • Obwohl die in diesem Handbuch enthaltenen Informationen mit größter Sorgfalt auf Genauigkeit und Vollständigkeit überprüft wurden, kann für Fehler oder Versäumnisse keinerlei Haftung übernommen werden. Canon behält sich das Recht auf unangekündigte jederzeitige Änderung
Страница 41 из 139 Bitte lesen Sie diese Anleitung sorgfältig, um das wasserdichte Gehäuse richtig zu bedienen. Bewahren Sie diese Anleitung nach dem Lesen für späteres Nachschlagen an einem sicheren Ort auf. Einführung • Vielen Dank für den Kauf dieses wasserdichten Gehäuses. Das wasserdichte Gehäuse erlaubt es
Страница 42 из 139 Lieferumfang Sicherheitsmaßnahmen Das wasserdichte Gehäuse wird mit den unten aufgeführten Gegenständen geliefert. Bitte überprüfen Sie die Vollständigkeit. Wenden Sie sich an Ihren Canon-Händler, falls etwas fehlt. • Wasserdichtes Gehäuse • Schulterriemen • Handschlaufe • Streuscheibe •
Страница 43 из 139 • Nehmen Sie vor dem Einsatz unter Wasser den Schulterriemen ab und bringen Sie die Handschlaufe an. Es besteht die Gefahr, dass der Schulterriemen sich verfängt, jemanden stranguliert oder andere Unfälle verursacht. • Verwenden Sie das wasserdichte Gehäuse nicht in Wassertiefen von mehr als 40
Страница 44 из 139 Vorsichtsmaßnahmen bei der Bedienung • Werfen Sie das wasserdichte Gehäuse nicht, und lassen Sie es nicht fallen. • Verwenden Sie nur die beiliegende SilikonPaste. Durch die Verwendung anderer Dichtungsmittel kann die Dichtheit des wasserdichten Gehäuses beeinträchtigt werden. Falls versehentlich
Страница 45 из 139 Bei Eindringen von Wasser Hören Sie sofort auf zu fotografieren, wenn das wasserdichte Gehäuse undicht ist. Wenn die Kamera unter diesen Bedingungen verwendet wird, kann sich ein Brand entwickeln oder ein Stromschlag die Folge sein. Benutzen Sie die Kamera niemals unter diesen Umständen. Wischen
Страница 46 из 139 Pflege und Wartung Abb. 1 Dichtungsring (O-Ring) • Achten Sie darauf, nicht zu viel Silikon-Paste aufzutragen (ein Tropfen genügt). Sonst könnte ein Eindringen von Wasser die Folge sein. • Benutzen Sie zum Auftragen der Paste weder Papier noch Stoff. • Eine beschädigte oder rissige Dichtung kann
Страница 47 из 139 Bezeichnung der Teile Vorderseite Rückseite Riemenbefestigung ISO-Wahlrad Ein-/Aus-Schalter Auslöser Zoom-Hebel Entriegelungstaste Verriegelung Stativgewinde Modus-Wahlrad Streuscheibe C Y P O Da Schmutz oder Verunreinigungen auf dem Objektivfenster auf Fotos zu sehen sind, halten Sie das
Страница 48 из 139 Vorbereitungen Vorbereitung der Kamera Sie sich, dass die 1 Vergewissern Kamera ausgeschaltet ist; öffnen Sie den Speicherkarten-/Batterie-/ Akkufachdeckel. Sie die Batterien/Akkus und 2 Legen die Speicherkarte ein. • Weitere Informationen über die Verwendung der Batterien/Akkus sowie
Страница 49 из 139 Wenn Sie bei angebrachter Schlaufe die Kamera in das wasserdichte Gehäuse einlegen, kann die Schlaufe im wasserdichten Gehäuse eingeklemmt werden und zu Undichtigkeiten führen. Verwenden Sie die Schlaufe der Kamera nicht für das wasserdichte Gehäuse. C Y P O Vorbereitung des wasserdichten Gehäuses
Страница 50 из 139 Benutzen Sie den Schulterriemen, wenn Sie die Kamera am Strand tragen. Vor dem Einsatz unter Wasser nehmen Sie den Schulterriemen ab und bringen die Handschlaufe an. Es besteht die Gefahr, dass sich der Schulterriemen verheddert und zu Strangulation oder anderen Zwischenfällen führt. Sie die 5
Страница 51 из 139 Tragen Sie eine dünne Schicht Silikon-Paste auf den gesamten Dichtungsring auf, bevor Sie das wasserdichte Gehäuse verwenden, um Verschleiß und Schäden zu vermeiden. Vorsichtsmaßnahmen zur Verwendung des Dichtungsringes finden Sie unter „Dichtungsring“ auf Seite 6. 1. Entfernen Sie den
Страница 52 из 139 Sie das wasserdichte 7 Schließen Gehäuse. • Stellen Sie sicher, dass die Dichtung und ihre Kontaktflächen frei von Ablagerungen (z. B. Sand, Schmutz oder Haaren) sind. Ein einziges Haar oder Sandkorn in der Dichtung kann Lecks verursachen. • Stellen Sie sicher, dass die Verriegelung richtig
Страница 53 из 139 Sie das Modus-Wahlrad in 2 Bringen die gewünschte Position. Sie die gewünschten 3 Nehmen Einstellungen vor. • Drücken Sie die DISPLAY-Taste, um den LCD-Monitor einzuschalten. • Den Zoom können Sie mit dem ZoomHebel einstellen. Einstellen des Special Scene-Modus auf (Unterwasser) für
Страница 54 из 139 Sie den Bildausschnitt mit 4 Wählen dem LCD-Monitor. Drücken Sie den Auslöser halb hinunter, und warten Sie, bis die obere Anzeigelampe grün oder orange leuchtet. Wenn sie leuchtet, drücken Sie den Auslöser ganz hinunter. • Stellen Sie sicher, dass das Objektivfenster immer sauber ist. • Stellen
Страница 55 из 139 Handhabung des Blitzes Für eine gleichmäßige Lichtverteilung des Blitzlichts verwenden Sie die Streuscheibe. • Vermeiden Sie Kratzer auf der Oberfläche der Streuscheibe, da dies die gleichmäßige Streuung des Blitzlichts verringert. • Im Blitzmodus kann unten rechts am Bild ein Schatten erscheinen.
Страница 56 из 139 keine weitere Wiedergabe 2 Wenn erfolgen soll, schalten Sie die Wiedergabe Sie die Taste 1 Drücken (Wiedergabe). Kamera aus. Ein-/Aus-Schalter (Wiedergabe) -Taste C Denken Sie nach dem Gebrauch des wasserdichten Gehäuses daran, die Kamera aus diesem herauszunehmen. Wenn die Kamera in dem
Страница 57 из 139 Herausnehmen der Kamera Sie das wasserdichte 1 Trocken Gehäuse nach Gebrauch unbedingt gründlich ab. • Entfernen Sie Schmutz, Sand, Haare und andere Ablagerungen vom wasserdichten Gehäuse, und waschen Sie Salzrückstände mit sauberem, fließenden Leitungswasser ab. Sie die 2 Verschieben
Страница 58 из 139 Lagerung • Lagern Sie das wasserdichte Gehäuse sorgsam und in geöffnetem Zustand; dies verhindert, dass sich der Dichtungsring verformt und die Wasserdichtigkeit beeinträchtigt wird. • Schützen Sie die Dichtung während der Lagerung vor Staub oder Kratzern. • Lagern Sie das wasserdichte Gehäuse
Страница 59 из 139 Technische Daten Maximale Tiefe: 40 m (Entspricht JISSchutzklasse 8 für Wasserdichtigkeit.) Wasserabdichtung: Dichtungsring, O-Ring usw. Empfohlene Anzahl der gesondert erhältlichen Gewichte (WW-DC1) für das wasserdichte Gehäuse: Hauptmaterialien Polykarbonat, ABS, 0 bis 40 °C 20 * Einschließlich
Страница 60 из 139 Español Aspectos legales • A pesar de que no se han escatimado esfuerzos para garantizar que la información de esta guía sea precisa y completa, Canon Inc. no se hace responsable de los errores u omisiones que pudiera haber. Canon se reserva el derecho a cambiar en cualquier momento y sin previo
Страница 61 из 139 Para utilizar correctamente la funda impermeable, lea atentamente este manual. Después de haber leído este manual, guárdelo en un lugar seguro para futuras referencias. Introducción • Muchas gracias por la adquisición de esta funda impermeable. Una vez instalada en la funda impermeable, usted podrá
Страница 62 из 139 Contenido del embalaje Accesorio opcional La funda impermeable se envía con los accesorios indicados a continuación. Compruebe ahora si su paquete está completo. Si falta algo, póngase en contacto con su proveedor Canon. • Funda impermeable • Correa de cuello • Correa de muñeca • Placa de difusión
Страница 63 из 139 Precauciones de seguridad Antes de utilizar la funda impermeable, lea detenidamente estas precauciones para poder usarla correctamente. Las precauciones descritas a continuación son para permitir la utilización segura de la funda impermeable y para evitar peligros y daños tanto a usted mismo como a
Страница 64 из 139 • No dañe la junta hermética, no raye sus superficies de contacto, ni permita que se acumule suciedad, arena, pelos, ni otros restos entre la junta hermética y la funda. Esto podría provocar filtraciones. • No utilice la funda impermeable en agua con una temperatura superior a 40 °C (104 °F). El
Страница 65 из 139 • El traslado rápido de la funda impermeable entre lugares con temperaturas altas y bajas puede causar la condensación de humedad (gotas de agua) en sus superficies internas. Si ocurre esto, deje de usar la cámara inmediatamente, ya que la condensación puede provocar un mal funcionamiento. Extraiga
Страница 66 из 139 Fig. 1 Para asegurar la hermeticidad de la funda impermeable, se recomienda reemplazar anualmente la junta hermética. Póngase en contacto con su Centro de atención al cliente Canon. Cuidado y mantenimiento Junta hermética • Tenga cuidado de no aplicar demasiada grasa. La aplicación de grasa en
Страница 67 из 139 Componentes Parte frontal Parte posterior Anillas para la correa Botón de ENCENDIDO Botón de disparo Palanca de zoom Dial de modo Dial de ISO Botón de bloqueo Cierre Rosca para trípode 8 Y P O Placa de difusión C Dial de compensación de la exposición Objetivo (Doble cristal resistente a la
Страница 68 из 139 Preparativos Preparación de la cámara que la cámara está 1 Compruebe apagada y abra la tapa de la batería o la ranura de la tarjeta de memoria. la batería y la tarjeta de 2 Inserte memoria. • Consulte la Guía del usuario de la cámara para obtener información sobre el tipo de batería a utilizar con
Страница 69 из 139 Si introduce la cámara mientras la correa está colocada, podría quedar pillada en la junta hermética de la funda impermeable y causar la infiltración de agua. No utilice la correa de la cámara como correa para la funda impermeable. Preparación de la funda impermeable C la correa de cuello a las
Страница 70 из 139 el botón de bloqueo como 5 Deslice se muestra y suelte el cierre para abrir la cubierta trasera. • Cuando utilice productos contra condensación que se pueden adquirir en el mercado, la solución contra condensación se deberá aplicar sólo a la superficie interior del objetivo usando un paño suave. Si
Страница 71 из 139 Aplique una fina capa de grasa a toda la junta antes de utilizar la funda impermeable a fin de evitar la abrasión y el deterioro. En cuanto a las precauciones de manejo de la junta hermética, vea el apartado “Junta hermética” de la página 6. 1. Retire la junta hermética. 2. Usando un bastoncillo de
Страница 72 из 139 la funda impermeable. 7 Cierre • Cerciórese de que la junta hermética y sus superficies de contacto estén libres de restos (p. ej., arena, suciedad o pelos). Si quedase pillado un solo pelo o un diminuto grano de arena en la junta hermética, podría producirse una infiltración. • Cerciórese de que
Страница 73 из 139 el dial de modo a cualquier 2 Ajuste posición deseada. los ajustes requeridos. 3 Realice • Presione el botón DISPLAY para activar la pantalla LCD. • Puede ajustar el zoom con la palanca de zoom. Ajuste el modo de Escena especial en (Bajo el agua) y realice la fotografía Ajuste el Modo de escena
Страница 74 из 139 la pantalla LCD para 4 Utilice encuadrar el motivo. Presione el botón de disparo hasta la mitad de su recorrido y espere hasta que el indicador superior se encienda en verde o anaranjado. Una vez encendido, presione completamente el botón de disparo. • Cerciórese de que el objetivo esté siempre
Страница 75 из 139 Utilización del flash Para distribuir uniformemente la luz procedente del flash, fíjele la placa de difusión. • No raye la superficie de la placa de difusión, ya que esto podría evitar que la luz se difundiese adecuadamente. • Puede que aparezca una sombra en la parte inferior derecha de las
Страница 76 из 139 Extracción de la placa de difusión Levante y extraiga la placa de difusión de la forma que se muestra. Reproducción 1 Presione el botón (Reproducir). Botón de ENCENDIDO C Y P O Botón (Reproducir) haya terminado de utilizar 2 Cuando la cámara, apáguela. Después de usar la funda impermeable, retire
Страница 77 из 139 Extracción de la cámara de haber utilizado la 1 Después cámara, cerciórese de secar completamente el agua de la funda impermeable. • Elimine la suciedad, los pelos y demás partículas de la funda impermeable y lávela con agua corriente limpia para eliminar los depósitos de sal. el botón de bloqueo
Страница 78 из 139 Almacenamiento • Guarde la funda impermeable con cuidado, dejándola abierta para impedir que la junta hermética se deforme y para mantener el efecto impermeable. • Proteja la junta hermética contra el polvo y los arañazos durante el almacenamiento. • No guarde la funda impermeable en un lugar ni
Страница 79 из 139 Especificaciones Profundidad máxima: Peso: 40 m (130 pies) (Cumple con la clase 8 de las normas de protección JIS para la impermeabilización) Impermeabilidad: Junta hermética, junta tórica, etc. Materiales principales: Número de lastres para la funda impermeable vendidos aparte (WW-DC1)
Страница 80 из 139 Français Clause de non-responsabilité • Canon a apporté tout le soin requis afin de garantir l’exactitude et l’exhaustivité des informations contenues dans ce manuel, mais ne peut être tenue responsable des éventuelles erreurs ou omissions. Canon se réserve le droit de modifier à tout moment les
Страница 81 из 139 Veuillez lire attentivement ce manuel pour utiliser correctement votre boîtier étanche. Une fois que vous l’avez lu, conservez ce manuel dans un endroit sûr afin de pouvoir vous y référer ultérieurement. Introduction • Nous vous remercions d’avoir acheté ce boîtier étanche. Une fois votre appareil
Страница 82 из 139 Contenu de l’emballage Vendu séparément Le boîtier étanche est fourni avec les articles suivants. Vérifiez qu’ils figurent dans l’emballage et contactez votre revendeur Canon si l’un d’entre eux devait manquer. • Boîtier étanche • Collier • Dragonne • Plaque de diffusion • Graisse au silicone pour
Страница 83 из 139 Précautions de sécurité Avant d’utiliser le boîtier étanche, lisez attentivement ces précautions afin d’en faire un usage correct. Les précautions ci-dessous sont destinées à garantir une utilisation sûre du boîtier étanche et à éviter tout danger ou dégât pour vous-même ou des tiers. Comprenez
Страница 84 из 139 • Ne laissez pas le boîtier étanche en plein soleil, dans une voiture par temps chaud ou près d’un appareil de chauffage car le boîtier pourrait se gondoler entraînant une perte d’étanchéité. Si vous devez laisser le boîtier au soleil, prenez soin de le recouvrir, par exemple, d’une serviette.
Страница 85 из 139 À propos des infiltrations d’eau Joint d’étanchéité Si vous constatez une infiltration d’eau dans le boîtier étanche, arrêtez immédiatement la prise de vue. L’utilisation de l’appareil photo dans ces conditions présente un risque d’incendie ou de décharge électrique. Veillez à respecter
Страница 86 из 139 Entretien du boîtier Fig. 1 • Lavez abondamment l’extérieur du boîtier étanche avec de l’eau propre (eau du robinet à moins de 30 °C/86 °F, etc.) dès que vous cessez de l’utiliser. Nous vous conseillons en particulier de le plonger dans de l’eau douce pendant plusieurs heures après son utilisation
Страница 87 из 139 Désignations Face avant Attaches du collier Déclencheur Bouton d’alimentation Levier du zoom Cliquet Bouton de verrouillage Encoche pour trépied Face arrière Molette modes C Molette de correction de l’exposition Y P O Étant donné que toute poussière ou saleté présente sur la fenêtre de l’objectif
Страница 88 из 139 Préparartifs Préparation de l’appareil photo que l’appareil photo est 1 Vérifiez éteint et ouvrez le couvercle du logement de la carte mémoire/ batterie. la batterie et la carte 2 Insérez mémoire. • Pour les informations relatives au type de batterie à utiliser avec l’appareil photo et les
Страница 89 из 139 Si vous insérez l’appareil photo alors que le collier est attaché, il risque de se coincer dans le joint d’étanchéité lors de la fermeture du boîtier étanche et d’entraîner des infiltrations d’eau. N’utilisez pas le collier comme collier pour le boîtier étanche. C Préparation du boîtier étanche le
Страница 90 из 139 glisser le bouton de 5 Faites verrouillage comme indiqué sur l’illustration et libérez le cliquet pour ouvrir le couvercle arrière. • Lors de l’utilisation de produits anti-buée en vente dans le commerce, la solution antibuée ne doit être appliquée que sur la surface intérieure de la fenêtre de
Страница 91 из 139 Pour éviter l’usure du joint d’étanchéité, enduisez toute la surface du joint d’une fine couche de graisse. Pour de plus amples informations concernant les précautions de manipulation du joint d’étanchéité, reportez-vous à la section « Joint d’étanchéité » de la page 6. 1. Retirez le joint
Страница 92 из 139 le boîtier étanche. 7 Refermez • Assurez-vous que le joint d’étanchéité et ses surfaces de contact ne sont pas souillés par des saletés (grains de sable, poussières, cheveux). Un minuscule grain Prise de vue Molette modes Voyant Levier du zoom de sable ou un cheveu sur le joint peut entraîner des
Страница 93 из 139 la molette modes sur 2 Positionnez le mode de votre choix. les réglages nécessaires. 3 Faites • Appuyez sur le bouton DISPLAY pour activer l’écran LCD. • Vous pouvez ajuster le zoom à l’aide du levier de zoom. Réglage du mode de scène spéciale sur (Sous-marin) pour prendre une photo Réglez le mode
Страница 94 из 139 l’écran LCD pour 4 Utilisez composer la prise de vue. Appuyez à mi-course sur le déclencheur et attendez que le voyant supérieur devienne vert ou orange. Lorsqu’il est allumé, appuyez à fond sur le déclencheur. • Veillez toujours à la propreté de la fenêtre d’objectif. • Veillez à ce que vos doigts
Страница 95 из 139 Utilisation du flash Pour une répartition uniforme de la lumière, fixez la plaque de diffusion. • Ne rayez pas la surface de la plaque de diffusion car cela pourrait empêcher le flash d’être diffusé correctement. • Lors de la prise de vue au flash, certaines parties de l’image peuvent être sombres.
Страница 96 из 139 Retrait de la plaque de diffusion Soulevez et retirez la plaque de diffusion comme indiqué. Lecture 1 Appuyez sur le bouton (Lecture). Bouton d’alimentation C Y P O Bouton (Lecture) vous avez fini d’utiliser 2 Lorsque l’appareil, éteignez-le. Lorsque vous n’utilisez plus le boîtier étanche, veillez
Страница 97 из 139 Retrait de l’appareil photo soin d’enlever toute trace 1 Prenez d’eau du boîtier étanche. • Enlevez la poussière, les cheveux et autres particules du boîtier étanche et lavez-le à l’eau courante pour éliminer les dépôts de sel. glisser le bouton de 2 Faites verrouillage comme indiqué sur
Страница 98 из 139 Stockage • Rangez soigneusement le boîtier étanche ouvert pour éviter de déformer le joint d’étanchéité et préserver ses performances d’étanchéité. • Protégez le joint d’étanchéité contre la poussière et les éraflures pendant les périodes d’inactivité. • Ne rangez pas le boîtier étanche dans un
Страница 99 из 139 Fiche technique Profondeur maximum sous l’eau : Poids : 40 mètres (130 pieds) (Conforme à la protection JIS classe 8 pour l’étanchéité.) Étanchéité : Dispositif d’étanchéité, joint torique, etc. Matériaux : Polycarbonate, ABS, plaque de verre transparente, EPDM, etc. C Température d’utilisation de
Страница 100 из 139 Italiano Dichiarazione di non responsabilità • Canon ha compiuto ogni sforzo per assicurare che Ie informazioni contenute nella presente Guida siano precise e complete e non si assume alcuna responsabilità in caso di errori od omissioni. Canon si riserva il diritto di modificare, in qualsiasi
Страница 101 из 139 Vi preghiamo di leggere attentamente questo manuale per utilizzare correttamente la Custodia Impermeabile. Una volta che avete letto questo manuale conservatelo in un posto sicuro per ulteriori consultazioni. Introduzione • Vi ringraziamo per aver acquistato la Custodia Impermeabile. Una volta
Страница 102 из 139 Disimballaggio La Custodia Impermeabile viene spedita con i prodotti elencati di seguito. Controllate immediatamente la confezione e verificate che contenga tutte le parti indicate. Se dovesse mancare qualcosa, contattate il rivenditore Canon da cui avete acquistato la Custodia Impermeabile. •
Страница 103 из 139 • Non utilizzate la Custodia Impermeabile come salvagente personale (giubbotto di salvataggio). • Non utilizzate la cinghia da collo nell’acqua. Prima di utilizzare la Custodia in acqua, rimuovete la cinghia da collo e montate la cinghietta da polso. La cinghia da collo potrebbe impigliarsi e
Страница 104 из 139 Precauzioni di impiego • Non fate cadere la Custodia Impermeabile. • Utilizzate solamente il grasso al silicone fornito. L’utilizzo di altri prodotti impermeabilizzanti potrebbe diminuire la resistenza della Custodia Impermeabile. Qualora venisse applicato per errore un altro prodotto
Страница 105 из 139 Infiltrazioni d’acqua Guarnizione Impermeabile Nel caso in cui si verifichi un’infiltrazione d’acqua, smettete immediatamente di utilizzare la Custodia Impermeabile. Se usate la fotocamera in queste condizioni correte il rischio che s’incendi o che emetta scosse elettriche. Non usarla mai in queste
Страница 106 из 139 Manutenzione della Guarnizione Impermeabile Fig. 1 • Lavate l’esterno della Custodia Impermeabile con acqua pulita (acqua corrente di rubinetto inferiore a 30°C, ecc.) entro breve tempo dall’uso. Dopo averla utilizzata nell’acqua marina, è particolarmente consigliabile immergerla nell’acqua pulita
Страница 107 из 139 Componenti Parte anteriore Parte posteriore Gancetti per l’inserimento della cinghia Ghiera di selezione Ghiera di ISO Ghiera di Pulsante (Blocco AE/Blocco FE) compensazione Pulsante (Lettura luce)/ esposizione (Salto) Pulsante di alimentazione Pulsante di scatto Leva dello zoom Diffusore C
Страница 108 из 139 Preparazioni Preparazione della fotocamera digitale che la fotocamera sia 1 Controllate spenta e aprite lo slot della scheda di memoria/coperchio della batteria. la batteria e la scheda di 2 Inserite memoria. C • Consultate la Guida dell’utente della fotocamera per informazioni riguardanti il tipo
Страница 109 из 139 L’inserimento della fotocamera con la cinghia attaccata potrebbe intrappolare la cinghia nella Custodia Impermeabile e causare infiltrazioni. Non utilizzate la cinghia della fotocamera come cinghietta per la Custodia Impermeabile. Preparazione della Custodia Impermeabile C Y P O Per applicare la
Страница 110 из 139 l’interruttore di blocco 5 Spostate come mostrato nell’illustrazione, e rilasciate il fermo per aprire il coperchio posteriore. • Quando utilizzate prodotti anticondensa, disponibili in commercio, applicate la soluzione anticondensa solo all’interno della superficie dell’obiettivo, usando un panno
Страница 111 из 139 Prima di usare la Custodia Impermeabile, applicate uno strato sottile di grasso su tutta la guarnizione in modo da prevenire rischi di abrasioni e deterioramento. Per le precauzioni su come maneggiare la Guarnizione Impermeabile, leggete “Guarnizione Impermeabile” a pagina 6. 1. Rimuovete la
Страница 112 из 139 la Custodia Impermeabile. 7 Chiudete • Assicuratevi che non vi sia alcun materiale estraneo sulla Guarnizione Impermeabile e sulle sue superfici di contatto (ad es. sabbia, polvere o capelli). Anche un solo capello o un granellino di sabbia depositatosi sulla guarnizione potrebbe essere causa
Страница 113 из 139 la ghiera di selezione 2 Impostate sulla posizione desiderata. le impostazioni come 3 Regolate richiesto. • Premete il pulsante DISPLAY per fare accendere il monitor LCD. • È possibile regolare lo zoom usando la leva zoom. Impostazione della modalità scene speciali su (Subacqueo) per effettuare lo
Страница 114 из 139 il monitor LCD per 4 Utilizzate comporre lo scatto. Premete Utilizzo della ghiera di comando leggermente (per metà) il pulsante di scatto ed attendete fino a quando l’indicatore superiore emette una luce verde o arancione. Quando si accende, premete completamente il pulsante di scatto. •
Страница 115 из 139 Utilizzo del Flash Per distribuire uniformemente la luce del flash, fissate il diffusore. • Non graffiate la superficie del diffusore, perchè ciò potrebbe impedire alla luce del flash di diffondersi correttamente. • Quando si usa il flash, nell’angolo inferiore destro dell’immagine potrebbe
Страница 116 из 139 Rimozione del diffusore Riproduzione Sollevate e rimuovete il diffusore. 1 Premete il pulsante (Riproduzione). Pulsante di alimentazione C Y P O Pulsante (Riproduzione) termine dell’utilizzo della 2 Al fotocamera, spegnetela. Dopo aver usato la Custodia Impermeabile, rimuovete la fotocamera dalla
Страница 117 из 139 Rimozione della fotocamera digitale l’utilizzo, asciugate 1 Dopo completamente la Custodia • Non lavate la parte interna della Custodia Impermeabile con acqua. Pulitela con un panno morbido e asciutto. Impermeabile. • Togliete ogni traccia di sporco, sabbia, capelli o altri detriti dalla Custodia
Страница 118 из 139 Conservazione • Riponete la Custodia Impermeabile con cura, lasciandola aperta per evitare che la Guarnizione Impermeabile si deformi e per mantenere la sua impermeabilità. • Proteggete la Guarnizione Impermeabile da polvere o da scalfiture durante la conservazione. • Non conservate la Custodia
Страница 119 из 139 Specifiche tecniche Profondità massima: Peso: 40 m (conforme alle norme di protezione JIS di classe 8 per l’impermeabilità) Impermeabilizzazione: Guarnizione, anello di tenuta, ecc. Materiali Principali: C Policarbonato, ABS, vetro trasparente, EPDM, ecc. Temperatura di Funzionamento della
Страница 125 из 139 保养方法 图1 防水封条 Y P O • 注意请勿涂抹过多的润滑脂。将过多的润滑脂涂 抹 在 封 条 上 可 能 会 造 成 漏 水 (约 一 小 滴 已 足 够)。 • 请勿用纸张或布片将润滑脂涂抹在封条上。 • 防水封条的损伤和裂缝可能会引致漏水。请联系 佳能客户支持中心。 C 为了维持防水套的防水性能,推荐一年更换一 次防水封条。更换时,请联系佳能客户支持中 心。 6 • 使用后请尽快用足够的清水(低于30℃的自来水 等)彻底清洗防水套的外部。在海水中使用过 后,为了去除沉淀的盐分,建议在清水中浸泡几 小时。请确保已将扣环锁紧以防水分进入防水 套。清洗后,请用软的干布擦干防水套。为避免
Страница 126 из 139 部件 正面 背面 模式转盘 背带 / 腕带带扣 快门按钮 电源键 变焦杆 扩散闪光板 C 锁定键 扣环 曝光补偿转盘 Y P O ISO 转盘 (自动曝光锁定 / 闪光曝光锁 定)键 (测光方式)/ (跳换)键 镜头窗 (防结露双层玻璃) 三脚架螺丝孔 镜头窗 因为镜头窗变脏后,可能会在图像上留下污垢 的痕迹,所以请用柔软的干布轻轻地擦拭,以 保持镜头窗清洁。 (手动对焦)/ 键 (闪光灯)/ 键 FUNC./SET (功能 / 设置)键 MENU(菜单)键 (快捷)键 (播放)键 (自动对焦框选择器)/ (单张图像删除)键 (连拍)/ (自拍)/ 键 DISPLAY(显示)键 (微距)/
Страница 127 из 139 准备 准备相机 1 确认相机电源已关闭,然后打开存储 卡插槽 / 电池盖。 2 插入电池和存储卡。 • 关于相机所用的电池的类型以及电池和存储 3 取下相机的系带。 Y P O 卡的安装方式等信息,请参阅相机使用者指 南。 • 请用已充足电的电池。 • 请确定您的存储卡上有足够的存储空间记录 您的图像。 C 存储卡 8 系带
Страница 128 из 139 不取下系带时插入相机, 关闭防水套时系带可能会 夹在防水套中,从而导致 漏水。 请勿将相机的系带用作防水套的系带。 准备防水套 C Y P O 腕带的装法 4 请如图所示将背带两端固定在背带带 扣上,并调节至舒适长度。 在海边时请使用背带携带相机。在水中使用前, 请解下背带并系上腕带。否则会有背带缠绕引 起窒息或其他伤害的危险。 9