21.
20.
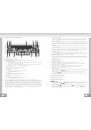
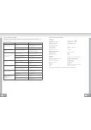
DISC CLEANING AND MAINTENANCE
Please note:
In addition to normal audio CDs, this unit can play CD-R and CD-RW discs that contain audio tracks
as well. However, depending on the conditions of the recording equipment, recording program or the
CD-R or CD-RW disc itself, some CD-R or CD-RW may not play.
When burning music to CD-R or CD-RW discs, too high recording speed may result in poor signal
quality and therefore it is recommended to select 24X or lower speed for CD recording and 4X lower
speed for CD-RW recording.
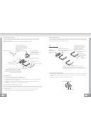
Handling of CDs
* Remove the CD from its cover.
* Do not touch the surfaces.
* Do not attach stickers to CDs and do not write on them.
* Do not bend CDs.
Storage
* Always store CDs in their cover.
* Do not subject discs to direct sunlight, dirty, dusty and damp areas or car heaters.
Cleaning
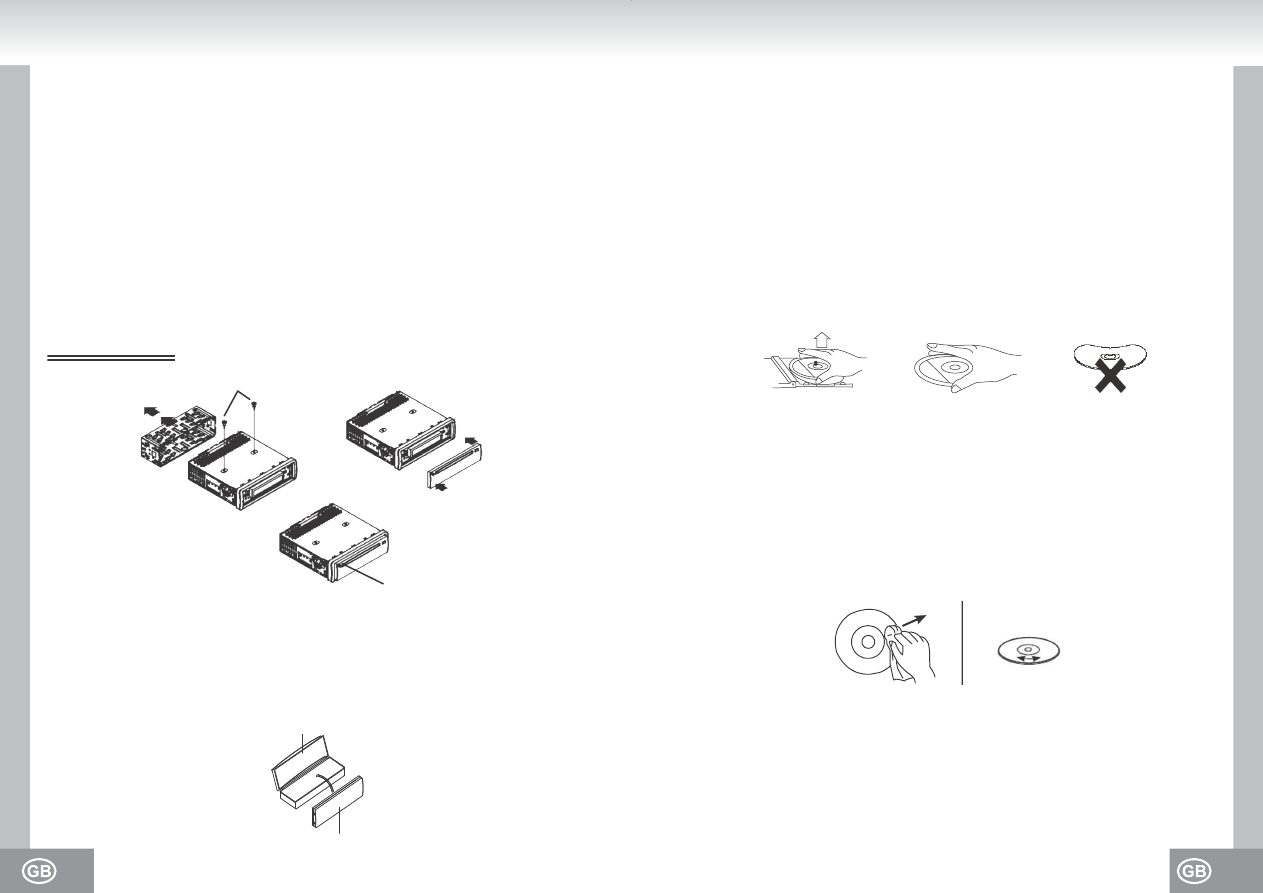
* Clean CDs with a soft cloth.
* Clean CDs from the center to the edge.
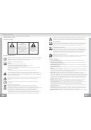
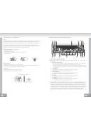
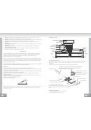
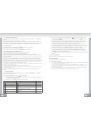
FROM THE CENTRE TO THE EDGE
CORRECT
INCORRECT
PRECAUTIONS AND MAINTENANCE
1. If the car interior is extremely hot after being parked in the sun, do not use the player until the car
has been driven for a while to cool off the interior.
2. Keep the front panel in its protective case.
PLEASE NOTE:
1. Must use 4Ω impedance speakers.
2. Do not short circuit antenna and earth cables.
3. The unit is designed for negative terminal of the battery, which is connected to the vehicle metal.
Please confirm it before installation.
4. Do not short circuit speaker cables as this may damage unit or speakers
5. Connect all cables before attaching the front panel.
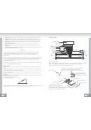
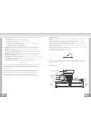
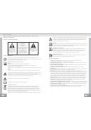
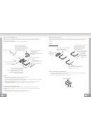
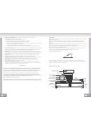
How to remove and install the front panel
When detaching or attaching the control panel, be careful not to damage the connectors on the back
of the control panel and on the panel holder and ensure the unit is switched off.
1. Press the release button and the left hand side of the front panel will release.
2. Remove the front panel and keep the front panel in the protective case.
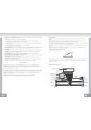
Installing the front panel
First insert the right hand side of the front panel into the housing of the unit, then push the left hand
side of the front panel and make sure the panel is properly installed, now press SEL briefly to switch
the device on.
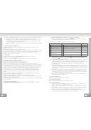
NOTE
REMOVE THE SLIDING
METAL HOUSING AWAY
REMOVE AWAY 2 SCREWS
FOR PROTECT THE DECK
BEFORE OPERATING IT.
TO INSTALL THE FRONT
PANEL BACK INTO THE UNIT
CHASSIS, FIRSTLY INSTALL
THE RIGHT SIDE BACK
INTO THE RIGHT
POSITION, THEN
PUSH THE
LEFT SIDE
BACK TO THE
UNIT CHASSIS
TILL OK.
PRESS THIS BUTTON TO DETACH THE FRONT PANEL FROM THE HEAD
UNIT AND THEN TAKE THE FRONT PANEL AWAY FROM THE HEAD UNIT.
PROTECTIVE CASE
FRONT PANEL