9
a
uDIo
s
teerIng
w
heel
c
ontrols
h
eaD
-u
P
D
IsPlay
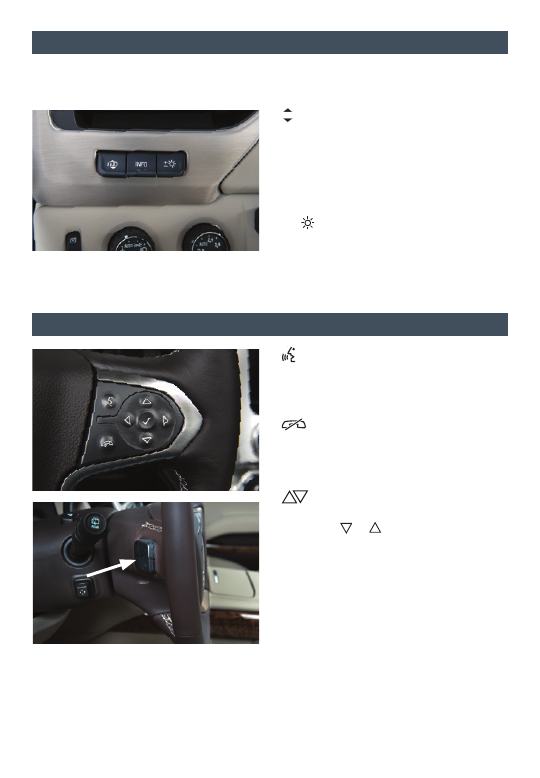
Push to Talk
Press to answer an incoming call or to use
natural voice recognition with the audio,
Bluetooth, navigation or OnStar
®
system.
End Call/Mute
Press to end or reject a call.
Press to mute/unmute the vehicle
speakers.
Next/Previous
With the Audio screen displayed on the
DIC, press or to seek the previous
or next radio station or track.
Volume
(behind right side of steering wheel)
Press the top or bottom button to adjust
the volume.
Next/Previous Favorite Station
(behind left side of steering wheel)
Press the top or bottom button to display
the current station or track. Press the top
or bottom button again to go to the next or
previous favorite radio station or track.
See your Infotainment System Owner Manual.
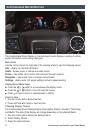
The Head-Up Display (HUD) projects some operating information onto the windshield.
The HUD controls are located on the left side of the instrument panel.
HUD
HUD
Lift up or press down to adjust the position
of the image on the windshield. It cannot
be adjusted side-to-side.
INFO
Press to select a display view.
+ –
Lift up or press down to brighten or dim the
display. Hold down to turn off the display.
See Instruments and Controls in your Owner Manual.
Next/Previous Favorite Station button shown.
Volume button is located behind the right side of
the steering wheel.