13
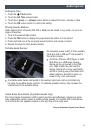
Navigation System
F
Note: When the vehicle is moving, various on-screen functions are disabled to reduce
driver distraction.
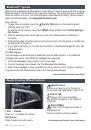
Controls
NAV Navigation
Press to view the vehicle’s current position on the map screen.
DEST Destination
Press to access the Route screen to enter a destination or plan a route.
RPT Repeat
Press to repeat the last voice guidance prompt.
To select various functions, touch the highlighted touch screen buttons in the on-screen
menus or use the MENU/SEL knob.
Entering a Destination
1. Press the DEST control button.
2. Touch one of the Select Destination menu options to plan a route. If you know the
specific address, touch the Address Entry screen button.
3. Enter the State/Province, City and Street name. Touch the List screen button to select
the desired name from the generated list for each entry.
4. Enter the house number. Touch the DONE screen button.
5. If the displayed address is correct, touch the GO screen button.
6. Select the route preference and touch the Start Guidance screen button.
See your Infotainment System Owner Manual.
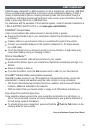
Rear Seat Entertainment System
F
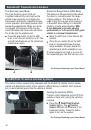
Play a DVD Video
1. Press the release button on the seatback consoles to raise the screens.
2. Insert a DVD into the audio system.
3. Press the DVD screen button to select the DVD source. Sound will play through the
vehicle speakers.
4. To use the wireless headphones, press the On/Off button on the headphones, select
Channel 1, and adjust the volume using the headphone volume control.
5. To control DVD playback, use the audio controls or the remote control. For best
performance, aim the remote control at the driver-side seatback console.
Changing the Source on the Video Screens
Continually press the AUX button on the remote control to play a DVD or an auxiliary
device, such as a video game, on both screens or a different source on each screen.
See your Infotainment System Owner Manual.
F
Optional equipment