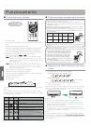
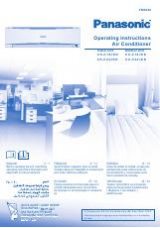
Please read this operation manual before using the air conditioner.
●
Keep this operation manual for future reference.
SPLIT TYPE ROOM AIR CONDITIONER
OPERATION MANUAL
0010563992
AS07ZS2ERA
AS09ZS2ERA
AS12ZS2ERA
AS18ZS2ERA
9
1
2
8
5
Contents
Contenido
11
12
15
18
19
Indice
21
22
25
28
29
Table des matières
31
39
32
35
38
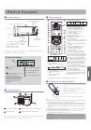
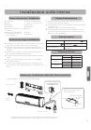
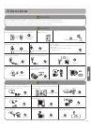
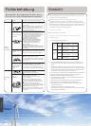
PARTS AND FUNCTIONS
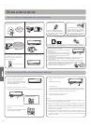
OPERATION
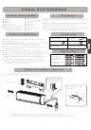
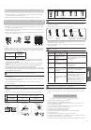
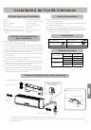
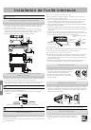
INDOOR UNIT INSTALLAION
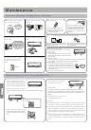
MAINTENANCE
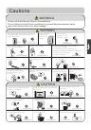
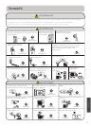
CAUTIONS
TROUBLE SHOOTING
10
INSTALACIÓN DE LA UNIDAD INTERIOR
MANTENIMIENTO
PRECAUCIONES
RESOLUCIÓN DE PROBLEMAS
PARTES Y FUNCIONES
FUNCIONAMIENTO
20
PARTI E FUNZIONI
FUNZIONAMENTO
INSTALLAZIONE UNITÀ INTERNA
MANUTENZIONE
AVVERTENZE
RISOLUZIONE DEI PROBLEMI
30
ÉLÉMENTS ET FONCTIONS
UTILISATION
INSTALLATION DE L'UNITÉ INTÉRIEURE
ENTRETIEN
MISES EN GARDE
DÉPANNAGE
40
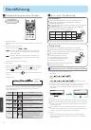
TEILE UND FUNKTIONEN
....................................... 41
BETRIEB
................................................................... 42
INSTALLATION DES INNENGERÄTS
...................... 45
WARTUNG
................................................................ 48
VORSICHTSMASSNAHMEN
.................................... 49
FEHLERBEHEBUNG
................................................ 50
Inhalt
Deutsch