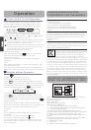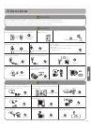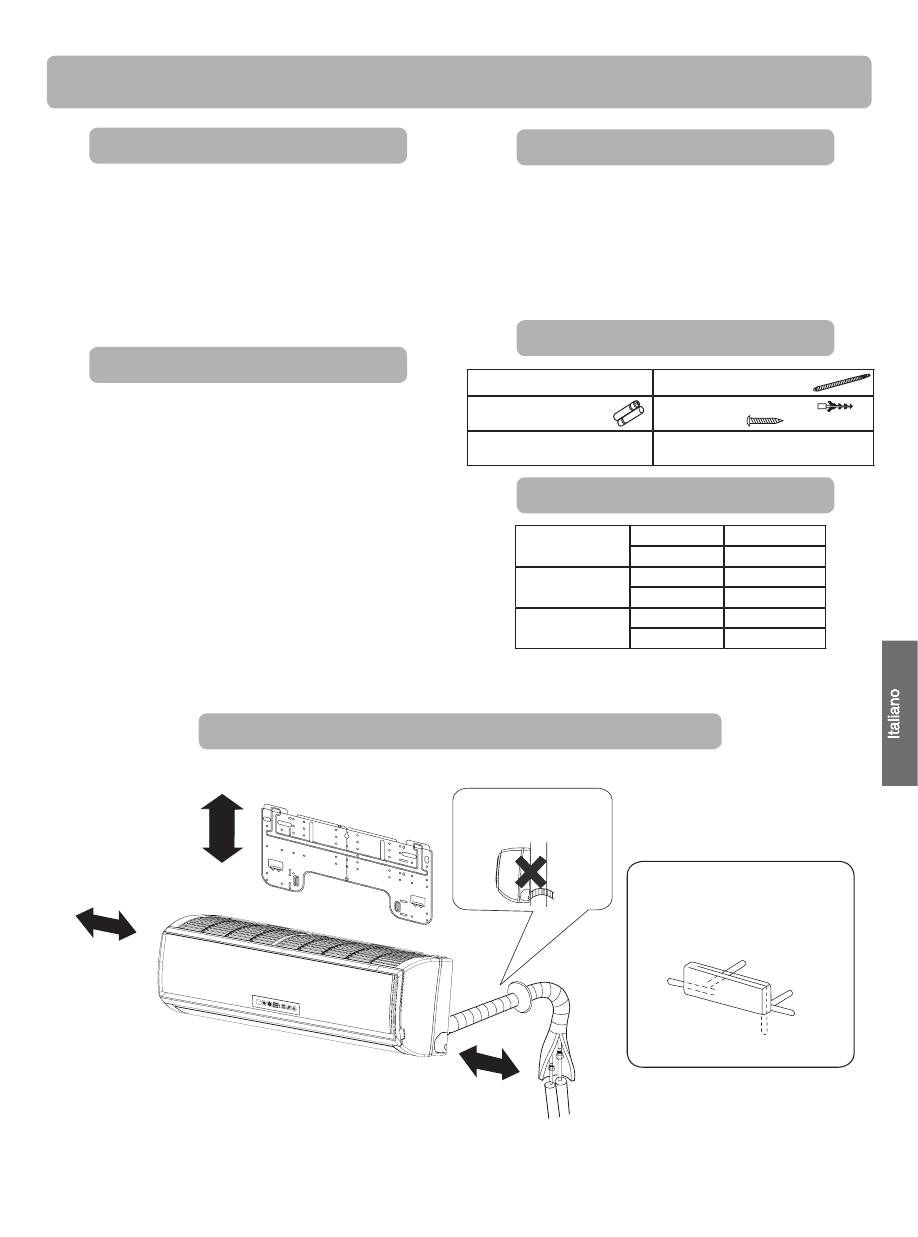
Installazione unità interna
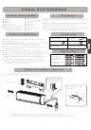
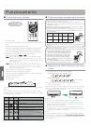
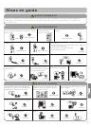
Cacciavite
Chiave dinamometrica
(17 mm, 22 mm, 26 mm)
Pinza
Seghetto
Tagliatubi
Carotatrice
Allargatubi
Chiave per bulloni (17, 19
e 26 mm)
Lama
Rilevatore di perdite del
gas oppure soluzione d’
acqua saponata
Metro
Alesatrice
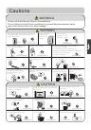
Prima di collegare la spina alla presa di corrente, accer-
tarsi che la tensione sia corretta.
L'alimentazione deve essere uguale a quella dell'etichetta
corrispondente.
Installare un circuito derivato della corrente.
Ad una certa distanza deve essere installato un ricetta-
colo dove poter raggiungere il cavo d’alimentazione. Non
allungare il cavo tagliandolo.
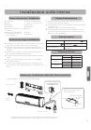
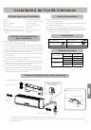
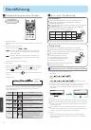
Telecomando (1)
Tubo flessibile di scarico (1)
Batteria a secco R-03 (2)
Coperchio di plastica (4)
Viti Ø4X25 (4)
Piastra di montaggio (1)
Filtro di purificazione dell'aria
(opzionale) (1)
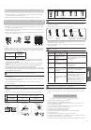
PER 07K 09K 12K
Tubo per liquidi Ø 6,35 x 0,8 mm
Tubo per gas
Ø 9,52 x 0,8 mm
PER 18K
Tubo per liquidi Ø 6,35 x 0,8 mm
Tubo per gas
Ø 12,7 x 0,8 mm
PER 24K
Tubo per liquidi Ø 9,52 x 0,8 mm
Tubo per gas
Ø 15,88 x 1,0 mm
Attrezzi necessari per l’’installazione
I modelli adottano il refrigerante senza HFC R410A
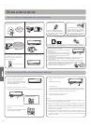
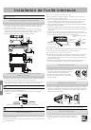
più di 15 cm
Deve essere prestata atten-
zione al sollevamento del
tubo flessibile di scarico
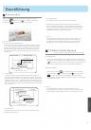
Disposizione della direzio-
ne delle tubature
Sinistra
Posteriore sinistra
Posteriore
destra
Destra
Inferiore
La distanza tra l’unità interna e il pavimento deve essere superiore ai 2 m.
Attenersi al prodotto acquistato: le immagini sono solo per riferimento.
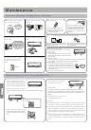
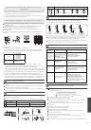
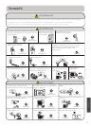
Selezione del luogo d’installazione
Origine d'alimentazione
Parti accessorie
Selezione dei tubi
Schema per l'installazione dell'unità interna ed esterna
più di
10 cm
più di 10 cm
25
Installare in un luogo solido, senza vibrazioni, in grado di
supportare in modo sufficiente il peso dell’unità.
Luogo non soggetto a calore o vapore generato nelle
vicinanze, dove i rubinetti e gli scarichi dell’unità non sono
disturbati.
Luogo dove lo scarico è semplice, dove le tubature pos-
sono essere collegate all'unità esterna.
Luogo da dove l’aria fredda può essere diffusa in tutta la
stanza.
Luogo vicino ad una presa di corrente, con sufficiente
spazio libero attorno.
Luogo ad una distanza superiore ad 1 m da dove si tro-
vano televisori, radio, apparati wireless e lampade fluore-
scenti.