GB
3
V
entilation
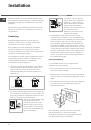
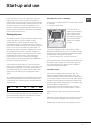
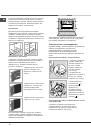
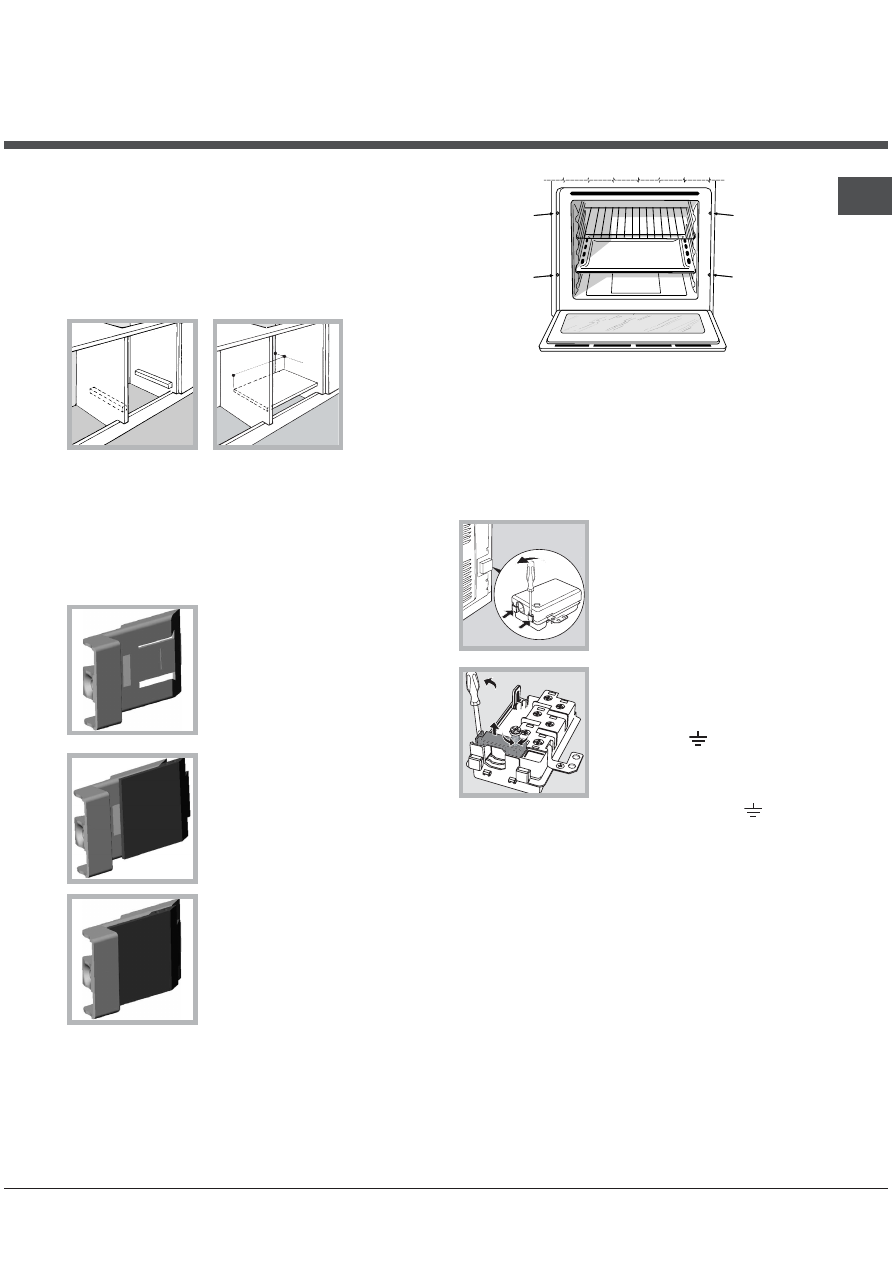
To ensure adequate ventilation, the back panel of
the cabinet must be removed. It is advisable to
install the oven so that it rests on two strips of wood,
or on a completely flat surface with an opening of at
least 45 x 560 mm (
see diagrams
).
C
ent
r
in
g
an
d
f
a
s
tenin
g
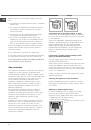
Position the 4 tabs on the side of the oven according
to the 4 holes on the outer frame. Adjust the tabs
according to the thickness of the cabinet side panel,
as shown below:
20 mm thick: take off the
removable part of the tab (
see
diagram
).
18 mm thick: use the first
groove, which has already
been set in the factory (
see
diagram
).
16 mm thick: use the second
groove (
see diagram
).
Secure the appliance to the cabinet by opening the
oven door and fastening 4 screws into the 4 holes of
the outer frame.
All parts ensuring the safe operation of the
appliance must not be removable without the aid of
a tool.
E
le
c
t
r
i
c
al
c
onne
c
tions
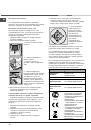
Ovens equipped with a three-pole power supply
cable are designed to operate with alternating
current at the voltage and frequency indicated on
the data plate located on the appliance (
see below
).
F
ittin
g
t
h
e
p
o
w
er
suppl
y
ca
b
le
1. Open the terminal board by
inserting a screwdriver into the
side tabs of the cover. Use
the screwdriver as a lever by
pushing it down to open the
cover (
see diagram
).
2. Loosen the cable clamp
screw and remove it, using a
screwdriver as a lever (see
figure).
3. Remove the wire contact
screws L-N-
, then fasten
the wires under the screw
heads, respecting the colour
code: Blue (N), Brown (L) and
Yellow-Green Verde ( ).
Connecting
the
suppl
y
ca
b
le
to
the
mains
Install a standardised plug corresponding to the
load indicated on the data plate (
see adjacent box
).
The appliance must be directly connected to the
mains using an omnipolar circuit-breaker with a
minimum contact opening of 3 mm installed between
the appliance and the mains. The circuit-breaker
must be suitable for the charge indicated and must
comply with current electrical regulations (the
earthing wire must not be interrupted by the circuit-
breaker). The supply cable must not come into
contact with surfaces with temperatures higher than
50°C.
The installer must ensure that the correct electrical
connection has been made and that it is compliant
with safety regulations.
560
mm
.
45 mm
.