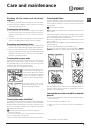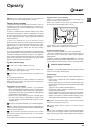
EN
26
Rinse aid and refined salt
Only use products which have been specifically designed
for dishwashers.
Do not use table/industrial salt or washing-up liquid.
Follow the instructions given on the packaging.
If using a multi-functional product it is not necessary to add
any rinse aid. However,
we recommend that you add salt,
especially if you live in an area where the water is hard or
very hard.
(Follow the instructions given on the packaging).
If you do not add salt or rinse aid, the LOW SALT
*
and
LOW RINSE AID indicator lights will stay lit.
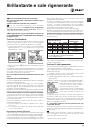
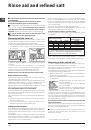
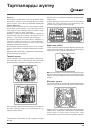
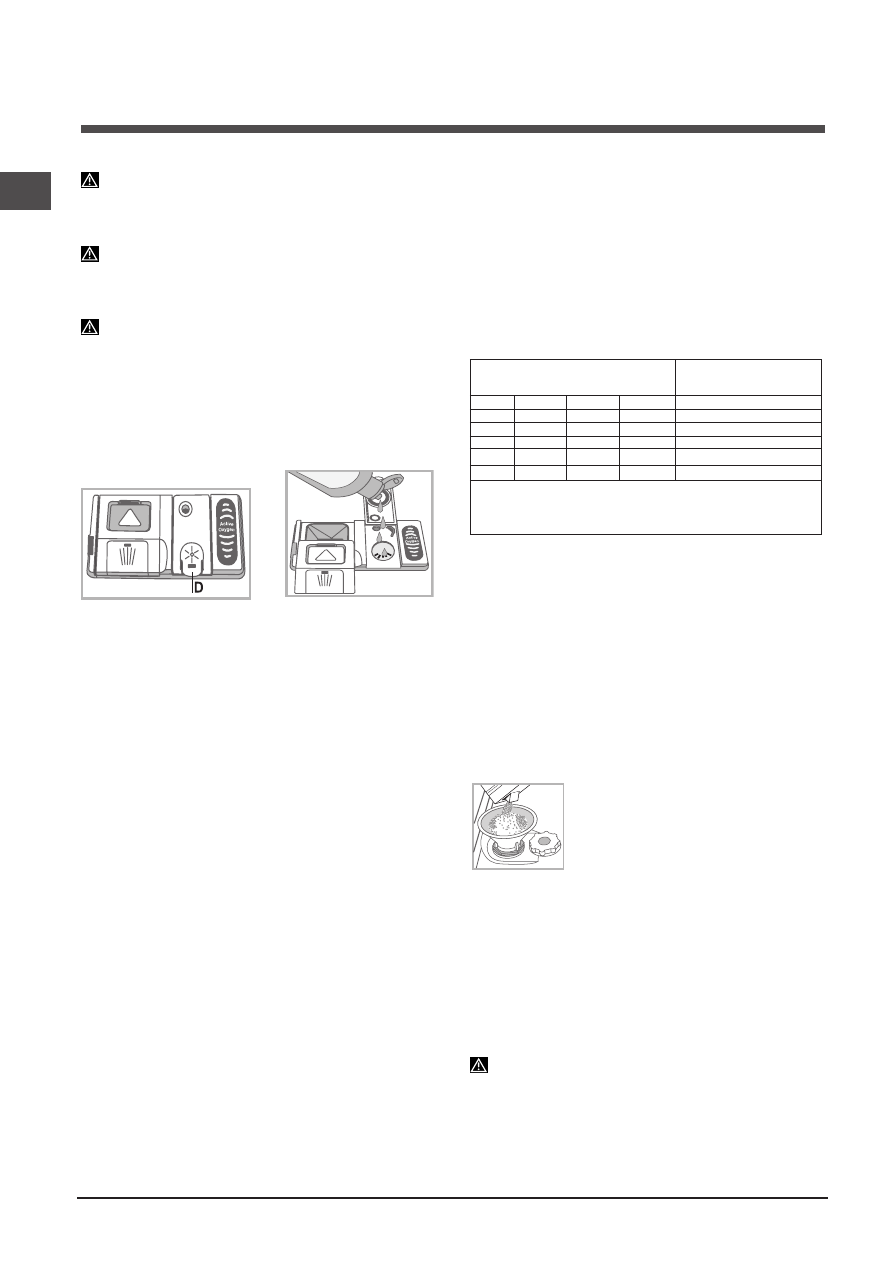
Measuring out the rinse aid
Rinse aid makes it easier for the crockery to dry, as water runs off
the surfaces more readily and therefore does not leave streaks
or marks. The rinse aid dispenser should be filled:
• When the LOW RINSE AID indicator light
*
on the control panel
is illuminated, a reserve supply of rinse aid is still available
for 1-2 cycles;
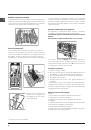
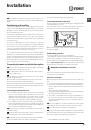
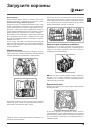
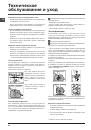
1. Open the dispenser
“D”
by pressing and pulling up the tab
on the lid;
2. Carefully introduce the rinse aid as far as the maximum
reference notch of the filling space - avoid spilling it. If this
happens, clean the spill immediately with a dry cloth.
3. Press the lid down until you hear a click to close it.
NEVER pour the rinse aid directly into the appliance tub.
Rinse-aid dispenser setting
If you are not completely satisfied with the drying results, you
can adjust the quantity of rinse aid.
Switch the dishwasher on and off using the On/Off button. Press
the
P
button 3 times. Switch on using the ON/OFF button, the
indicator light of the set level flashes
(set to factory level).
Adjust the level of rinse aid supply using the
P
button; during
this procedure the rinse aid indicator light flashes.
Press the ON/OFF button to save the setting.
If the rinse aid level is set to ZERO (ECO cycle), no rinse aid will
be supplied. The LOW RINSE AID indicator light will not be lit if
you run out of rinse aid.
Up to maximum 4 levels can be set based on the dishwasher
model.
• If there are streaks on the crockery, set the adjustment device
to a lower number (1-2.)
• If there are drops of water or limescale marks, set the
adjustment device to a higher number (3-4.)
Setting the water hardness
Every dishwasher is equipped with a water softener which, by
using refined salt specially designed for this type of appliance,
supplies water without limescale which is then used to wash
the crockery.
This dishwasher offers a setting which helps to reduce pollution
and optimises washing performance in accordance with the
water hardness level in your area. This information can be
obtained from your local water supplier.
Switch the dishwasher on and off using the ON/OFF button.
Press and hold the
P
button for a few seconds until you hear
a beep sound. Switch the dishwasher on using the ON/OFF
button, the indicator light of the set level flashes
(water softener
set to medium level).
During this procedure the salt indicator light flashes.
Adjust the hardness level using the
P
button,
(1-2-3-4-5
*
see
water hardness table)
up to max. 5
*
levels.
Press the ON/OFF button to save the setting.
Even if using multi-functional tablets, the salt dispenser should
still be filled.
(°dH = hardness measured in German degrees - °f = hardness
measured in French degrees – mmol/l = millimoles per litre)
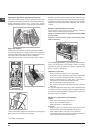
Measuring out the refined salt
In order to obtain the best possible results from a wash cycle,
make sure that the salt dispenser is never empty.
Refined salt removes limescale from the water, thus avoiding
the formation of deposits on crockery.
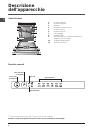
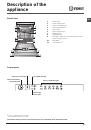
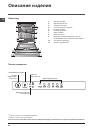
The salt dispenser is located in the lower part of the dishwasher
(see Description)
and should be filled:
• When the green float
*
cannot be seen by simply looking at
the cap of the salt dispenser;
• When the LOW RINSE AID indicator light on the control panel
is illuminated
*
;
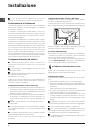
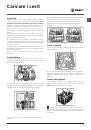
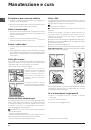
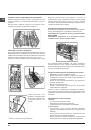
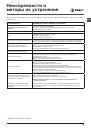
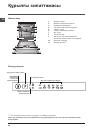
1. Remove the lower rack and unscrew the
cap (anticlockwise).
2. The first time you do this: fill the water tank
right up to its edge.
3. Position the funnel
*
(see figure)
and fill the
salt dispenser up to the edge (approximately
1 kg). It is normal for a little water to leak out.
4. Remove the funnel* and wipe any salt residues away from
the opening; rinse the cap under running water and then screw
it on, the head facing downwards so as to let the water flow out
of the four slots (star-shaped arrangement) in the lower part of
the cap (cap with green float
*
).
It is advisable to perform this procedure every time you add
salt to the dispenser.
Make sure the cap is screwed on tightly so that no detergent can
get into the container during the wash cycle (this could damage
the water softener beyond repair).
When necessary, measure out the salt before a wash cycle
so that any saline solution which has leaked out of the salt
dispenser is removed.
*
Only available in selected models.
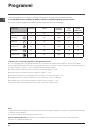
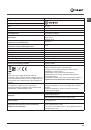
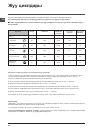
Water Hardness Table
Average salt container
capacity duration
**
Level
°dH
°fH
mmol/l
months
1
0 - 6
0 - 10
0 - 1
7 months
2 6 - 11
11 - 20
1,1 - 2
5 months
3 12 - 17 21 - 30
2,1 - 3
3 months
4 17 - 34 31 - 60
3,1 - 6
2 months
5
*
34 - 50 61 - 90
6,1 - 9
2/3 weeks
For values between 0°f and 10°f, we do not recommend the
use of salt. * this setting may cause a slight increase in the
duration of the cycles. ** for 1 wash cycle per day.
M
A
X