Инструкция для INDESIT K 3C0 M R

(скачивание инструкции бесплатно)
Формат файла: PDF
Доступность: Бесплатно как и все руководства на сайте. Без регистрации и SMS.
Дополнительно: Чтение инструкции онлайн
background image

18

Practical Cooking Advice

The oven offers a wide range of alternatives which allow you
to cook any type of food in the best possible way. With time
you will learn to make the best use of this versatile cooking
appliance and the following directions are only a guideline
which may be varied according to your own personal
experience.

Baking cakes
The oven should always be warm before putting in cakes
wait till the end of preheating (about 10-15 min.). Cake-baking
temperatures are normally around 160°C/200°C. Do not open
the oven door during the baking process as this could cause
the cake to sink.In general:
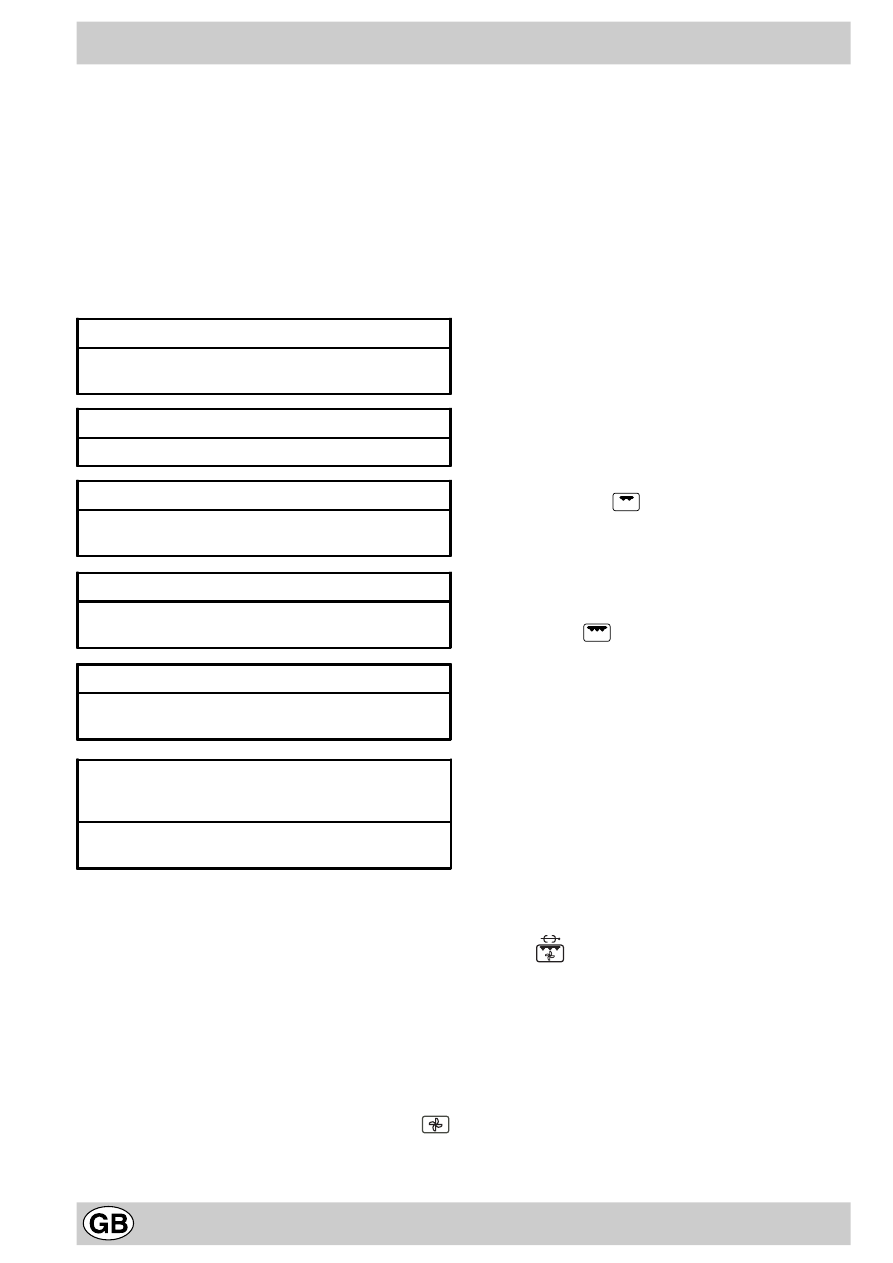
Pastry is too dry

Increase the temperature by 10°C and reduce the

cooking time.

Pastry dropped

Use less liquid or lower the temperature by 10°C.

Pastry is too dark on top

Place it on a lower rack, lower the temperature, and
increase the cooking time.

Cooked well on the inside but sticky on the outside

Use less liquid, lower the temperature, and increase the

cooking time.

The pastry sticks to the pan

Grease the pan well and sprinkle it with a dusting of
flour or use greaseproof paper.

I used more than one level (in the function

"ventilated oven") and they are not all at the same

cooking point

Use a lower temperature setting. It is not necessary to
remove the food from all the racks at the same time.

Cooking fish and meat
When cooking white meat, fowl and fish use low temperatures.
(150°C-175°C). When red meat must be superficially well-
cooked but succulent inside, it is advisable to start with a
high temperature (200-220°C) for a short time, and then to
reduce it at a later point. Generally speaking, the more meat
there is, the lower the temperature and the longer the cooking
time should be.Place the meat in the centre of the grid and
put a spill-tray underneath to catch grease drips. Insert the
grid so that it is in the middle of the oven. If more heat from
below is required, use the 1° bottom shelf.

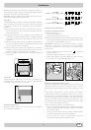
Cooking on More Than One Rack
Should you need to use two grids, use only function 2 
ventilated oven” which is the only solution for this process.

·

The oven has 5 different rack heights. When cooking with
the ventilated mode, use only the two centre rack heights:

the bottom and topmost rack heights directly receive hot
air and this could result in more delicate dishes being
burned.

·

In general, use levels 2 and 4 from the bottom, placing
the food requiring more heat at level no. 2. For example,
when cooking a roast together with other food, place the
roast at level 2 and the more delicate dishes at level 4.

·

When cooking foods requiring different cooking times and
temperatures, make sure that the temperature is set be-
tween the two recommended temperatures and put the
more delicate dishes at level no. 4. Finally, remove the
dish with the shorter cooking time first.

·

Use the dripping pan at the bottommost rack height and
the grill at the top.

·

When cooking pizza on more than one rack with the tem-
perature set at 220°C. Remember to preheat the oven
for at least 15 minutes. In general the 4th rack height
cooks a little slower, so remove the pizza on the second
rack height first and leave the other one in the oven for a
few minutes.

Using the Grill
The oven allows you to use two different grilling methods.
Use the no. 3 setting 

 “Grill” for small portions. Energy

consumption for this feature is only 1200 W; however, it is
ideal for grilling small dishes or portions, e.g. toast, frankfurt-
ers, etc.
Place the food in the centre of the grill, as only the cen-
tre of the heating element is turned on. Food in the cor-
ners of the oven will not be cooked.
The no. 4 setting 

 “Double Grill” allows you to grill along

the entire surface area of the grill itself. Use this feature when
you have food distributed uniformly beneath the grill and you
want it to be browned evenly.
Important: Always leave the oven door closed when us-
ing the grill setting 
 n order to achieve the best results and
save on energy (about 10%).
When using the grill settings, it is recommended that the
thermostat be set to maximum, as this is the optimal setting
for the grill, which utilizes radiation produced by infrared rays.
However, this does not mean that lower temperature set-
tings cannot be used when necessary by simply turning the
control knob.
When using the grill, place the rack  at the 4 rack heights
(see cooking table) and place the dripping-pan beneath the
oven rack to prevent grease from falling onto the bottom of
the oven.

Setting 5 

 “Ventilated Double Grill”, is extremely use-

ful for grilling foods rapidly, as the distribution of heat makes
it possible not only to brown the surface, but also to cook the
bottom part. It can also be used to grill large pieces of meat
or fowl. Moreover, it can also be used for browning foods at
the end of the cooking process.
When using this function, place the grid on the 2nd or 3rd
oven rack from the bottom (see cooking table) then, to pre-
vent fat and grease from dripping onto the bottom of the
oven and thus smoke from forming, place a dripping-pan on
the 1st rack from the bottom. When using this function to-
gether with the spit (only on some models), you can also
cook dishes on the dripping-pan situated on the 1st rack, for
example: potatoes, etc…….

1
2
3
4
5
6
7
8
9
10
11
12
13
14
15
16
17
18
19
20
21
22
23
24
25
26
27
28
29
30
31
32
33
34
35
36
37
38
39
40
41
42
43
44
45
46
47
48
49
50
51
52
Оглавление инструкции
  • Страница 1 из 53
    Cucina Installazione e uso Cooker Installation and use Cuisinière Installation et emploi Êóõoííaÿ ïëèòà Óñòàíîâêà è ïîëüçîâàíèå Sporák Instalace a použití K 3C0 M/R K 3C7 M/R
  • Страница 2 из 53
    Cucina con forno multifunzione e piano vetroceramica Istruzioni per l'installazione e l'uso 3 Cooker with multifunction oven and ceramic hob Instructions for installation and use Cuisinière avec four multifonction et table vitrocéramique Instruction pour l'installation et l'emploi 22 Ïëèòà ñ
  • Страница 3 из 53
    Importante Per garantire l'EFFICIENZA e la SICUREZZA di questo elettrodomestico: • rivolgetevi esclusivamente a centri di assistenza tecnica autorizzati • richiedete sempre l'utilizzo di parti di ricambio originali 1 Questo apparecchio è stato concepito per un uso di tipo non professionale
  • Страница 4 из 53
    27 Durante l'uso dell'apparecchio gli elementi riscaldanti e alcune parti della porta forno diventano molto calde. Fare attenzione a non toccarle e tenere i bambini a distanza 28 controllare sempre che le manopole siano nella posizione "o"/"o" quando l'apparecchio non è utilizzato; 29 Avvertenza:
  • Страница 5 из 53
    essere sufficiente per il carico e deve essere conforme alle norme vigenti (il conduttore di terra non deve essere interrotto dall'interruttore). Il cavo dell'alimentazione deve essere posizionato in modo tale da non superare 50°C più della temperatura ambiente per tutta la sua lunghezza. Prima di
  • Страница 6 из 53
    La cucina con forno multifunzione D E F G H K I M N N Q Leccarda o piatto di cottura Cruscotto Piedini o gambe regolabili Manopola di selezione Spia luminosa verde Griglia ripiano del forno Manopole piastre elettriche La spia termostato Manopola del timer Manopola del termostato Orologio con
  • Страница 7 из 53
    4. . Il "Doppio grill" - Posizione manopola "G": - Posizione manopola "N": Max. Un grill più grande dei soliti e con un disegno del tutto nuovo: il rendimento di cottura è aumentato del 50%. Il doppio grill elimina le zone angolari di assenza di calore. Importante: Per ottenere risultati di cottura
  • Страница 8 из 53
    Orologio con contaminuti rustico Funzione contaminuti Nel funzionamento contaminuti viene impostato un tempo dal quale comincia un conto alla rovescia. Questa funzione non controlla l'accensione e lo spegnimento del forno, ma emette solamente un allarme acustico a tempo scaduto. Come impostare il
  • Страница 9 из 53
    ponendo il cibo che necessita di maggior calore sul ripiano 2. Ad esempio: nel caso in cui voleste cucinare un arrosto con un altro tipo di alimento, ponete l'arrosto al secondo livello e l'alimento più delicato sul quarto. · Quando cucinate alimenti che richiedono tempi e temperature di cottura
  • Страница 10 из 53
    Istruzioni sull'uso del piano di cottura in ceramica Istruzioni per l'uso del piano di cottura in vetroceramica Per ottenere dal piano di cottura i migliori risultati possibili, seguire alcune regole fondamentali al momento di preparare o cucinare i cibi. · Sui piani di cottura in vetroceramica è
  • Страница 11 из 53
    Consigli pratici per la cottura Manopola di selezione Cibo da cucinare Peso (Kg) Posizione di cottura dal basso Tempo di riscaldamento (min.) Manopola del termostato Durata della cottura (min.) 1 Statico Anatra Roast beef Arrosto di maiale Biscotti Crostate 1 1 1 1 3 3 3 3 3 15 15 15 15 15 200 200
  • Страница 12 из 53
    Manutenzione ordinaria e pulizia del forno Scollegare il forno dalla fonte di elettricità prima di effettuare qualsiasi operazione di manutenzione o pulizia. Perché il forno duri il più a lungo possibile, pulirlo frequentemente e con cura, tenendo sempre a mente che: · le parti smaltate e i
  • Страница 13 из 53
    Important To maintain the EFFICIENCY and SAFETY of this appliance, we recommend: • call only the Service Centers authorized by the manufacturer • always use original Spare Parts 1 This appliance is intended for non-professional use within the home. 2 Before using the appliance, carefully read the
  • Страница 14 из 53
    Installation The following instructions should be read by a qualified technician to ensure that the appliance is installed, regulated and technically serviced correctly in compliance with current regulations. Important: disconnect the cooker from the electricity when making any adjustement,
  • Страница 15 из 53
    Technical Specifications Oven Dimensions (WxDxH) Volume Oven absorption Max 39x41x34 cm 54 lt 2100 W Ceramic Hob Front Left Back Left Back Right Front Right Hob Ceramic absorption Max This appliance conforms with the following European Economic Community directives: 1200 W 1700 W 1200 W 1700 W 5800
  • Страница 16 из 53
    How To Use Your Appliance 2. Ventilation Mode - Position of the “G” knob: - Position of the “N” knob: between 50°C and Max Since the heat remains constant and uniform throughout the oven due to the fan at the behind, the air cooks and browns food uniformly over its entire surface. With this mode,
  • Страница 17 из 53
    the oven. This helps prevents foods from burning on the surface, allowing the heat to penetrate into the food. Excellent results are achieved with kebabs made with meats and vegetables, sausages, ribs, lamb chops, chicken, quail, pork chops, etc. This mode is also ideal for cooking fish steaks,
  • Страница 18 из 53
    Practical Cooking Advice The oven offers a wide range of alternatives which allow you to cook any type of food in the best possible way. With time you will learn to make the best use of this versatile cooking appliance and the following directions are only a guideline which may be varied according
  • Страница 19 из 53
    User's instructions the ceramic hob Description The hobs have been provided with radiant electric heaters. These heaters are incorporated under the surface of the hob as zones which redden while they are in use. A. Cooking area (A). B. A lights which indicate whether the corresponding heaters are
  • Страница 20 из 53
    Practical Cooking Advice Selection knob Food to be cooked Wt. (Kg) Cooking position from bottom Heating time (min.) Thermostat knob Cooking time (min.) 1 Static Duck Roast beef Roast pork Biscuits Tarts 1 1 1 1 3 3 3 3 3 15 15 15 15 15 200 200 200 180 180 65-75 70-75 70-80 15-20 30-35 2 Fan oven
  • Страница 21 из 53
    Routine maintenance and cleaning of the oven Disconnect the oven from the source of electricity before performing any maintenance or cleaning. To ensure a long life for your oven, clean it frequently and carefully, keeping in mind that: · the enamelled parts and the self-cleaning panels should be
  • Страница 22 из 53
    Important Pour garantir l'EFFICACITE et la SECURITE de cet électroménager : • adressez-vous exclusivement à des Centres d'assistance technique agréés • exigez toujours l'utilisation de pièces détachées originales. 1 Cet appareil a été conçu pour un usage familial, de type non professionnel. 2 Avant
  • Страница 23 из 53
    Installation Les instructions suivantes sont destinées à l'installateur qualifié pour lui permettre d'effectuer les opérations d'installation, de réglage et d'entretien technique de façon correcte et conformément aux normes en vigueur. Important : coupez l'alimentation électrique de la cuisinière
  • Страница 24 из 53
    Caractéristiques Techniques Four Dimensions (LxPxH) Volume Absorption Max. four 39x41x34 cm 54 l 2100 W Plan de cuisson vitrocéramique Avant gauche Arrière gauche Arrière droit Avant droit Absorption Max. plan de cuisson vitrocéramique Cet appareil est conforme aux Directives Communautaires
  • Страница 25 из 53
    Mode d'emploi de la cuisinière sur le premier ou le deuxième gradin en partant du bas vous obtiendrez plus de chaleur dans la partie inférieure. Pour sélectionner les différentes fonctions du four, servezvous des dispositifs de commande de son tableau de bord. Attention : avant d'utiliser le four
  • Страница 26 из 53
    Voyant de fonctionnement du four (L) Il signale la montée en chaleur du four. Il s'éteint dès que la température à l'intérieur du four a atteint la température sélectionnée à l'aide du bouton. Le voyant commence alors à s'allumer et à s'éteindre à tour de rôle pour signaler le fonctionnement du
  • Страница 27 из 53
    Conseils utiles pour la cuisson Le four vous offre de nombreuses possibilités de cuisson appropriées à chaque type d'aliment. Les notes qui suivent ne sont par conséquent qu'indicatives, vous pourrez les enrichir au gré de votre expérience personnelle. Cuisson de la pâtisserie Réchauffez toujours
  • Страница 28 из 53
    Mode d'emploi de la table vitrocéramique Description Les tables de cuisson sont équipées de foyers électriques radiants incorporés au-dessous de la surface du plan de cuisson (zones qui deviennent rouges en cours de fonctionnement). A. Zone de cuisson (A). B. Voyants lumineux qui indiquent si la
  • Страница 29 из 53
    Practical Cooking Advice Bouton sélection Poids (Kg) Position gradins en partant du bas Préchauffage (min.) Bouton thermostat Durée cuisson (min.) 1 Traditionnel Canard Roast-beef Rôti de porc Biscuits Tartes 1 1 1 1 3 3 3 3 3 15 15 15 15 15 200 200 200 180 180 65-75 70-75 70-80 15-20 30-35 2 Four
  • Страница 30 из 53
    Maintenance ordinaire et entretien du four Avant toute opération de nettoyage ou d'entretien, déconnectez le four. Pour prolonger la durée de vie de votre four, nettoyez-le fréquemment et avec soin, en n'oubliant pas que : · les parties émaillées et les panneaux autonettoyants doivent être lavés à
  • Страница 31 из 53
    Áåçîïàñíîñòü — õîðîøàÿ ïðèâû÷êà 1. 2. 3. 4. 5. 6. 7. 8. 9. 10. 11. 12. 13. 14. Íå êàñàéòåñü ïëèòû, åñëè Âàøè ðóêè èëè íîãè ìîêðûå èëè ñûðûå, íå ïîëüçóéòåñü îáîðóäîâàíèåì áîñèêîì. 15.  ñîîòâåòñòâèè ñ îáùèìè òðåáîâàíèÿìè Ãîñóäàðñòâåííîé Ïðîòèâîïîæàðíîé ñëóæáû íå îñòàâëÿéòå ïëèòó áåç ïðèñìîòðà. 16.
  • Страница 32 из 53
    Óñòàíîâêà Ýòîò ðàçäåë ïðåäíàçíà÷åí äëÿ êâàëèôèöèðîâàííûõ òåõíèêîâ è ñîäåðæèò èíñòðóêöèè ïî óñòàíîâêå è îáñëóæèâàíèþ ïëèòû â ñîîòâåòñòâèè ñ äåéñòâóþùèìè íîðìàìè áåçîïàñíîñòè. Âàæíî: ïåðåä ëþáûìè ðàáîòàìè ïî íàëàäêå, îáñëóæèâàíèþ è ò.ï. îòêëþ÷èòå ïëèòó îò ýëåêòðè÷åñêîé ñåòè. Ïàðàìåòðû ïèòàþùåãî
  • Страница 33 из 53
    Òåõíè÷åñêèå õàðàêòåðèñòèêè ÄÓÕÎÂÊÀ Ðàçìåðû (Øèðèíà x Ãëóáèíà x Âûñîòà) 39x41x34 ñì Îáúåì Ýòî îáîðóäîâàíèå ñîîòâåòñòâóåò ñëåäóþùèì äèðåêòèâàì Åâðîïåéñêîãî ýêîíîìè÷åñêîãî ñîîáùåñòâà: 54 ë Ìîùíîñòü äóõîâêè (max) - 89/336/EEC îò 03/05/89 (Ýëåêòðîìàãíèòíàÿ ñîâìåñòèìîñòü) è ïîñëåäóþùèå ìîäèôèêàöèè; -
  • Страница 34 из 53
    Èíñòðóêöèè ïî ýêñïëóàòàöèè òåìïåðàòóðà ïîääåðæèâàåòñÿ àâòîìàòè÷åñêè. Âåíòèëèðóåìàÿ äóõîâêà îñîáåííî ïîäõîäèò äëÿ ïðèãîòîâëåíèÿ áëþä èç äâóõ è áîëåå èíãðèäèåíòîâ. Ðåæèì âåíòèëèðóåìîé äóõîâêè ïîçâîëÿåò ãîòîâèòü íà 2-õ óðîâíÿõ îäíîâðåìåííî (ñì. ðàçäåë «Ïðèãîòîâëåíèå íà íåñêîëüêèõ óðîâíÿõ
  • Страница 35 из 53
    Ðóêîÿòêà òàéìåðà (M) øàøëûêîâ èç ìÿñà è îâîùåé, êîëáàñîê, ðåáðûøåê, îòáèâíûõ èç áàðàíèíû è ñâèíèíû, öûïëÿò è ò.ä. Ýòîò ðåæèì èäåàëåí òàêæå äëÿ ïðèãîòîâëåíèÿ ñòåéêîâ èç ðûáû..  ýòîì ðåæèìå ìîòîð òàêæå âðàùàåò âåðòåë (ïðè íàëè÷èè), íà êîòîðîì ðåêîìåíäóåòñÿ ãîòîâèòü ìÿñíîå æàðêîå, äîìàøíþþ ïòèöó è
  • Страница 36 из 53
    Ïðàêòè÷åñêèå ñîâåòû Ïðèãîòîâëåíèå íà íåñêîëüêèõ óðîâíÿõ îäíîâðåìåííî Øèðîêèé äèàïàçîí ôóíêöèé äóõîâêè ïîçâîëÿåò ïðèãîòîâèòü ïèùó íàèëó÷øèì ñïîñîáîì. Ñî âðåìåíåì Âû ïðèîáðåòåòå ñîáñòâåííûé îïûò, êîòîðûé ïîçâîëèò íàèáîëåå ïîëíî èñïîëüçîâàòü âîçìîæíîñòè îáîðóäîâàíèÿ. Êðîìå òîãî, Âàì ïîìîãóò ñëåäóþùèå
  • Страница 37 из 53
    Èñïîëüçîâàíèå ñòåêëîêåðàìè÷åñêîé ïîâåðõíîñòè Îïèñàíèå Èñïîëüçîâàíèå ïîñóäû íà ñòåêëîêåðàìè÷åñêîé ïîâåðõíîñòè Ðàáî÷àÿ ïîâåðõíîñòü îáîðóäîâàíà ðàäèàëüíûìè êîíôîðêàìè, âñòðîåííûìè ïîä ïîâåðõíîñòü êàê çîíû íàãðåâà, êîòîðûå ñòàíîâÿòñÿ êðàñíûìè âî âðåìÿ èñïîëüçîâàíèÿ. A. Îáëàñòè äëÿ ãîòîâêè (A). Â.
  • Страница 38 из 53
    Ïðàêòè÷åñêèå ñîâåòû ïî ïðèãîòîâëåíèþ ïèùè â äóõîâêå Ïîçèöèÿ ðóêîÿòêè âûáîðà Áëþäî ôóíêöèé äóõîâêè 1. Óòêà Ñòàòè÷íàÿ Æàðêîå èç ãîâÿäèíû äóõîâêà Æàðêîå èç ñâèíèíû Áèñêâèòû Òîðòû 2. Ïèööà (íà 2-õ óðîâíÿõ) Âåíòèëèðóåìàÿ Ëàçàíüÿ äóõîâêà Áàðàíèíà Êóðèöà ñ êàðòîôåëåì Ñêóìáðèÿ Áóæåíèíà Ñëèâîâûé ïèðîã
  • Страница 39 из 53
    Îáñëóæèâàíèå è óõîä Ïåðåä ëþáîé îïåðàöèåé ïî óõîäó è ÷èñòêå îòêëþ÷àéòå äóõîâêó è ðàáî÷óþ ïîâåðõíîñòü îò ýëåêòðè÷åñêîé ñåòè. Íèêîãäà íå èñïîëüçóéòå æåñòêèå ãóáêè (ùåòêè) è àáðàçèâíûå ïðåïàðàòû. Êðîìå òîãî, íå äîëæíû ïðèìåíÿòüñÿ õèìè÷åñêè àêòèâíûå ÷èñòÿùèå ñðåäñòâà, ïðåäíàçíà÷åííûå äëÿ î÷èñòêè
  • Страница 40 из 53
    Merloni Elettrodomestici spa Ñðîê ñëóæáû 10 ëåò ñî äíÿ èçãîòîâëåíèÿ Ïðîèçâîäèòåëü îñòàâëÿåò çà ñîáîé ïðàâî áåç ïðåäóïðåæäåíèÿ âíîñèòü èçìåíåíèÿ â êîíñòðóêöèþ, íå óõóäøàþùèå ýôôåêòèâíîñòü ðàáîòû îáîðóäîâàíèÿ. Íåêîòîðûå ïàðàìåòðû, ïðèâåäåííûå â ýòîé èíñòðóêöèè, ÿâëÿþòñÿ ïðèáëèçèòåëüíûìè.
  • Страница 41 из 53
    K 3C0 M Sporák s multifunkèní troubou Návod k instalaci a použití Vážený zákazníku, dìkujeme Vám, že jste si zakoupil výrobek spoleènosti MERLONI Elettrodomestici, spa. Pøi vybírání pøístroje peèlivì zvažte, jaké èinnosti a funkce od pøístroje požadujete. To, že výrobek nevyhovuje Vašim pozdìjším
  • Страница 42 из 53
    Dùležité Aby byla zajištìna øádná ÚÈINNOST a BEZPEÈNOST tohoto zaøízení, doporuèujeme Vám: l Kontaktovat servisní støedisku, které je autorizováno výrobcem l Vždy používat originální náhradní díly. 1 Tento spotøebiè je urèen k neprofesionálnímu použití v domácnostech. 2 Pøed použitím spotøebièe si
  • Страница 43 из 53
    Instalace Následující pokyny jsou urèeny pro odborné pracovníky, aby podle platných ustanovení mohli provádìt instalaci, seøízení a technickou údržbu zaøízení. Dùležité: Pøed provádìním jakýchkoli seøizovacích prací nebo údržby odpojte zaøízení od sítì. 400 3N H05RR-F 5x2.5 CEI-UNEL 35363 1 1 230V
  • Страница 44 из 53
    Technické údaje Trouba Rozmìry Objem Max. pohlcení tepla v troubì 39 × 41 × 34 cm 54 litrù 2100 W Sklokeramická varná deska Pøední levá varná zóna Zadní levá varná zóna Zadní pravá varná zóna Pøední pravá varná zóna Max. pohlcení tepla keramickou varnou deskou Tento spotøebiè splòuje požadavky
  • Страница 45 из 53
    Návod k používání zaøízení 2. Horkovzdušný režim - Poloha knoflíku „G”: - Poloha knoflíku „N”: mezi 50°C a Max Vzhledem k tomu, že díky cirkulaci zajištìné vìtrákem umístìným vzadu pùsobí horký vzduch ve všech èástech trouby stejnì, je výsledný pokrm upeèený dozlatova, stejnomìrnì a dokonale.
  • Страница 46 из 53
    Vynikajících výsledkù dosáhnete pøi použití tohoto režimu k pøípravì mletého masa, zeleniny, klobás, vepøových žebírek, jehnìèích kotlet, kuøat, køepelek a vepøových øízkù. Gril s ventilací je velmi vhodný i pro úpravu rùzných rybích specialit, napø. steakù z meèouna, tuòáka nebo plnìné chobotnice.
  • Страница 47 из 53
    Praktické rady pøi peèení Trouba Vám nabízí rùzné zpùsoby umožòující pøipravit jakýkoliv druh pokrmu co nejlepším zpùsobem. Postupem èasu se jistì nauèíte maximálnì využívat všech výhod tohoto všestranného sporáku. Následující pokyny jsou pouze orientaèní, v pøípadì potøeby je mùžete obmìòovat. l
  • Страница 48 из 53
    Pokyny k používání keramické varné desky Popis Varná deska je vybavena varnými zónami pracujícími na bázi sálavého tepla. Topná tìlesa jsou umístìna pod povrchem keramické desky, v zapnutém stavu èervenì svítí. A. Varná zóna B. Kontrolka udávající, zda je pøíslušná varná zóna v provozu, svítí i po
  • Страница 49 из 53
    Praktické rady pøi peèení Poloha knoflí ku volby režimu Pø ipravovaný pokrm 1 Statický režim Kachna Hovìzípeèenì Vepø peèenì ová Snìhové peèivo Sušenky 2 Horkovzdušný režim Pizza (na 2 úrovní ch) Lasagne Jehnìèí Kuø + brambory e Makrela Pražma Švestkový koláè Krémové lehké peèivo (na 2 úrovní ch)
  • Страница 50 из 53
    Obvyklé èištìní a údržba Pøed každým èištìním vypnìte sporák ze sítì. Pro dosažení dlouhé životnosti pøístroje je nezbytnì nutné jej pravidelnì celý vyèistit. Dbejte však na následující pokyny: l Smaltované èásti a samoèistící panely omývejte pouze teplou vodou. Zásadnì nepoužívejte žádný písek ani
  • Страница 51 из 53
    Seznam servisních støedisek je uveden na internetových stránkách: http://www.merloni.cz http://www.indesit.cz http://www.ariston.cz Garantem servisu pro Èeskou republiku je firma AP servis AR s.r.o., tel.: 02/71 74 20 67 Merloni Elettrodomestici s.r.o. U nákladového nádraží 2, 130 00 Praha 3, Èeská
  • Страница 52 из 53
    Merloni Elettrodomestici Cucina con forno multifunzione e piano VTC (Russia) * 11/01 - 195029205.03 Xerox Business Services - Docutech Viale Aristide Merloni 47 60044 Fabriano Italy Tel +39 0732 6611 Fax +39 0732 662501 www.merloni.com
  • Страница 53 из 53