19
GB
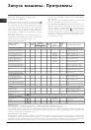
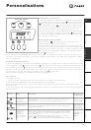
Function
Effect
Comments
Enabled with
programmes:
Stain
removal
Bleaching cycle
designed to
remove the
toughest stains.
Please remember to pour the bleach into extra compartment 4
(see page 20).
This function is incompatible with the EASY IRON function.
2, 3, 4,
Rinse cycle.
Extra Rinse
Increases the
efficiency of the
rinse.
Recommended when the appliance has a full load or with large
quantities of detergent.
1, 2, 3, 4, 7,
8, 9, 11, 12,
Rinse cycle.
Easy iron
This option
reduces the
amount of
creasing on
fabrics, making
them easier to
iron.
When this function is set, programmes 4, 5, 6 will end, with the
laundry left to soak (Anti-crease), and the relative button flashes:
- to conclude the cycle, press the START/RESET button or the
EASY IRON button;
- to run the draining cycle alone, set the knob to the relative
symbol and press the START/RESET button.
This function is incompatible with the STAIN REMOVAL function.
3, 4, 5, 6, 7, 8,
9, Rinse
cycle.
Service
Tr
oubleshooting
Precautions
Care
Programmes
Detergents
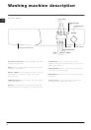
Installation
Description
Personalisations
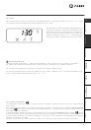
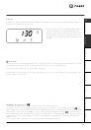
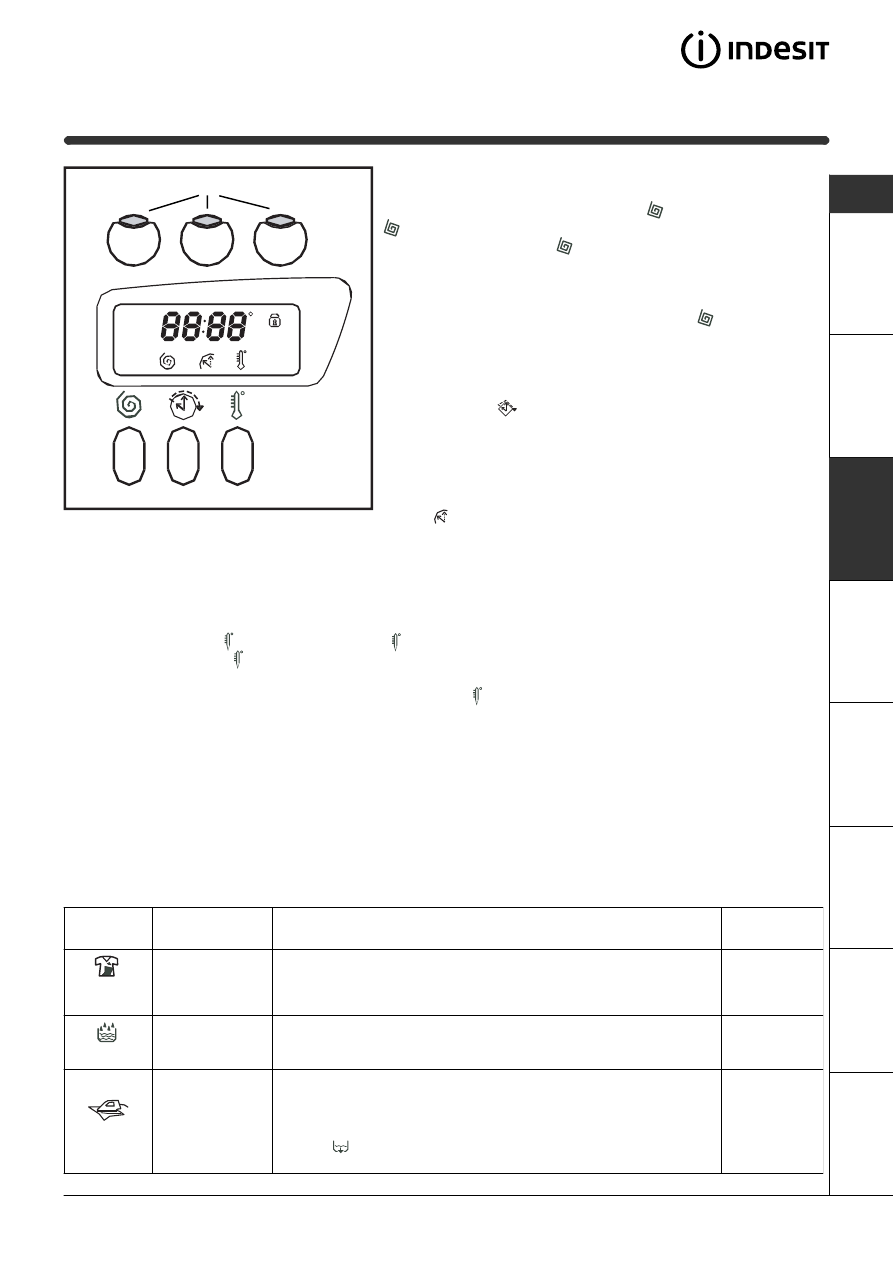
Setting the spin cycle
If, when the appliance is switched on, the KNOB is positioned on
a programme with a spin cycle, a fixed
appears. Press button
and the maximum spin speed allowed for the programme set
will be displayed, and the
icon flashes. Press it again and the
values lower until they reach OFF, which indicates that the spin
cycle has been excluded (press it again to go back to the
maximum value); stop on the desired speed, after approximately
2 seconds the setting is accepted: the symbol
remains fixed.
The spin cycle setting is enabled with all the programmes except
for 6 and the Draining cycle.
Setting the Delay Timer
Press the button
and you will see the word OFF on the
display, while the relative symbol flashes.
Press the button again and "1h" appears, that is, a delay of one
hour (this can reach up to 24h); stop on the "desired" delay; after
approximately 2 seconds the setting is accepted, following which,
the time for the set programme appears on the display and the
symbol remains on.
If you now press the START/RESET button, the set "delay" appears; this decreases every hour until the start of
the cycle. In this phase, the "delay" can only be modified by decreasing it. The Delay Timer regulation is enabled
with all programmes.
Setting the temperature
If, when the appliance is switched on, the KNOB is positioned on a programme for which the temperature needs
to be regulated, a fixed appears. Press button and the maximum temperature allowed for the programme set
will be displayed and the icon flashes. Press it again and the temperature lowers until it reaches OFF, which
indicates a cold wash cycle (press it again to go back to the maximum value); stop on the desired value, after
approximately 2 seconds the setting is accepted: the symbol remains fixed.
The temperature adjustment is enabled with all wash programmes.
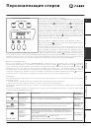
Functions
To enable a function:
1. press the button corresponding to the desired function, according to the table below;
2. the function is enabled when the corresponding button is illuminated.
Note: The rapid flashing of the button indicates that the corresponding function cannot be selected for the
programme set.
If you set a function that is incompatible with another function you selected previously, only the last one selected
will be enabled.
FUNCTION buttons