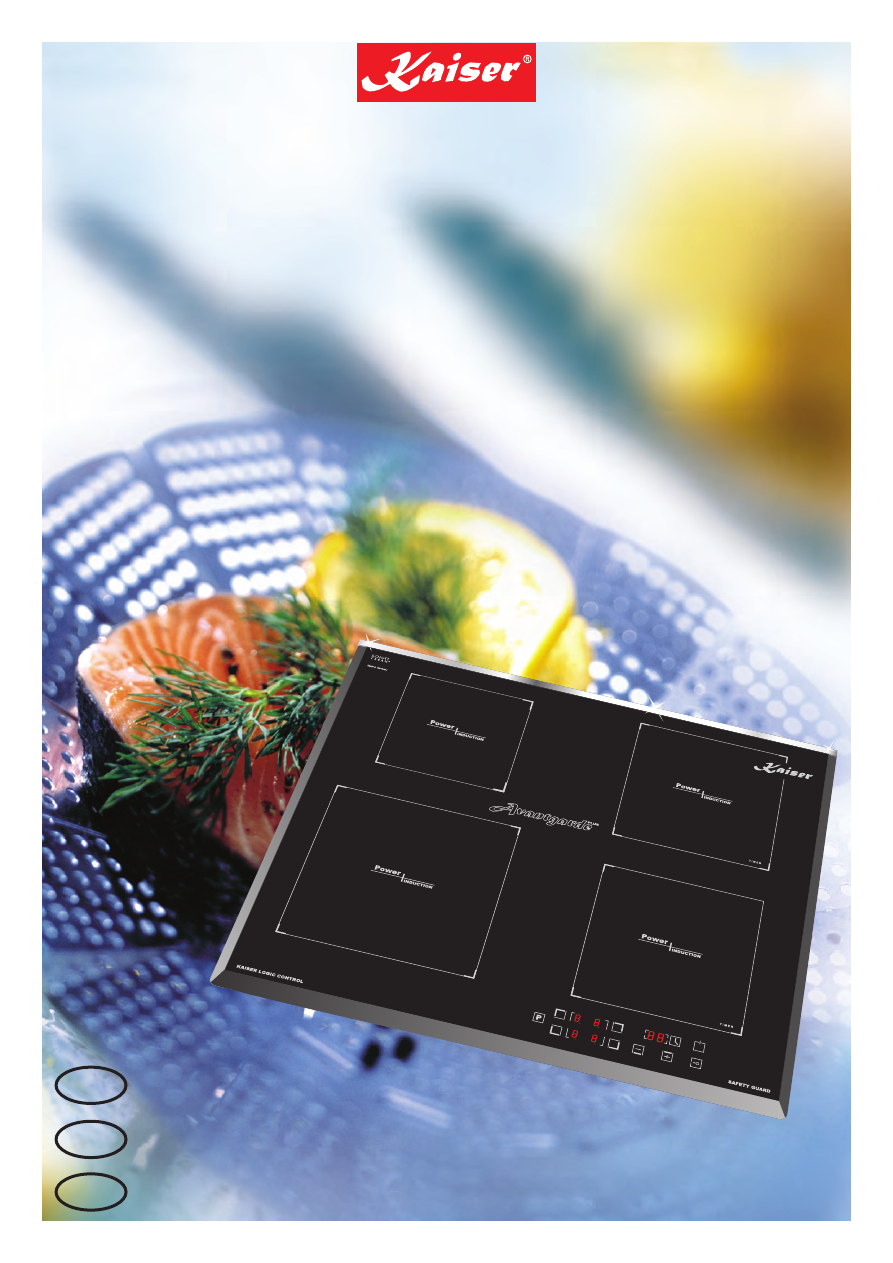
Инструкция для KAISER KCT 65 FIN La Perle

(скачивание инструкции бесплатно)
Формат файла: PDF
Доступность: Бесплатно как и все руководства на сайте. Без регистрации и SMS.
Дополнительно: Чтение инструкции онлайн
background image

USER MANUAL

EN

DE

RU

GEBRAUCHSANWEISUNG

ИНСТРУКЦИЯ ПО ОБСЛУЖИВАНИЮ И ЭКСПЛУАТАЦИИ

KCT 64... FI *, KCT 65... FI *

KCT 34... FI *

BUILT IN COOKING INDUCTION HOB VITROCERAMIC

INDUKTION-EINBAUKOCHFELD GLASKERAMIK

ВСТРАИВАЕМАЯ ИНДУКЦИОННАЯ

НАГРЕВАТЕЛЬНАЯ ПОВЕРХНОСТЬ СТЕКЛОКЕРАМИКА

1
2
3
4
5
6
7
8
9
10
11
12
13
14
15
16
17
18
19
20
21
22
23
24
25
26
27
28
29
30
31
32
33
34
35
36
37
38
39
40
41
42
43
44
45
46
47
48
49
50
51
52
53
54
55
56
57
58
59
60
Оглавление инструкции
  • Страница 1 из 61
    KCT 64... FI *, KCT 65... FI * KCT 34... FI * BUILT IN COOKING INDUCTION HOB VITROCERAMIC INDUKTION-EINBAUKOCHFELD GLASKERAMIK ВСТРАИВАЕМАЯ ИНДУКЦИОННАЯ НАГРЕВАТЕЛЬНАЯ ПОВЕРХНОСТЬ СТЕКЛОКЕРАМИКА EN USER MANUAL DE GEBRAUCHSANWEISUNG RU ИНСТРУКЦИЯ ПО ОБСЛУЖИВАНИЮ И ЭКСПЛУАТАЦИИ
  • Страница 2 из 61
    EN DEAR CUSTOMERS, thank you for purchasing this Kaiser product. We are convinced that you have made a right choice. This product which satisfies the high quality demands and corresponds to world comprehensive standards realizes your cookeries, and his modern appearance which has been developed by
  • Страница 3 из 61
    RU DE LIEBE KUNDIN, LIEBER KUNDE, УВАЖАЕМЫЙ ПОКУПАТЕЛЬ, wir danken Ihnen für den Erwerb unserer Technik. благодарим Вас за приобретение нашей техники. Wir sind überzeug, dass Sie eine richtige Wahl getroffen haben. Dieses Produkt, das die hohen Forderungen zur Qualität befriedigt und
  • Страница 4 из 61
    EN INSTALLATION INSTRUCTIONS Installation of the hobs 6 Electrical connection 8 Safety notes 10 BRIEF DESCRIPTION 14 Working principle 14 Advantages of induction hobs 14 Location drawing 16 Control panel 22 EQUIPMENT Heating elements USAGE 4 6 24 24 30 Cooking zones control 30 CARE AND ATTENDANCE
  • Страница 5 из 61
    RU DE FÜR DEN INSTALLATEUR 7 ИНСТРУКЦИЯ ПО МОНТАЖУ 7 Einbau des Kochfeldes 7 Установка варочной поверхности 7 Stromanschluss 9 Подключение к электросети 9 Sicherheitshinweise 11 Указания по технике безопасности 11 KURZBESCHREIBUNG 15 КРАТКОЕ ОПИСАНИЕ 15 Fubktionsprinzip 15 Принцип длействия 15
  • Страница 6 из 61
    EN INSTALLATION INSTRUCTIONS INSTALLATION OF THE COOKING HOB m 0m 56 These Instructions are for the qualified technician, as a guide to the installation, adjustment and maintenance, according to the laws and standards in force. 49 0m m m m n 50 mi mm 50 min mm 50 min m 5m 27 The appliance can be
  • Страница 7 из 61
    DE RU FÜR DEN INSTALLATEUR ИНСТРУКЦИЯ ПО МОНТАЖУ EINBAU DES KOCHFELDES УСТАНОВКА ВАРОЧНОЙ ПОВЕРХНОСТИ Die angegebenen Anweisungen sind an den zugelassenen Installateur als Richtlinie für die Installation, Regelung und Instandhaltung, gemäß den geltenden Gesetzen und Normen, gerichtet. Сборка,
  • Страница 8 из 61
    EN ELECTRICAL CONNECTION 400 V • 2N~ Before connecting the cooking hob to the mains power supply, make sure that: 220 – 240 V 220 – 240 V 400 V • the plant characteristics are such as to follow what is indicated on the matrix plate placed at the bottom of the working area, N L2 L1 blue blau синий
  • Страница 9 из 61
    DE RU STROMANSCHLUSS ПОДКЛЮЧЕНИЕ К ЭЛЕКТРОСЕТИ Vor der Durchführung des Stromanschlusses muss sichergestellt werden, dass: Перед подключением варочной поверхности к эл. сети, необходимо убедиться, что: • die Eigenschaften des Stromnetzes mit den Werten auf dem unter der Kochfeld angebrachten
  • Страница 10 из 61
    EN SAFETY NOTES Owing to the very fast reaction at the high power setting (max. power setting), do not use the induction hob without supervision! During cooking pay attention to the heat-up speed of the cooking zone. Avoiding boiling the pots dry as there is a risk of the pots overheating! Do not
  • Страница 11 из 61
    DE RU SICHERHEITSHINWEISE УКАЗАНИЯ ПО ТЕХНИКЕ БЕЗОПАСНОСТИ Wegen der sehr schnellen Reaktion bei hoher Kochstufeneinstellung (max. Power) das Induktionskochfeld nicht unbeaufsichtigt betreiben! Из-за очень быстрой реакции при установк е высшей ступени нагрева (макс. мощность) не используйте
  • Страница 12 из 61
    EN Do not put kitchen foil or plastic onto the cooking zone. Keep everything which could melt, such as plastics, foil and in particular sugar and sugary foods away from the hot cooking zone. Remove sugar immediately from the hob when it is still hot with a scraper to avoid damage Take care with
  • Страница 13 из 61
    DE RU Keine Alufolie bzw. Kunststoff auf die Kochzone legen. Von der heißen Kochzone alles fernhalten, was anschmelzen kann, z.B. Kunststoffe, Folie, besonders Zucker und stark zuckerhaltige Speisen. Zucker umgehend im heißen Zustand mit einem Schaber von der Kochfläche abheben, um Beschädigungen
  • Страница 14 из 61
    EN BRIEF DESCRIPTION WORKING PRINCIPLE The principle of induction ceramic hob is based on use of magnetic field energy. Under the glass surface there are inductors. The spin of its electric fields create eddy currents in the bottom of metal utensil, it warms up together with food being there. Thus
  • Страница 15 из 61
    RU DE BESCHREIBUNG ОПИСАНИЕ FUNKTIONSPRINZIP ПРИНЦИП ДЕЙСТВИЯ Das Funktionsprinzip des Induktionskochfeldes beruht sich auf der Nutzung des magnetischen EnergieFeldes. Принцип действия индукционной нагревательной поверхности основан на использовании энергии магнитного поля. Unter der
  • Страница 16 из 61
    EN Safety: there are no open flame, hot burners and mechanical parts. Heating of the field can be turned on only if the utensiles have ferromagnetic properties and about 60 – 70% of its area should be under the utensiles. Heating objects which a diameter less than 12 cm is blocked by a special
  • Страница 17 из 61
    DE RU Sicherheit: keine offene Flamme, keine erhitzten Gasbrenner und mechanische Teile. Die Kochzonen schalten nur dann ein, wenn das Geschirr über die ferromagnetischen Eigenschaften verfügt, damit sich die Kochzone eingeschaltet hat, soll die Kochfläche zu ca. 60 – 70% vom Geschirr bedeckt sein.
  • Страница 18 из 61
    EN KCT 65 FI * 1. Cooking zone 2. Control panel 1 1 2 KCT 6506 FI 1. Cooking zone 2. Control panel 1 1 2 KCT 6505 FI * 1. Cooking zone 2. Control panel 1 1 2 18
  • Страница 19 из 61
    RU DE KCT 65 FI * 1. Kochzone 2. Bedienblende KCT 6506 FI 1. Kochzone 2. Bedienblende KCT 6505 FI * 1. Kochzone 2. Bedienblende KCT 65 FI * 1. Нагревательное поле 2. Панель управления KCT 6506 FI 1. Нагревательное поле 2. Панель управления KCT 6505 FI * 1. Нагревательное поле 2. Панель управления
  • Страница 20 из 61
    EN KCT 6536 FI * 1. Cooking zone 2. Control panel 1 1 2 KCT 3426 FI Avant. 1. Cooking zone 2. Control panel 1 2 20
  • Страница 21 из 61
    RU DE KCT 6536 FI * 1. Kochzone 2. Bedienblende KCT 3426 FI Avant. 1. Kochzone 2. Bedienblendee KCT 6536 FI * 1. Нагревательное поле 2. Панель управления KCT 3426 FI Avant. 1. Нагревательное поле 2. Панель управления 21
  • Страница 22 из 61
    EN 1 2 6 4 7 8 CONTROL PANEL KCT 6406 FI * KCT 6436 FI * 1 3 5 2 4 9 10 6 7 11 8 C KCT 3426 FI * KCT 65 FI * KCT 6505 FI * KCT 6505 FI * 3 7 11 9 6 C 12 6 2 11 8 3 2 + 3 3 2 13 10 9 10 15 4 + 1 4 5 5 11 8 14 3 29 10 15 1 4 5 11 6 6 6 7 1 12 8 15 14 10 15 3 29 12 8 14 1 4 13 11 6 6 22 14 12 8 KCT
  • Страница 23 из 61
    RU DE BEDIENBLENDE ПАНЕЛЬ УПРАВЛЕНИЯ KCT 6406 FI * KCT 6406 FI * KCT 6436 FI * KCT 6436 FI * C KCT 3426 FI * C KCT 3426 FI * KCT 65 FI * KCT 65 FI * KCT 6505 FI * KCT 6505 FI * KCT 6505 FI * KCT 6505 FI * KCT 6536 FI * KCT 6536 FI * 1. Leistungserhöhung Power Boost 2. Obere linke Kochzone mit
  • Страница 24 из 61
    EN EQUIPMENT HEATING ELEMENTS 1 3 KCT 6406 FI * 1.Cooking zone: 2.Cooking zone: 3.Cooking zone: 4.Cooking zone: 2 Ø 150 mm, 1500 W Ø 210 mm, 2200 W Ø 180 mm, 2000W Ø 180 mm, 1500 W 4 KCT 6436 FI * 5.Cooking zone: 6.Cooking zone: 7.Cooking zone: 5 Ø 140 mm, 1500 W Ø 220 mm, 2100 W Ø 280 mm, 3600 W 7
  • Страница 25 из 61
    RU DE AUSSTATUNG ОБОРУДОВАНИЕ HEIZELEMENTE НАГРЕВАТЕЛЬНЫЕ ЭЛЕМЕНТЫ KCT 6406 FI * KCT 6406 FI * 1. Kochzone: 2. Kochzone: 3. Kochzone: 4. Kochzone: Ø 150 mm, 1500 W Ø 210 mm, 2200 W Ø 180 mm, 2000 W Ø 180 mm, 1500 W KCT 6436 FI * 5. Kochzone: 6. Kochzone: 7 Kochzone: Kochzone 10 + 11: Ø 150 мм, 1500
  • Страница 26 из 61
    EN KCT 6506 FI * 1 3 2,0 kW 3,0 kW 1.Cooking zone: 2.Cooking zone: 3.Cooking zone: 4.Cooking zone: Ø 140 mm, 1400 W/ 2000 W Ø 210 mm, 2200 W/ 3600 W Ø 180 mm, 2000 W/ 3000 W Ø 140 mm, 1400 W/ 2000 W 2 4 3,6 kW 2,0 kW 6 KCT 6505 FI * 7 5 1,5 kW 2,6 kW 5.Cooking zone: 6.Cooking zone: 7.Cooking zone:
  • Страница 27 из 61
    RU DE KCT 6406 FI * 1. Kochzone: 2. Kochzone: 3. Kochzone: 4. Kochzone: KCT 6406 FI * Ø 140 mm, 1400 W/ 2000 W Ø 210 mm, 2200 W/ 3600 W Ø 180 mm, 2000 W/ 3000 W Ø 140 mm, 1400 W/ 2000 W KCT 6505 FI * 5. Kochzone: 6. Kochzone: 7 Kochzone: 8 Kochzone: Ø 140 мм, 1400 Вт/ 2000 Вт Ø 210 мм, 2200 Вт/
  • Страница 28 из 61
    EN KCT 3426 FI Avant. 1 1.Cooking zone: 2.Cooking zone: Ø 180 mm, 2000 W Ø 140 mm, 1500 W 2 Minimal diameter of the utensil’s bottom is 120 mm 28
  • Страница 29 из 61
    RU DE KCT 3426 FI Avant. 8. Kochzone: 9. Kochzone: KCT 3426 FI Avant. Ø 180 mm, 2000 W Ø 140 mm, 1500 W Mindesdurchmesser des Geschirrbodens ist 120 mm 8. Нагревательное поле: 9. Нагревательное поле: Ø 180 мм, 2000 Вт Ø 140 мм, 1500 Вт Минимальный диаметр дна посуды 120 мм 29
  • Страница 30 из 61
    EN USAGE 2 COOKING ZONES CONTROL 1 After mains voltage is applied the control initializes for approx. 1 second before it is ready for operation. 2 1 After a reset all displays and LEDs glow for approx. 1 second. When this time is over all displays extinguish and the control is in the stand-by mode.
  • Страница 31 из 61
    DE RU BENUTZUNG ИСПОЛЬЗОВАНИЕ KOCHFELDERSTEUERUNG УПРАВЛЕНИЕ НАГРЕВАТЕЛЬНЫМИ ПОЛЯМИ EIN/ AUS-Schalten der Touch Control Включение/ Выключение Nach Anlegen der Netzspannung initialisiert sich die Steuerung für ca. 1 Sekunde bevor sie betriebsbereit ist. После подк лючения к сети сенс орный
  • Страница 32 из 61
    EN 1 If a cooking zone has residual heat, the display shows a symbol H, 1. 2 3 4 1 2 3 When the Touch Control is ON it can be switched-OFF at any time by operating the ON/ OFF key 3. This is also valid if the control has been locked (activated child lock feature). The ON/ OFF key 3 has always
  • Страница 33 из 61
    DE RU Sollte eine Kochzone den Status »Heiss« besitzen, wird ein statisches Symbol H, 1 angezeigt. Если какое-либо поле горячее, высветится символ H, 1. Sollte zum Zeitpunkt des Einschaltens die Kindersicherung noch aktiv sein, wird auf Display das Lo Symbol, 2 (wie locked) angezeigt (siehe auch
  • Страница 34 из 61
    EN Switching a cooking zone ON and OFF 1 3 7 If the control is ON the respective cooking zone can be selected by operating a cooking zone select keys 1, 2, 3 or 4 of the respective cooking zone. 2 1 4 6 5 3 7 System Comfort For a more comfortable control during the turning on of a cooking zone is
  • Страница 35 из 61
    RU DE Einschalten/ Ausschalten einer Kochzone Включение/ Выключение нагревательного поля Wenn die Bedienung der Kochplatte eingeschaltet ist, kann die beliebige Kochzone durch das Berühren auf die Wahltaste der entsprechenden Kochzone 1, 2, 3 oder 4 eingeschaltet werden. Когда управление
  • Страница 36 из 61
    EN 3 1 Function Power Use this function to accelerate heating. The function Power allows to increase power of a heating zone. 7 2 8 4 6 5 9 11 10 12 4 cooking zones: By activation the function Power for the cooking zone 9 a level of heating of the zone 10 will be reduced to level 2 and vice
  • Страница 37 из 61
    DE RU Funktion Power – Leistungserhöhung Функция Power – повышение мощности Diese Funktion wird für Erhitzungsbeschleunigung benutzt. Die Funktion Power erlaubt die Leistung der Kochzone zu erhöhen. Данная функция используется для ускорения нагрева. Функция Power позволяет поднять мощность
  • Страница 38 из 61
    EN Key lock (child safety feature) 4 2 3 To avoid the undesirable use, the hob’s control may be blocked. To do this: 1 4 • Touch the key 1. 2 3 The device emits a beep. The timer display shows a symbol 2, Lo. While the lock is engaged, all operation of the keys is disabled, with the exception of
  • Страница 39 из 61
    RU DE Tastensperre (Kindersicherung) Блокировка кнопок (защита от детей) Zur Vermeidung der unerwünschten Benutzung, kann die Bedienung des Kochfeldes gesperrt werden. Во избежание нежелательного пользования, управление поверхностью может быть заблокировано. Dafür: Для этого: • Berühren Sie die
  • Страница 40 из 61
    EN Timer function 4 3 This function too simplifies operation by not requiring human supervision during the cooking cycle. Once the set time on the timer has elapsed, the cooking zone will be switched off automatically. . 1 7 2 5 6 4 3 If no zone has been programmed, the timer simply operates as a
  • Страница 41 из 61
    RU DE Funktion Timer Функция таймер Auch diese Funktion erleichtert das Kochen, da Sie nicht mehr die ganze Zeit am Kochfeld stehen müssen. Nach Ablauf der eingestellten Zeit wird die Kochzone automatisch abgeschaltet. Эта функция также упрощает процесс приготовления, поскольку не требует
  • Страница 42 из 61
    EN Setting the minute counter 4 3 When the unit is off: • Touch the ON key 1. . 1 • Turn on the minute counter by touching the key 2. 7 2 5 6 4 3 • Use the 4 (+) and 5 (–) keys to set the required time to be counted back. . 1 7 2 3 On the minute counter display 3 blinks statement 10 (minutes). 6 5
  • Страница 43 из 61
    RU DE Einstellen der Kurzzeitweker Установка минутника Wenn das Gerät ausgeschaltet ist: При выключенной поверхности: • Berühren Sie die Einschalttaste 1, • Коснитесь кнопки включения поверхности 1. • Schalten Sie den Kurzzeitwecker ein durch Berühren die Taste 2. • Включите минутник касанием до
  • Страница 44 из 61
    EN Keep-Warm function • Touch the key of a correspondent cooking zone 1. 3 • Touch the Keep-Warm function key 2. 1 2 4 The indication of the cooking zone shows symbol 3. To cancel the Keep-Warm function: • touch the Keep-Warm function key 2; or • touch the slider control 4. Pause function 5 To
  • Страница 45 из 61
    RU DE Wärmehaltefunktion Функция поддерживания тепла • Berühren Sie die Taste des gewünschten Kochfeldes 1, • Коснитесь кнопки нужного нагревательного поля 1. • Berühren Sie die Taste der Wärmehaltefunktion 2, • Коснитесь кнопки функции поддерживания тепла 2. Auf dem Display erscheint das Symbol 3.
  • Страница 46 из 61
    EN Deactivating the minute counter function When the set time has elapsed, an acoustic signal is emitted for two minutes. • To stop the sound signal touch any key. To interrupt the minute counter, proceed as follows: • Touch the minute counter key 2. • Press the 4 (–) key to reset the time. Rapid
  • Страница 47 из 61
    DE RU Abschalten der Kurzzeitweker-Funktion Отключение функции минутник Wenn die eingestellte Zeit abgelaufen ist, ertönt ein etwa 2 Minuten langes Signal. По истечении установленного времени в течение 2 минут подается звуковой сигнал. • Zum vorzeitigen Abschalten des Signals berühren Sie einfach
  • Страница 48 из 61
    EN Maintenance First of all remove stray food bits and grease drops from the cooking surface with the special scraper. Then clean the hot area as best as possible with cleansing agent and a paper towel, then rinse again with water and dry with a clean cloth. Pieces of aluminum foil and plastic
  • Страница 49 из 61
    RU DE Instandhaltung Уход Vor allem Essensreste und Fettspritzer von der Kochoberfläche mit einem Schaber entfernen. Danach die warme Fläche mit Reinigungsmittel und Küchenpapier säubern, dann mit Wasser abwaschen und einem sauberen Lappen trocknen. Прежде всего удалите с поверхности скребком
  • Страница 50 из 61
    EN RESPECT FOR THE ENVIRONMENT The documentation provided with this oven has been printed on chlorine free bleached paper or recycled paper to show respect for the environment. The packaging has also been designed to avoid environmental impact. Packaging material is ecological and can be re-used or
  • Страница 51 из 61
    DE RU UMWELTVERTRÄGLICHKEIT ОХРАНА ОКРУЖАЮЩЕЙ СРЕДЫ Als Beitrag zum Umweltschutz wurde die Dokumentation dieses Geräts auf chlorfrei gebleichtes oder Recycling-Papier gedruckt. В качестве вклада в охрану окружающей среды, вся документация к этому устройству была напечатана на отбеленной, не
  • Страница 52 из 61
    УСЛОВИЯ ГАРАНТИИ 1. Гарантия на исправное действие прибора действительна на период 12 месяцев со дня покупки прибора (подтверждена оттиском печати пункта розничной продажи и подписью продавца). 2. Фирма-изготовитель обеспечивает безвозмездный ремонт в случае обнаружения в гарантийный период
  • Страница 53 из 61
    ГАРАНТИЙНЫЙ ТАЛОН (№. соответствует номеру аппарата, смотри на задней странице обложки настоящей инструкции) Данные гарантийные обязательства не ограничивают определенные законом права потребителей Поздравляем Вас с приобретением бытовой техники отличного качества! Пожалуйста ознакомьтесь с
  • Страница 54 из 61
    Представительство в России по сервисному обслуживанию и работе с потребителями Tел/ факс (495) 488-75-10, 488-76-10 www.kaiser.ru E-Mailservice@kaiser.ru Почтовый адрес127238, Москва, а/я 46. Адреса и телефоны авторизированных сервисных центров, обеспечивающих гарантийное и послегарантийное
  • Страница 55 из 61
    Комсомольск на Амуре Кострома Котлас Краснодар Сервисная компанияООО «Гамбит», ул. Ленина, 76/3 Сервисный центр «Гепард», ул. Молочная гора, д. 3, Рыбные ряды корпус 1 СЦ «Домотехника», ул.Мира д.99 ООО «ТОП ЧЭНП Лтд»,ул. Чапаева, д. 94 Красноярск ИП Краснощеков Ю.Н., ул. Горького, д. 104 Сервисный
  • Страница 56 из 61
    Тула Тюмень Улан-Удэ Ульяновск Уссурийск Уфа Ухта Хабаровск Ханты-Мансийск Чебоксары Челябинск Череповец Чита Южно-Сахалинск ООО «Соли-Сервис», ул. Иркутский тракт, 102 ООО «Дуэт Сервис», Красноармейский пр-кт, д. 26 ООО «Аверс-Сервис», ул. Мельникайте, д. 131 "А" ООО «Евросервис», ул. М. Горького,
  • Страница 57 из 61
    Представництво в Україні: Тел.: 8 (044) 331-50-77, 8 (044) 331-50-78, 8 (044) 496-55-44 Факс: 8 (044) 391-03-00 www.kaiser.com.ua E-Mail: service@kaiser.com.ua Адреси та телефони авторизованих сервісних центрів, що забезпечують гарантійне та післягарантійне обслуговування техніки в Україні:
  • Страница 58 из 61
    The manufacturer declines all responsibility for possible mistakes and typing errors and reserves the right to make in design and construction of our own products those changes which do not touch negative influence upon the qualities and properties without a preliminary notification. Die
  • Страница 59 из 61
  • Страница 60 из 61
    OLAN-Haushaltsgeräte, Berlin Germany www.kaiser-olan.de 42
  • Страница 61 из 61