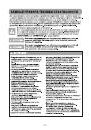
Страница 3 из 31 Basic Parts 20 14 16 15 21 Optional Parts The different figure and quantity of the following part depend on the different models which you have bought. (optional) (как вариант) Accessory These specifications are subject to change according to the agent / buyer’s request. (optional) (как вариант)
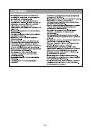
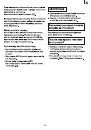
Страница 6 из 31 IMPORTANT SAFETY INSTRUCTIONS Read and follow all instructions before using your vacuum cleaner to prevent the risk of fire,electric shock, personal injury,or damage when using the vacuum cleaner.This guide do not cover all possible conditions that may occur.Always contact your service agent or
Страница 7 из 31 WARNING • Do not continue to vacuum if any parts appear missing or damaged. Personal injury or product damage could result. In these cases, contact LG Electronics Service Agent to avoid hazard. • Do not use an extension cord with this vacuum cleaner • Repairs to electrical appliances may only be
Страница 8 из 31 IMPORTANT SAFETY INSTRUCTIONS CAUTION • Do not put any objects into openings. Failure to do so could result in product damage. • Do not use with any opening blocked: keep free of dust, lint, hair, and anything that may reduce air flow. Failure to do so could result in product damage. • Do not use
Страница 9 из 31 IMPORTANT SAFETY INSTRUCTIONS CAUTION Thermal protector : This vacuum cleaner has a special thermostat that protects the vacuum cleaner in case of motor overheating. If the vacuum cleaner suddenly shuts off, turn off the switch and unplug the vacuum cleaner. Check the vacuum cleaner for possible
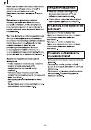
Страница 10 из 31 18 17 14 20 • Crevice Tool (9) Flexible Crevice Tool (optional) (13) 21 24 • Accessory Holder (12) can be attached on the Extention wands using clamping hook. Accessories can be stored in the holder. -9- 23
Страница 11 из 31 24 25 26 • Cleaning the washable HEPA filter with water at least once a year. Hard floor Nozzle (27) 28 29 - 10 -
Страница 22 из 31 P Порядок использования Как подключиться к сети и пользоваться Подсоединение гибкого шланга Наденьте конец головки (1) на гибкий шланг (2) в точке крепления на пылесосе. Чтобы снять гибкий шланг с пылесоса, нажмите на кнопку (3), расположенную на головке, а затем потяните вверх. Извлеките сетевой