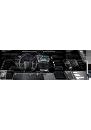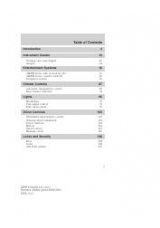
INSTRUMENT
PANEL
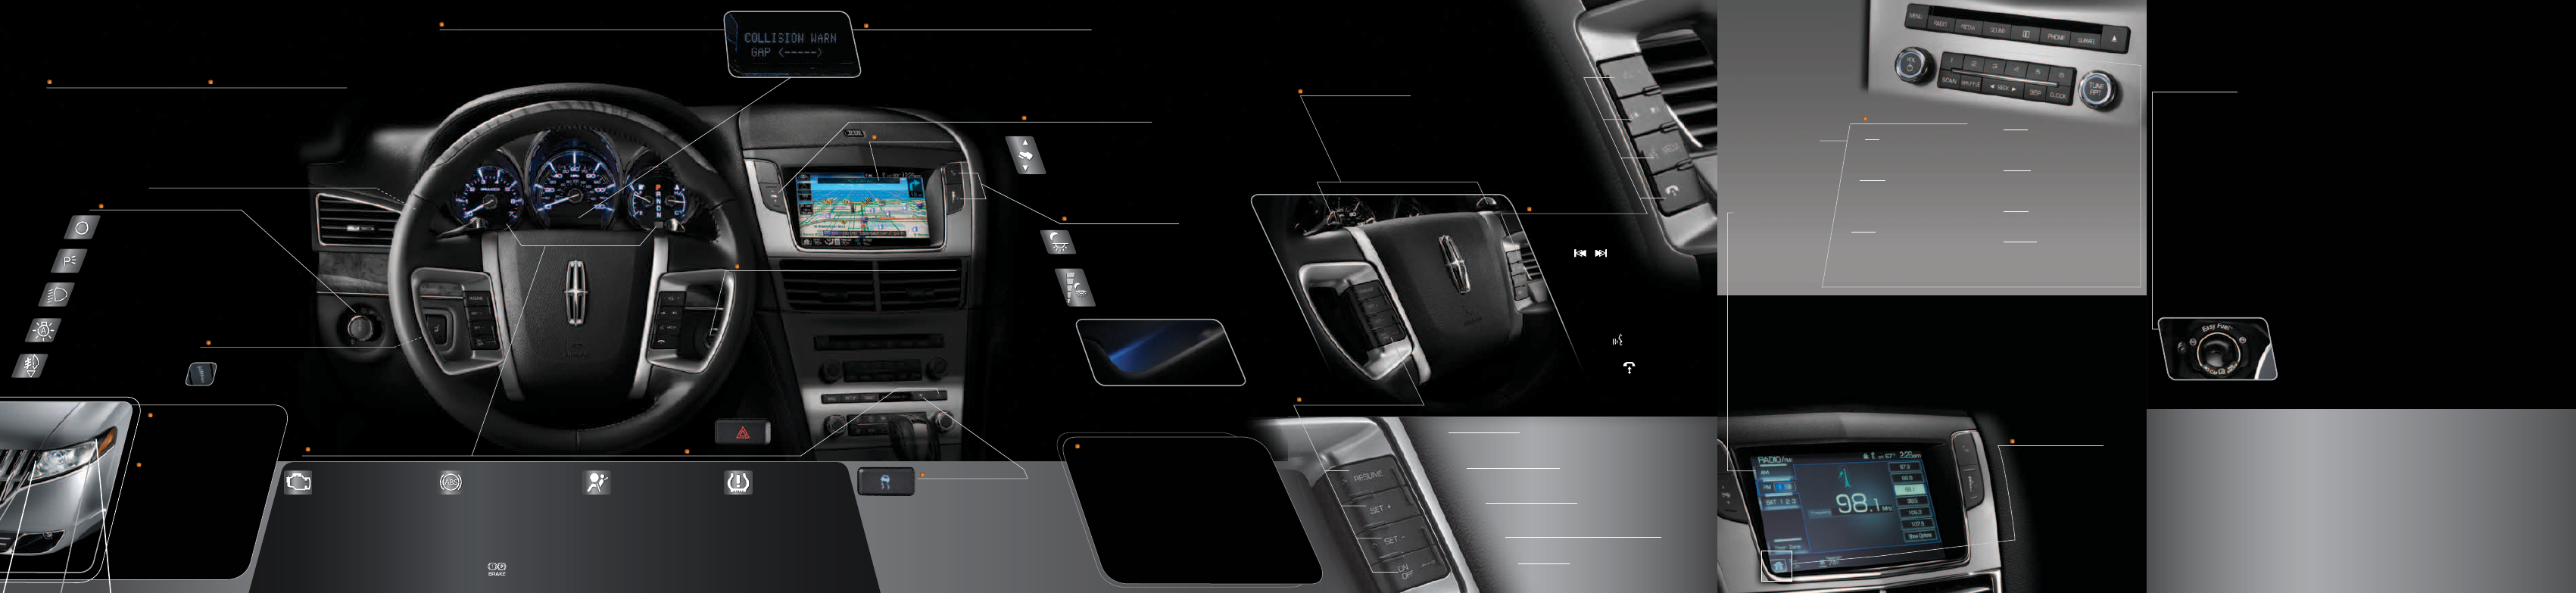
HEADLAMP CONTROLS
Turns the headlamps off.
Turns on parking, instrument
panel, license plate and tail lamps.
Turns on low beam headlamps.
Autolamps: Automatically turns
the exterior lamps on/off based
on available daylight.
Turns on fog lamps by pulling
the control towards you.
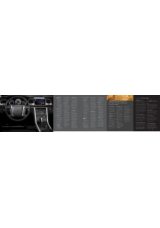
STEERING
WHEEL
C O N T R O L S
POWER ADjUSTAbLE
fOOT PEDALS
Press the bottom of the control
to move the pedals
closer to you or the top of the control
to move the
pedals further away from you. The pedals should only be
adjusted when the vehicle is stopped and in Park (P).
NAVIGATION
SYSTEM
(if equipped)
• Press
+
VOL
-
to increase/
decrease volume levels.
• Press
to access the
previous/next radio station,
CD track or preset satellite
radio channel.
• Press
MEDIA
repeatedly
to access all possible
media sources.
• Press
to access voice
recognition.
• Press
to access SYNC
®
phone features.
MEDIA CONTROLS
HOME SCREEN
Your mobile media system has a
homescreen where you can load,
save and view up to 32 of your
favorite pictures as well as view
your current audio and climate
control settings and the audio
visualizer. To access, press the
house icon at the bottom left
hand corner of any screen.
Your mobile media system
allows you to listen to,
record and save music, play
DVDs (audio and video) and
also access some climate
control functions.
Press the hard buttons
on the system face (such
as RADIO or MEDIA) to
access corresponding
menus on
the touchscreen.
Tabs will appear along
the left side of the
touchscreen which
represent the major
components within that
menu. Simply touch the
desired tab to access.
AUDIO
SYSTEM
JukEbOx
– This feature allows
you to record and save your
music to the 10 GB hard drive for
later access. You can then access
and play your music by specific
tracks, artists, albums or genres.
You can even choose to create
and access your own playlists.
SYNC
®
–
This is a hands-free
communications and
entertainment system with
special phone and media
features including 911 Assist
TM
and Vehicle Health Reports. For
more information, please refer
to the SYNC
®
Supplement, the
SYNC
®
section in the Navigation
Supplement (if equipped) or visit
www.SyncMyRide.com.
SIRIUS
®
satellite radio
broadcasts music, sports, news
and entertainment programming.
For more information and a
complete list of SIRIUS
®
satellite radio channels, visit
www.sirius.com in the United
States, www.sirius-canada.ca
in Canada, or call SIRIUS
®
at
1–888–539–7474. Satellite radio
is only available with a valid
SIRIUS
®
radio subscription.
For more information on this system,
please refer to your Owner’s Guide.
EASY fUEL
TM
“NO CAP” fUEL
SYSTEM
ROADSIDE ASSISTANCE
S.O.S.
POST CRASH ALERT
fUEL TANK
CAPACITY/fUEL INfO
TIRE
PRESSURE
LOCATION Of SPARE TIRE
AND TOOLS
Your new Lincoln MKT comes with
the assurance and support of 24-hour
emergency roadside assistance.
Roadside assistance includes such
services as: lockout assistance, limited
fuel delivery, battery jump starts,
changing a flat tire, towing, and winch
out. To receive roadside assistance in
the United States, call 1 (800) 241-
3673. In Canada, call 1 (800) 665-2006.
aftermarket funnels as they will not work
with the Easy Fuel™ system and may
cause damage.
This system provides audible and
visual alarms when a crash causes the
deployment of airbags or the activation
of the safety belt pretensioners. The
turn signals will flash and the horn will
sound. To deactivate, press the hazard
flasher control, or (panic icon)
on your remote transmitter.
LOCATION Of SPARE
TIRE AND TOOLS
Your vehicle is equipped with a
temporary spare tire. The spare
tire and jack are located under the
carpeted floor panel in the rear
of the vehicle. (If your vehicle is
equipped with a third row seat
that is stowed in the floor, you will
need to unstow the seat in order
to access the tire and jack.) The
tire is designed for emergency use
only and should be replaced as
soon as possible.
If your vehicle is equipped with
a towing package, you will also
have a
Temporary Mobility kit
.
It is recommended that vehicles
with towing packages use the
temporary mobility kit instead of
the spare. The temporary mobility
kit is located under the driver’s
seat. To remove the mobility
kit, move the driver’s seat fully
forward and undo the Velcro
®
strap that attaches it to the rear
of the seat frame. The kit contains
an air compressor to reinflate
the tire and a sealing compound
that will seal most punctures
caused by nails or similar objects.
Do not attempt to repair large
punctures or damage to the tire’s
sidewall. The mobility kit provides
a temporary seal allowing you to
drive up to 120 miles at a maximum
speed of 50 mph. After sealant use,
the TPMS sensor and valve stem
on the wheel must be replaced by
an authorized Ford dealer.
Note:
The sealant in the canister
is to be used for one tire only.
See your authorized dealer for
replacement canisters.
ROADSIDE
ASSISTANCE
Your new Lincoln MKT comes
with the assurance and
support of 24-hour emergency
roadside assistance. Roadside
assistance
includes such
services as: lockout assistance,
limited fuel delivery, battery
jump starts, changing a flat tire,
towing, and winch out.
To receive roadside assistance
in the United States,
call 1 (800) 241-3673. In Canada,
call 1 (800) 665-2006.
TIRE
PRESSURE
Check your tire pressure at
least once a month and before
long trips (including spare, if
equipped). The recommended
specifications are on the
Safety Compliance Certification
Label or Tire Label located
on the B-Pillar or the edge of
the driver’s door. As an added
safety feature, your vehicle
has been equipped with a
Tire
Pressure Monitoring System
(TPMS)
that illuminates a low
tire pressure warning light
when one or more of your tires
is significantly under-inflated.
Refer to the Tires, Wheels and
Loading chapter in your Owner’s
Guide for more information.
VOL
– Push to turn the system
on/off. Turn to increase/decrease
the volume.
MEDIA
– Press to access available
media sources of CD/DVD, Jukebox
and User Device (SYNC
®
). Select
the desired tab on the touchscreen.
RADIO
– Press to access available
radio sources of AM, FM1, FM2, as
well as SAT1, 2, 3 (SIRIUS
®
satellite
radio, if activated). Select the desired
tab on the touchscreen.
MENu
– Press to access Display
settings, Feedback settings, System
settings and Valet mode.
PHONE
– Press to access SYNC
®
phone features. Refer to your SYNC
®
supplement for more information.
CLOCk
– Press to access the clock
screen and set the time.
CLIMATE
– Press to access some
climate control options on the
touchscreen such as Front Zone,
Rear Zone, Dual (zone) and Max A/C.
HARD bUTTONS
AMbIENT LIGHTING
Press repeatedly to turn the feature on,
cycle through your color options and turn
the feature off.
Press the second control to adjust the
color intensity. When activated, the foot
well areas, cup holders and center console
bin illuminates with the chosen color.
MESSAGE CENTER
Displays important vehicle information through a constant monitoring
of vehicle systems. The system will notify you of potential problems with
a display of warnings followed by a long indicator chime. Use the INFO,
SETUP and RESET buttons to access various menus and settings within
the message center. Refer to your Owner’s Guide for more information.
COLLISION WARNING SYSTEM
(if equipped)
Uses a radar sensor to detect if vehicles ahead of you which are moving in the same direction may
be a collision risk. The system will alert you with an audible chime and red warning light which will
appear above the dash. If the risk of collision increases, the system will increase brake support to
help reduce collision speed. The collision warning system is active at speeds above approximately
5 mph (8 km/h). For more information, refer to your Owner’s Guide.
PANEL DIMMER
CONTROL
Press the control up or down until the desired lighting
level is reached. Press the control to the second
detent to turn on the interior courtesy lights. The lights
will remain on until the second detent down is pressed.
MULTI-fUNCTION LEVER
Rotate the end of the control up/down
to increase/decrease the speed of
the wipers.
Push the end of the stalk:
• quickly for a single swipe
without fluid,
• hold briefly for three swipes
with washer fluid,
• and hold for a longer wash cycle.
RAIN SENSING WIPERS
These wipers automatically activate when moisture
is present on the windshield and the control is set
to any setting except OFF. The wiper speed will vary
based on the amount of moisture detected on
the windshield as well as the current interval
setting. Ensure that the control is turned to OFF
prior to entering a car wash.
Note
: For optimal wiper
performance, clean your blades and glass regularly.
Refer to your Owner’s Guide for more information.
WA R N I N G L I G H T S
SERVICE ENGINE
SOON
Illuminates briefly when
the ignition is turned on. If it remains
on or is blinking after the engine is
started, the On Board Diagnostics
System (OBD-II) has detected a
malfunction. Drive in a moderate
fashion and contact your authorized
dealer as soon as possible.
AbS WARNING
Illuminates briefly when the
ignition is turned on. If the
light remains on or continues to flash,
a malfunction has been detected.
Contact your authorized dealer as
soon as possible and have the system
serviced. Normal braking (less ABS)
is still functional unless the brake
warning light
is also illuminated.
AIRbAG
READINESS
Illuminates briefly when
the ignition is turned on. If this light
fails to illuminate, remains on or
continues to flash after the engine
is started, contact your authorized
dealer for service as soon as possible.
A chime will also sound if there is a
malfunction in the indicator light.
LOW TIRE
PRESSURE
WARNING
Illuminates when your tire
pressure is low. If the light remains
on, the tire pressure should be
checked. If the light does not turn
on at ignition or begins to flash,
contact your authorized dealer as
soon as possible.
PUSH bUTTON
START
Your vehicle is equipped
with a Push Button Start
which allows you to start your
vehicle by simply pressing the
ENGINE START button while
pressing the brake pedal,
provided your Intelligent
Access (IA) key is present
inside the vehicle or in
the trunk.
backup method of starting:
In the event that the battery is low in your
Intelligent Access (IA) key, or if there is
excessive radio frequency interference, you
can start the car by placing the IA key in
the backup slot in your center console utility
compartment. Insert the IA key into the slot
with buttons facing towards the rear of the
vehicle and with key ring up. Then use the START
button and brake pedal to start your vehicle as
usual. The IA key can be removed from the backup
slot once the vehicle is started, if desired.
HAZARD fLASHER
ADVANCETRAC
®
STAbILITY ENHANCEMENT
SYSTEM WITH ROLL
STAbILITY CONTROL
TM
Helps you maintain stability and steerability of
your vehicle during a variety of road conditions.
If your vehicle becomes stuck, try turning off the
AdvanceTrac
®
system (by pressing the control)
to allow wheel spin and help increase momentum
to help dig the vehicle out. Refer to your Owner’s
Guide for more information.
ADAPTIVE
HEADLAMPS
These headlamps move in the same
direction as your steering wheel to
provide added visibility around curves.
AUTOMATIC
HIGH bEAMS
During nighttime driving, the
automatic high beam system
automatically turns on your high
beams if it is dark enough and no
other traffic is present. When it
detects an approaching vehicle’s
headlights or a preceding vehicle’s
tail lamps, the system turns off the
high beams (low beams remain on)
before they distract other drivers.
TO SET THE SPEED:
Press
ON
. Accelerate to the desired speed.
Press
SET +
or
SET -
and take your foot off the accelerator.
TO SET A HIgHER SPEED:
Press and hold
SET +
or press
SET +
repeatedly until
the desired speed is reached.
TO SET A LOwER SPEED:
Press and hold
SET –
or press
SET –
repeatedly until
the desired speed is reached.
TO RETuRN TO A PREVIOuSLY SET SPEED:
Press
RESuME.
TO TuRN Off:
Depress the brake pedal or press
Off.
SPEED CONTROLS
ADAPTIVE CRUISE CONTROL
(if equipped)
Allows you to set a ‘gap distance’ between
yourself and the vehicle in front of you in the
same lane, while your cruise control is active.
Press <---> steering wheel controls to select
one of three possible gap distances (Sporty,
Normal or Comfort); the vehicle will then
automatically apply the brakes when necessary
to ensure that the specified distance is kept.
For complete information on setting and using
the adaptive cruise control as well as detection
issues, refer to Adaptive cruise control in the
Driver Controls chapter of your Owner’s Guide.
Use extreme caution when using any device or feature
that may take your attention off the road. Your primary
responsibility is the safe operation of the vehicle. Only use
non-essential features and devices when it is safe to do so.
EASY fUEL
TM
“NO CAP”
fUEL SYSTEM
With this system, you simply open
the fuel filler door, insert the nozzle
and begin fueling. It is self-sealing
and therefore protected against
dust, dirt, water, snow and ice.
Wait five seconds from the time
the refueling nozzle is shut-off until
the nozzle is pulled back out of the
fill pipe to allow residual fuel in the
nozzle to drain into the tank. To use
a portable fuel container, slowly
insert the fuel funnel (located in
the spare tire compartment), and
pour the fuel into the funnel. When
done, clean the funnel or properly
dispose of it. Extra funnels can be
purchased from your authorized
dealer.
Do not
use aftermarket
funnels as they will not work with
the Easy Fuel™ system and may
cause damage.
fUEL TANK
CAPACITY/fUEL INfO
Your vehicle has a fuel tank
capacity of 18.6 gallons (70.4L).
Your vehicle will run normally on
87 octane regular fuel. Premium
fuel will provide improved
performance. Do not use E85
fuels because your vehicle was
not designed to run on fuels with
more than 10% ethanol.
If you have a 3.5L V6 Ecoboost
engine, your vehicle is designed
to run on regular fuel with an
octane rating of 87 or higher.
For best overall performance,
premium fuel with an octane rating
of 91 or higher is recommended.
The performance gained by
using premium fuel will be most
noticeable in hot weather or in
severe duty applications such as
towing a trailer. Some stations
offer fuels posted as ‘Regular’
with an octane rating below 87,
particularly in high altitude areas.
Fuels with octane levels below 87
are not recommended for either
engine. Do not be concerned if
your engine sometimes knocks
lightly. However, if it knocks
heavily while you are using
fuel with the recommended octane
rating, see your authorized dealer
to prevent any engine damage.
ESSENTIAL
INfORMATION
PADDLE SHIfTERS
Your six speed automatic transmission gives you the ability to
manually change gears without taking your hands off the wheel.
To use, move the gearshift lever from the Drive position (D) to the
Manual position (M). To downshift, push the paddle shifters on
the steering wheel control forward. To upshift, press the paddle
shifters on the steering wheel rearward. The current gear will
display in the instrument cluster. For more information, refer
to your Owner’s Guide.