21 -
Operating additional equipment
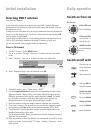
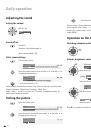
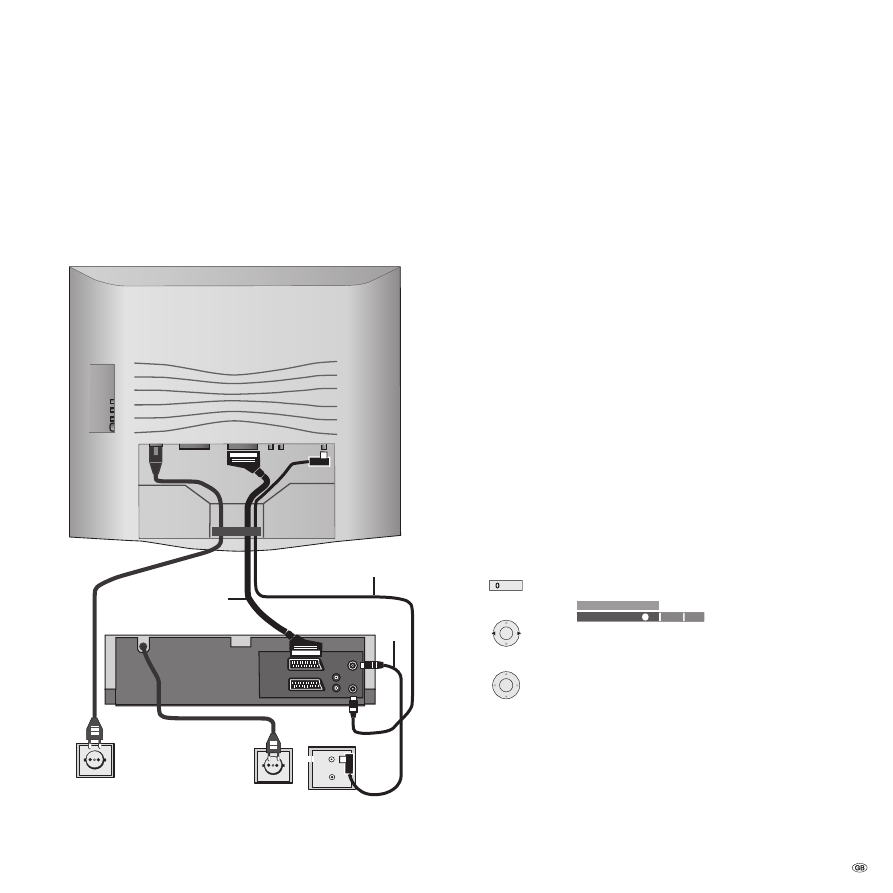
Connecting recorders
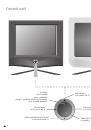
Connect your antenna or cable connection to the recorder (1).
Connect the recorder to the Euro-AV sockets on the TV set if possible (2).
Connect the antenna output of the recorder to the antenna input of the TV
set (3). The antenna signal is then available to both the tuner in the recorder
and in the TV set.
ENTREE
ANTENNE
EURO AV2
DECODER
EURO AV1
AUDIO/
VIDEO
SORTIE
ANTENNE
AERIAL
RF OUT
SORTIE
G
L
D
R
OUT
AUDIO
220 - 240 V ~
3
1
2
1.
2.
3.
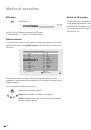
Log in the device
Call the TV menu.
Select “Connections“.
Select the free connection (AV1, AV2
(1
or AVS).
Select the device type you want to connect and its signal type in the connec-
tion wizard, e.g. “VHS/8 mm....VCR“ for video recorder.
Con
fi
rm with
OK
.
Select the colour norm of the video device. If you do not know it, select
”automatic”.
Con
fi
rm with
OK
.
Video playback
You get the best picture and sound reproduction when the recorder, DVD player
or camcorder is connected by an AV cable (Scart cable) to one of the AV sockets
of the TV.
When you are playing a video recorder, DVD player, camcorder or digital
camera, select the AV socket to which the video device is connected with ”AV
selection” (button 0 AV) or with the station table.
Recorders transmit a switching voltage during playback which the TV set can
decode (set Connections – Switching voltage to ”
yes
” in the TV menu). Then the
picture of the recorder is shown at the current channel position during playback.
Calling an AV program in the AV selection list
Call AV selection.
AV
AV selection
OK
AV2
AV1
AVS
Select AV socket for external video device.
OK
Call with
OK
.
OK
Now you will see the playback from the connected video device.
(1
AV2 is not available in DVB-T models.
1.
2.
3.
4.
5.
6.
7.