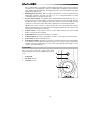
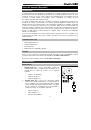
4
We recommend that you ground the unused negative input (this can be done by wiring the
ring and sleeve of the TRS plug together). The TRS input is summed through a balanced
input amplifier with the XLR input, allowing both inputs to be used simultaneously. Input
specifications apply to both.
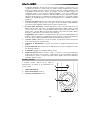
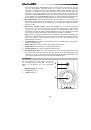
3.
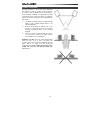
Sub-Frequency Vent Port:
This port aids in reproduction of very low frequencies by
discharging frequencies below 60 Hz and to act as a cooling mechanism to prevent
overheating. This port should not be blocked.
4.
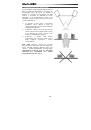
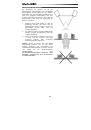
Acoustic Space Switch:
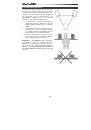
Your BX6 monitors should ideally be placed at least one foot
away from the nearest wall, ceiling, or other large, flat surface. In the real world, this may
be impractical due to space limitations within your studio. For that reason, BX6 monitors
feature an acoustic space switch. This switch compensates for placement near walls.
Tip:
Be sure to leave at least 3" of space between the rear of the speaker and a wall to
allow the rear-firing port to "breathe" properly. Placing the speaker any closer than 3" may
adversely affect low-frequency response.
5.
Volume Control:
Use the volume control to set the output sound pressure from the BX6
Carbon to proper levels as required.
6.
Power Switch:
This switch turns the monitor on and off.
7.
Power Receptacle:
Accepts a detachable 3-circuit line cord in order to power the monitor.
8.
Fuse Holder:
Holds the external main fuse.
9.
Voltage-Select Switch:
Provides two selections, 115V AC and 230V AC, and should be
set to match the "house supply" (receptacle) voltage of the country or location in which the
speaker is used. The 115V setting is correct for the USA, while the 230V setting is correct
for most of the UK and Europe.
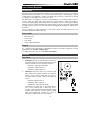
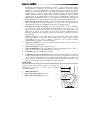
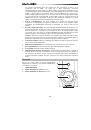
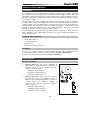
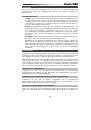
Front Panel
The front panel houses the Power LED, which
indicates whether the speakers (amplifier) power is on
or off.
1.
Power LED
2.
HF Driver
(tweeter)
3.
LF Driver
(woofer)
2
1
3