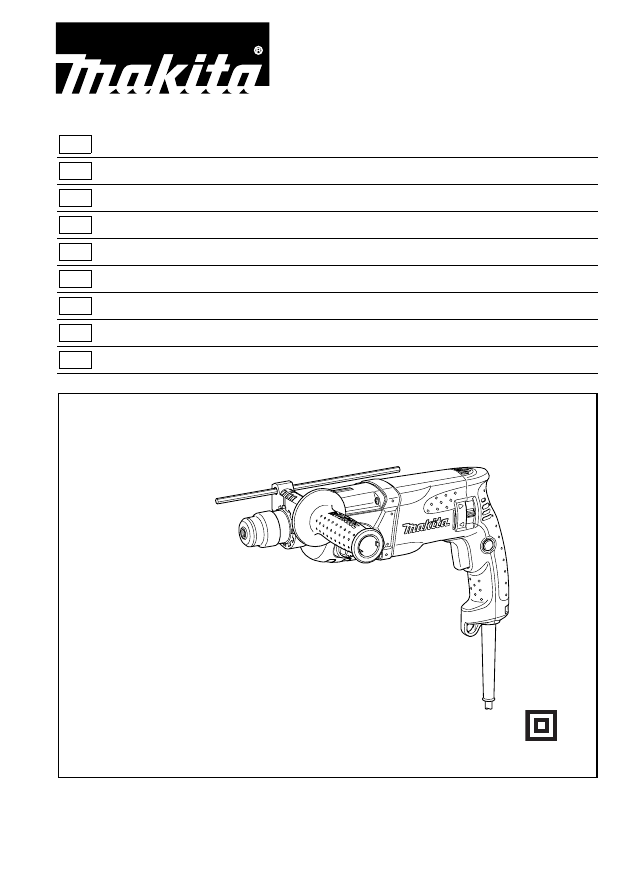
Инструкция для MAKITA HR2460

(скачивание инструкции бесплатно)
Формат файла: PDF
Доступность: Бесплатно как и все руководства на сайте. Без регистрации и SMS.
Дополнительно: Чтение инструкции онлайн
background image

GB Rotary Hammer

Instruction Manual

F

Perforateur


Manuel d’instructions

D

Bohrhammer

Betriebsanleitung

I

Martello rotativo

Istruzioni per l’uso

NL Boorhamer Gebruiksaanwijzing

E

Martillo rotativo

Manual de instrucciones

P

Martelo rotativo

Manual de instruções

DK Borehammer

Brugsanvisning

GR

Περιστρφικ σφυρί 

δηγίες ρήσεως

HR2460
HR2460F

1
2
3
4
5
6
7
8
9
10
11
12
13
14
15
16
17
18
19
20
21
22
23
24
25
26
27
28
29
30
31
32
33
34
35
36
37
38
39
40
Оглавление инструкции
  • Страница 1 из 41
    GB Rotary Hammer Instruction Manual F Perforateur Manuel d’instructions D Bohrhammer Betriebsanleitung I Martello rotativo Istruzioni per l’uso NL Boorhamer Gebruiksaanwijzing E Martillo rotativo Manual de instrucciones P Martelo rotativo Manual de instruções DK Borehammer GR Περιστρφικ σφυρί
  • Страница 2 из 41
    2 3 1 1 2 B 5 4 A 3 4 6 11 9 7 5 10 6 14 14 15 15 7 2 13 12 8 8
  • Страница 3 из 41
    16 17 9 10 18 20 19 11 12 21 22 13 3
  • Страница 4 из 41
    ENGLISH Explanation of general view 1 2 3 4 5 6 7 8 Switch trigger Lock button Lamp Reversing switch lever Action mode changing knob Grip base Side grip Loosen 9 10 11 12 13 14 15 16 Tighten Teeth Protrusion Bit shank Bit grease Bit Chuck cover Depth gauge 17 18 19 20 21 22 3. SPECIFICATIONS Model
  • Страница 5 из 41
    FUNCTIONAL DESCRIPTION Torque limiter CAUTION: • Always be sure that the tool is switched off and unplugged before adjusting or checking function on the tool. The torque limiter will actuate when a certain torque level is reached. The motor will disengage from the output shaft. When this happens,
  • Страница 6 из 41
    OPERATION Hammer drilling operation Position the bit at the desired location for the hole, then pull the switch trigger. Do not force the tool. Light pressure gives best results. Keep the tool in position and prevent it from slipping away from the hole. Do not apply more pressure when the hole
  • Страница 7 из 41
    FRANÇAIS Descriptif 1 2 3 4 5 6 7 Gâchette de l’interrupteur Bouton de blocage Lampe Levier inverseur Bouton de changement de mode de fonctionnement Embase de la poignée Poignée latérale 8 9 10 11 12 13 14 15 Desserrer Serrer Crans Saillie Queue de foret Graisse de foret Foret Cache du porte-outil
  • Страница 8 из 41
    14. Certains matériaux contiennent des produits chimiques qui peuvent être toxiques. Prenez les précautions nécessaires pour ne pas inhaler les poussières qu’ils dégagent et pour éviter tout contact avec la peau. Conformez-vous aux consignes de sécurité du fabricant. CONSERVEZ CES INSTRUCTIONS.
  • Страница 9 из 41
    Tige de profondeur (Fig. 9) Perçage du bois ou du métal (Fig. 12 et 13) La tige de profondeur vous permet de percer des trous de longueur uniforme. Desserrez la poignée latérale et insérez la tige de profondeur dans l’orifice de la poignée latérale. Réglez la tige à la profondeur voulue puis serrez
  • Страница 10 из 41
    ACCESSOIRES ATTENTION : • Les accessoires ou pièces supplémentaires qui suivent sont recommandés pour l’utilisation avec l’outil Makita spécifié dans ce manuel. L’utilisation de tout autre accessoire ou pièce supplémentaire peut comporter un risque de blessure. Utilisez uniquement l’accessoire ou
  • Страница 11 из 41
    DEUTSCH Übersicht 1 2 3 4 5 6 7 8 Elektronikschalter Schalterarretierung Lampe Drehrichtungsumschalter Betriebsartenschalter Griffbasis Seitengriff Lösen 9 10 11 12 13 14 15 16 Festziehen Innenverzahnung Außenverzahnung Bohrerschaft Bohrerfett Bohrer Werkzeugverriegelung Tiefenanschlag 3.
  • Страница 12 из 41
    14. Manche Materialien können giftige Chemikalien enthalten. Treffen Sie Vorsichtsmaßnahmen, um das Einatmen von Arbeitsstaub und Hautkontakt zu verhüten. Befolgen Sie die Sicherheitsdaten des Materialherstellers. BEWAHREN SIE DIESE HINWEISE SORGFÄLTIG AUF. WARNUNG: MISSBRAUCH oder Missachtung der
  • Страница 13 из 41
    Montage und Demontage des Bohrers Den Bohrerschaft vor der Montage des Bohrers reinigen und mit dem mitgelieferten Bohrer-/Meißelfett schmieren. (Abb. 6) Bohrer drehend in die Werkzeugaufnahme einführen und einschieben, bis es einrastet. (Abb. 7) Prüfen Sie nach jedem Montagevorgang den sicheren
  • Страница 14 из 41
    WARTUNG VORSICHT: • Denken Sie vor der Durchführung von Überprüfungen oder Wartungsarbeiten stets daran, die Maschine auszuschalten und vom Stromnetz zu trennen. Um die SICHERHEIT und ZUVERLÄSSIGKEIT dieses Produkts aufrechtzuerhalten, sollten Reparaturen, Überprüfung und Austausch der Kohlebürsten
  • Страница 15 из 41
    ITALIANO Visione generale 1 2 3 4 5 6 7 Interruttore a grilletto Bottone di bloccaggio Lampadina Levetta d’inserzione Manopola di selezione della modalità di funzionamento Base manico Manico laterale 8 9 10 11 12 13 14 15 Per allentare Per stringere Dente Sporgenze Codolo Grasso punta Punta
  • Страница 16 из 41
    DESCRIZIONE DELL’UTILIZZO ATTENZIONE: • Accertarsi sempre che l'utensile sia spento e non collegato alla presa di corrente prima di regolarlo o di controllarne il funzionamento. Funzionamento dell’interruttore a grilletto (Fig. 1) ATTENZIONE: • Prima di collegare l’utensile alla presa di corrente,
  • Страница 17 из 41
    Scodellino della polvere (Fig. 10) Usate lo scodellino della polvere per evitare che la polvere cada sull’utensile o su voi stessi quando trapanate un punto sopra la testa. Attaccate lo scodellino della polvere alla punta, come mostrato nella Fig. 10. Le dimensioni delle punte a cui si possono
  • Страница 18 из 41
    NEDERLANDS Verklaring van algemene gegevens 1 2 3 4 5 6 7 8 Trekschakelaar Vergrendelknop Lamp Omkeerschakelaar Werkingskeuzeknop Handgreepvoet Zijhandgreep Losdraaien 9 10 11 12 13 14 15 16 Vastzetten Tanden Nokken Boorschacht Boorvet Boor Boorkopdeksel Diepteaanslag 17 18 19 20 21 22 2.
  • Страница 19 из 41
    14. Sommige materialen bevatten chemische stoffen die giftig kunnen zijn. Neem de nodige voorzorgsmaatregelen tegen inademing van stof en contact met de huid. Volg de veiligheidsinstructies van de leverancier van het materiaal op. BEWAAR DEZE VOORSCHRIFTEN. WAARSCHUWING: VERKEERD GEBRUIK of het
  • Страница 20 из 41
    Diepteaanslag (Fig. 9) Boren in hout of metaal (Fig. 12 en 13) De diepteaanslag is handig voor het boren van gaten van gelijke diepte. Maak de zijhandgreep los en steek de diepteaanslag in het gat in de zijhandgreep. Stel de diepteaanslag af op de gewenste diepte en zet de zijhandgreep vast.
  • Страница 21 из 41
    ACCESSOIRES LET OP: • Deze accessoires of hulpstukken worden aanbevolen voor gebruik met het Makita gereedschap dat in deze gebruiksaanwijzing is beschreven. Bij gebruik van andere accessoires of hulpstukken bestaat er gevaar voor persoonlijke verwonding. Gebruik de accessoires of hulpstukken
  • Страница 22 из 41
    ESPAÑOL Explicación de los dibujos 1 2 3 4 5 6 7 Interruptor de gatillo Botón de bloqueo Lámpara Palanca del interruptor de inversión Mando de cambio del modo de accionamiento Base de la empuñadura Empuñadura lateral 8 9 10 11 12 13 14 15 16 Aflojar Apretar Dientes Salientes Espiga de la broca
  • Страница 23 из 41
    ADVERTENCIA: Selección del modo de accionamiento (Fig. 4) El MAL USO o el no seguir las normas de seguridad establecidas en este manual de instrucciones podrá ocasionar graves heridas personales. Esta herramienta emplea un botón de cambio de modo de accionamiento. Utilice este botón para
  • Страница 24 из 41
    Instalación o extracción de la broca Soplador (accesorio opcional) (Fig. 11) Limpie la espiga de la broca y aplique grasa antes de instalarla. (Fig. 6) Introduzca la broca en la herramienta. Gire la broca y empújela hacia dentro hasta que se acople. (Fig. 7) Después de instalar la broca, trate
  • Страница 25 из 41
    ACCESORIOS PRECAUCIÓN: • Estos accesorios o acoplamientos están recomendados para utilizar con su herramienta Makita especificada en este manual. El empleo de cualesquiera otros accesorios o acoplamientos conllevará un riesgo de sufrir heridas personales. Utilice los accesorios o acoplamientos
  • Страница 26 из 41
    PORTUGUÊS Explicação geral 1 2 3 4 5 6 7 8 Gatilho do interruptor Botão de bloqueio Lâmpada Comutador de inversão Selector do modo de acção Base do punho Punho lateral Desapertar 9 10 11 12 13 14 15 16 Apertar Dentes Saliências Encaixe da broca Massa de lubrificação Broca Cobertura do mandril Guia
  • Страница 27 из 41
    DESCRIÇÃO FUNCIONAL PRECAUÇÃO: • Verifique sempre se a ferramenta está desligada e se retirou a ficha da tomada de corrente antes de ajustar ou verificar as funções da ferramenta. Interruptor (Fig. 1) PRECAUÇÃO: • Antes de ligar a ferramenta à corrente verifique sempre se o gatilho do interruptor
  • Страница 28 из 41
    Depósito do pó (Fig. 10) Utilize o depósito do pó para evitar que este caia na ferramenta e em si quando executa trabalhos de perfuração em locais altos. Prenda o depósito do pó à broca como indicado na Fig. 10. O tamanho das brocas a que pode ligar os depósitos do pó é o seguinte: Diamêtro da
  • Страница 29 из 41
    DANSK Illustrationsoversigt 1 2 3 4 5 6 7 8 Afbryderkontakten Låseknap Lampe Omdrejningsvælger Funktionsknap Grebbase Sidegreb Løsne 9 10 11 12 13 14 15 16 Spænde Tænder Fremspring Bor/mejsel Smørelse til bor Bor Værktøjsholder Dybdeanslag SPECIFIKATIONER 3. Model HR2460/HR2460F Kapacitet Beton Bor
  • Страница 30 из 41
    FUNKTIONSBESKRIVELSER FORSIGTIG: • Kontrollér altid, at maskinen er slået fra, og at netstikket er trukket ud af stikkontakten, før De justerer eller kontrollerer funktioner på denne maskine. Betjening (Fig. 1) FORSIGTIG: • Før maskinen startes bør det altid kontrolleres at afbryderkontakten
  • Страница 31 из 41
    ANVENDELSE Hammerboring Placer boret på det ønskede sted, hvor hullet skal bores, og tryk derefter på afbryderen. Anvend ikke magt. Med et let tryk opnås de bedste resultater. Hold boret mod hullet og sørg for, at det ikke rutscher væk. Tryk ikke yderligere såfremt borehullet bliver tilstoppet af
  • Страница 32 из 41
    ΕΛΛΗΝΙΚΑ Περιγραφή γενικής άπψης 1 2 3 4 5 6 7 Σκανδάλη διακ πτης Κπυµπί ασφάλισης Λάµπα Μλ ς διακ πτη αντιστρφής Κυµπί αλλαγής τρ πυ λειτυργίας Βάση λαής Πλευρική λαή 8 9 10 11 12 13 14 15 16 αλάρωµα Σφί!ιµ ∆ ντια Πρε!ές Στέλες αιµής Γράσσ αιµής Αιµή Κάλυµµα σφιγκτήρα Μετρητής
  • Страница 33 из 41
    10. Κρατάτε τα έρια σας µακρυά απ τα κινύµενα µέρη. 11. Μην αφήνετε τ εργαλεί σε λειτυργία. Λειτυργείτε τ εργαλεί µ ν ταν τ κρατάτε στα έρια σας. 12. Μη διευθύνετε τ εργαλεί πρς άλλα άτµα στην περιή λειτυργίας. Η αιµή µπρεί να πετατεί έ+ω και και να τραυµατίσει κάπιν σ.αρά.
  • Страница 34 из 41
    ΣΥΝΑΡΜ Λ ΓΗΣΗ ΛΕΙΤ ΥΡΓΙΑ ΠΡ Σ #Η: • Πάνττε εαιώνεστε τι τ εργαλεί είναι σηστ και απσυνδεδεµέν απ τ ρεύµα πριν εκτελέσετε πιαδήπτε εργασία στ εργαλεί. Λειτυργία κρυστικύ τρυπανισµύ Πλευρική λα.ή (.ηθητική λα.η) (Εικ. 5) ΠΡ Σ #Η: • Πάνττε ρησιµπιείτε τη πλάγια λαή για να
  • Страница 35 из 41
    ΠΡ Σ #Η: • Πτέ µη ρησιµπιείτε “περιστρφή µε σφυρκ πηµα” ταν τ σύνλ σφιγκτήρα τρυπανιύ είναι τπθετηµέν στ εργαλεί. Τ σύνλ σφιγκτήρα τρυπανιύ µπρεί να πάθει ;ηµιά. Επίσης,  σφιγκτήρας τρυπανιύ θα γεί έ!ω ταν αντιστραφεί η φρά περιστρφής τυ εργαλείυ. • Πιέ;ντας υπερλικά
  • Страница 36 из 41
    ENH101-12 DEUTSCH ENGLISH EC Declaration of Conformity EG-Übereinstimmungserklärung We Makita Corporation as the responsible manufacturer declare that the following Makita machine(s): Designation of Machine: Rotary Hammer Model No./ Type: HR2460, HR2460F are of series production and Conforms to the
  • Страница 37 из 41
    ENH101-12 NEDERLANDS PORTUGUÊS EU-Verklaring van Conformiteit Declaração de conformidade CE Wij, Makita Corporation, als de verantwoordelijke fabrikant, verklaren dat de volgende Makita-machine(s): Aanduiding van de machine: Boorhamer Modelnr./Type: HR2460, HR2460F in serie zijn geproduceerd en
  • Страница 38 из 41
    ENH101-12 ΕΛΛΗΝΙΚΑ ∆ήλωση Συµµ ρφωσης ΕΚ Η Makita Corporation, ως  υπεύθυνς κατασκευαστής, δηλώνει τι τ/τα ακ λυθ(α) µηάνηµα(τα) της Makita: αρακτηρισµ ς µηανήµατς: Περιστρφικ σφυρί Αρ. µντέλυ/ Τύπς: HR2460, HR2460F είναι εν σειρά παραγωγή και συµµρφώννται µε τις ακ λυθες Ευρωπαϊκές
  • Страница 39 из 41
    ENGLISH ITALIANO For European countries only Modello per l’Europa soltanto ENG102-2 ENG102-2 Noise The typical A-weighted noise level determined according to EN60745: Sound pressure level (LpA): 90 dB (A) Sound power level (LwA): 101 dB (A) Uncertainty (K): 3 dB (A) Wear ear protection Rumore Il
  • Страница 40 из 41
    PORTUGUÊS ΕΛΛΗΝΙΚΑ Só para países Europeus Μν για ώρες της Ευρώπης ENG102-2 ENG102-2 Ruído A característica do nível de ruído A determinado de acordo com EN60745: Nível de pressão de som (LpA): 90 dB (A) Nível do som (LwA): 101 dB (A) Variabilidade (K): 3 dB (A) Utilize protectores para os
  • Страница 41 из 41