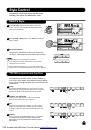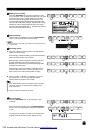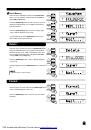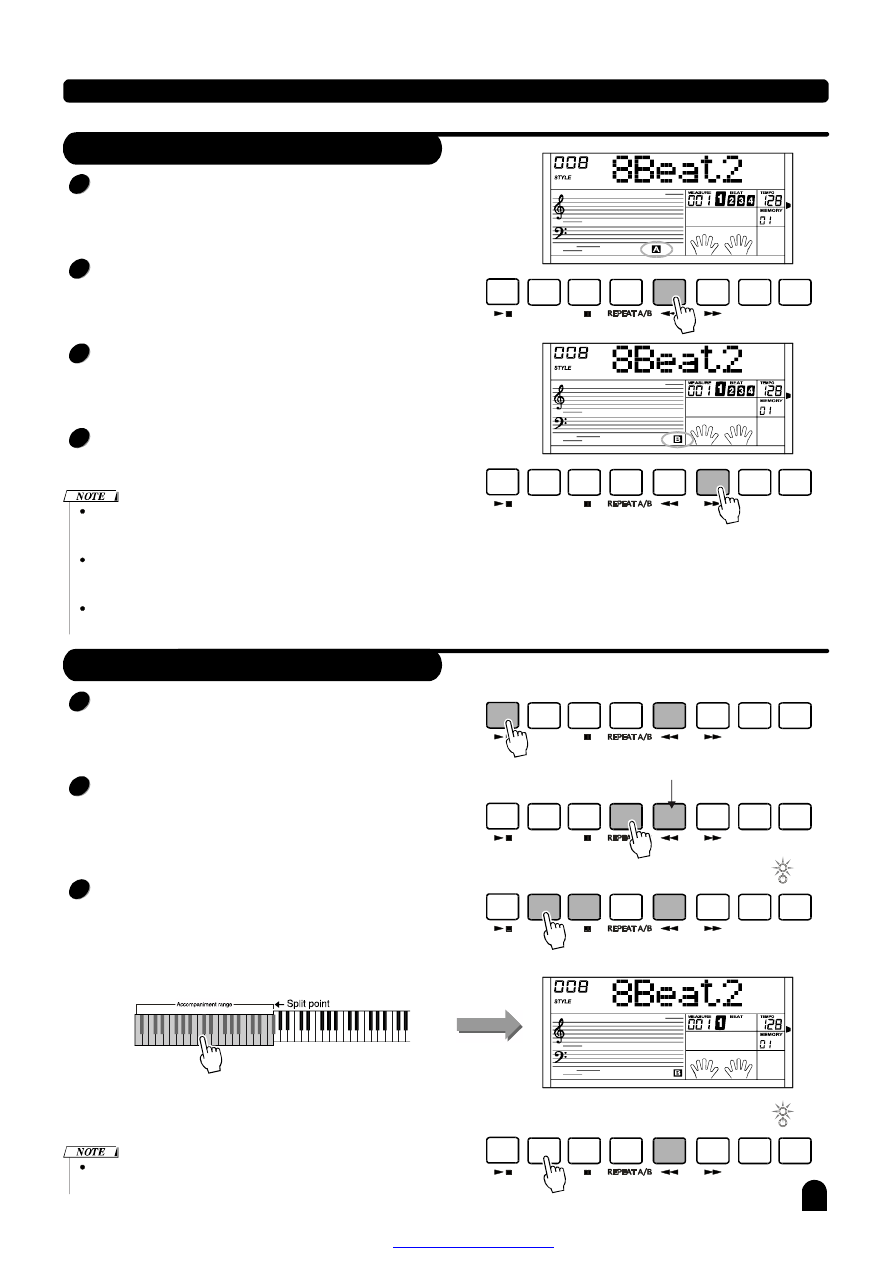
Fill A/B
Style Control
21
In NORMAL mode, press
button to insert 1 measure fill
and LCD flashes 'A'. After one measure is over, NORMAL
style will be returned.
[A]
In VARIATION mode, press
button to insert 1 measure
fill and LCD flashes 'B'. After one measure is over, VARIA-
TION style will be returned.
[B]
In NORMAL mode, press
] button to insert 1 measure fill
and LCD flashes 'B'. After one measure is over, VARIATION
mode will be started.
[B
In VARIATION mode, press
button to insert 1measure fill
and LCD flashes 'A' . After one measure is over, NORMAL
style will be started.
[A]
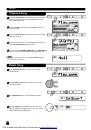
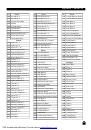
Hold down the
/
button when the style is playing, the selected
FILL pattern repeats continuously until button is released.
Press
when style stop, it will change to the normal section, the
flag
on LCD will be lightened;
Press
when style stop, it will change to the variation section, the
flag
on LCD will be lightened.
[A] [B]
[A]
[B]
"A"
"B"
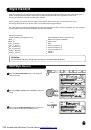
START/
STOP
START/
STOP
START/
STOP
START/
STOP
START/
STOP
START/
STOP
SYNC
STOP
SYNC
STOP
SYNC
STOP
SYNC
STOP
SYNC
STOP
SYNC
STOP
SYNC
START
SYNC
START
SYNC
START
SYNC
START
SYNC
START
SYNC
START
A
A
A
A
A
A
FADE
FADE
FADE
FADE
FADE
FADE
B
B
B
B
B
B
CHORD
MODE
CHORD
MODE
CHORD
MODE
CHORD
MODE
CHORD
MODE
CHORD
MODE
INTRO/
ENDING
INTRO/
ENDING
INTRO/
ENDING
INTRO/
ENDING
INTRO/
ENDING
INTRO/
ENDING
1
1
2
2
3
3
4
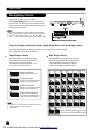
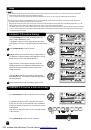
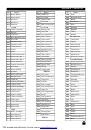
Stop immediatel y:
Th e acco mpanim ent can be st op p ed a t an y tim e by
pressing the
button.
[START/STOP]
Sync Stop:
When chord mode is on and style is not playing, press the
button, SYNC STOP and SYNC START LED
is lightened. In this mode, press the any key in left area of
keyboard to start the style playing and release the keyboard
will stop it.
When SYNC STOP LED is lightened and style is playing,
press the
button, the SYNC STOP LED will
be darken. In this mode, the style will playing continuously.
[SYNC STOP]
[SYNC STOP]
Ending stop:
Press the
button
[INTRO/END]
, the style will stop after the
ENDING section over.
Stop a Style
Flashing
Play a style
FINGERED
FINGERED
FULLRANGE
FULLRANGE
[SYNC STOP]
would be enabled only when CHORD MODE
indicator is on.
TOUC H
TOUC H
TOUC H
PDF created with pdfFactory Pro trial version
www.pdffactory.com