Инструкция для MITSUBISHI ELECTRIC PLH-6AKHS, PLH-6AAKH, PLH-5AKHS, PLH-5AAKH, PLH-4AKHS, PLH-4AAKH, PLH-3AKH, PLH-3AAKH, PLH-2KKHB, PLH-2KAKH, PLH-2.5KKHB, PLH-2.5KAKH, PLH-1.6KKHB, PLH-1.6KAKH
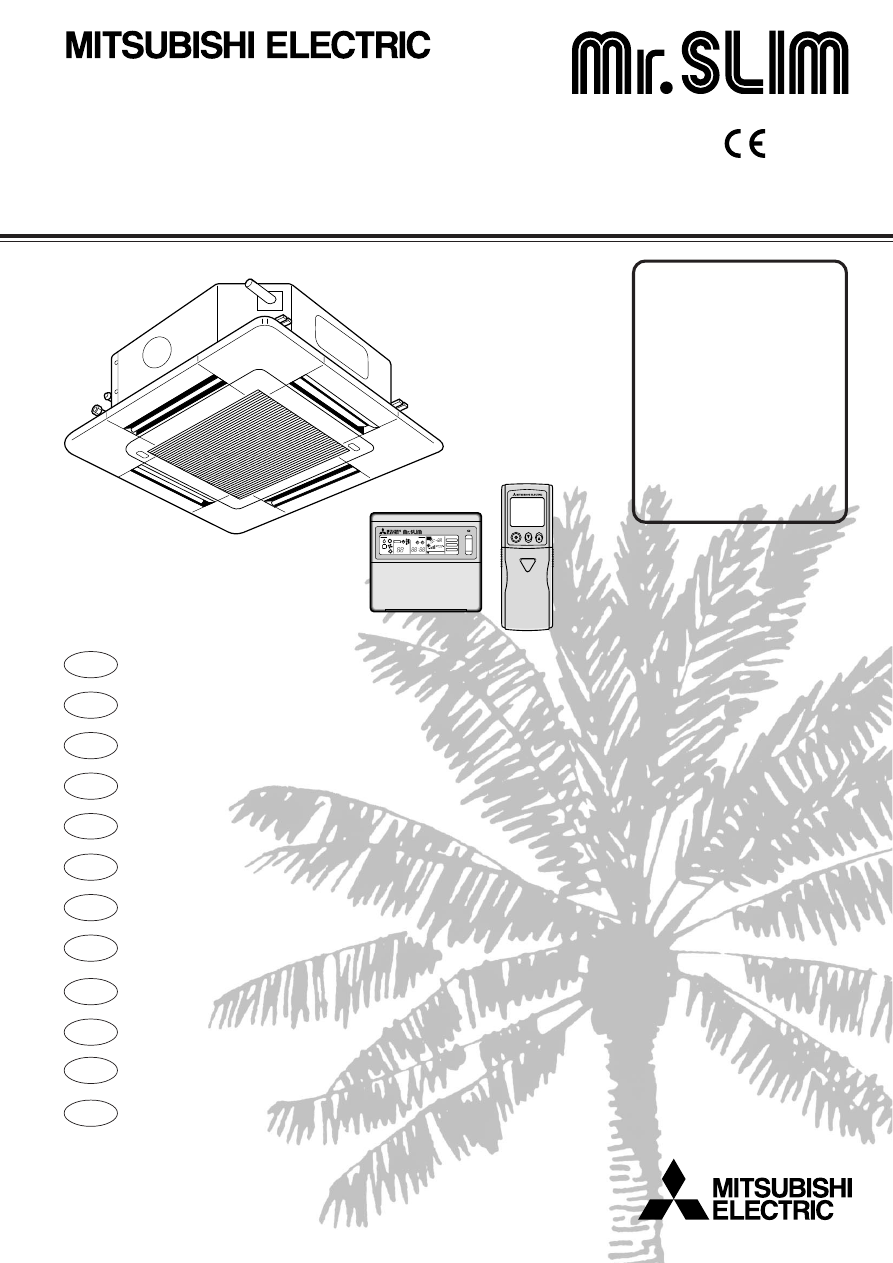
(скачивание инструкции бесплатно)
Формат файла: PDF
Доступность: Бесплатно как и все руководства на сайте. Без регистрации и SMS.
Дополнительно: Чтение инструкции онлайн
background image

Air-Conditioners

PLH-1.6, 2, 2.5KK(H)B
PLH-3AK(H), 4, 5, 6AK(H)S

OPERATION MANUAL

For safe and correct use, please read this operation manual thoroughly before operating the air-conditioner unit.

BEDIENUNGSHANDBUCH

Zum sicheren und einwandfreien Gebrauch der Klimaanlage dieses Bedienungshandbuch vor Inbetriebnahme gründlich durchlesen.

MANUEL D’UTILISATION

Pour une utilisation correcte sans risques, veuillez lire le manuel d’utilisation en entier avant de vous servir du climatiseur.

DRIFTSMANUAL

Läs denna driftsmanual noga för säkert och korrekt bruk innan luftkonditioneringen används.

BEDIENINGSHANDLEIDING

Voor een veilig en juist gebruik moet u deze bedieningshandleiding grondig doorlezen voordat u de airconditioner gebruikt.

ISTRUZIONI DI FUNZIONAMENTO

Leggere attentamente questi istruzioni di funzionamento prima di avviare l’unità, per un uso corretto e sicuro della stessa.

MANUAL DE INSTRUCCIONES

Lea este manual de instrucciones hasta el final antes de poner en marcha la unidad de aire acondicionado para garantizar un uso seguro y correcto.

MANUAL DE OPERAÇÃO

Para segurança e utilização correctas, leia atentamente o manual de operação antes de pôr a funcionar a unidade de ar condicionado.

DRIFTSMANUAL

Læs venligst denne driftsmanual grundigt før airconditionanlægget betjenes af hensyn til sikker og korrekt brug.

E°XEIPI¢IO O¢H°IøN XPH™Eø™

°È· ·ÛÊ¿ÏÂÈ· Î·È ÛˆÛÙ‹ ¯Ú‹ÛË, ·Ú·Î·Ï›ÛÙ ‰È·‚¿ÛÂÙ ÚÔÛ¯ÙÈο ·˘Ùfi ÙÔ ÂÁ¯ÂÈÚ›‰ÈÔ ¯Ú‹Ûˆ˜ ÚÈÓ ı¤ÛÂÙ Û ÏÂÈÙÔ˘ÚÁ›· ÙË ÌÔÓ¿‰· ÎÏÈÌ·ÙÈÛÌÔ‡.

IfiLETME ELK‹TABI

Emniyetli ve do¤ru biçimde nas›l kullan›laca¤›n› ö¤renmek için lütfen klima cihaz›n› iflletmeden önce bu elkitab›n› dikkatle okuyunuz.

РУКОВОДСТВО ПО ЭКСПЛУАТАЦИИ

Для обеспечения правильного и безопасного использования следует ознакомиться с инструкциями, указанными в данном руководстве по
эксплуатации, тщательным образом до того, как приступать к использованию кондиционера.

FOR USER
FÜR BENUTZER
POUR L’UTILISATEUR
FÖR ANVÄNDAREN
VOOR DE GEBRUIKER
PER L’UTENTE
PARA EL USUARIO
PARA O UTILIZADOR
TIL BRUGER
°π∞ ∆√¡ Ã∏™∆∏
KULLANICI ‹Ç‹N
ДЛЯ ПОЛЬЗОВАТЕЛЯ

E

D

ES

I

NL

F

SD

DK

TR

GR

PR

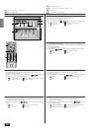
For PLH-AK(H) Series

ON/OFF –

STAND BY 
DEFROST

CENTRALLY CONTROLLED

˚C

CLOCK

ON OFF

˚C

1Hr.

NOT AVAILABLE

CHECK MODE

FILTER

CHECK

TEST RUN

RU

1
2
3
4
5
6
7
8
9
10
11
12
13
14
15
16
17
18
19
20
21
22
23
24
25
26
27
28
29
30
31
32
33
34
35
36
37
38
39
40
41
42
43
44
45
46
47
48
49
50
51
52
Оглавление инструкции
  • Страница 1 из 53
    Air-Conditioners PLH-1.6, 2, 2.5KK(H)B PLH-3AK(H), 4, 5, 6AK(H)S FOR USER FÜR BENUTZER POUR L’UTILISATEUR FÖR ANVÄNDAREN VOOR DE GEBRUIKER PER L’UTENTE PARA EL USUARIO PARA O UTILIZADOR TIL BRUGER °π∞ ∆√¡ Ã∏™∆∏ KULLANICI ‹Ç‹N ДЛЯ ПОЛЬЗОВАТЕЛЯ ON/OFF – CENTRALLY CONTROLLED ON OFF CHECK CLOCK 1Hr.
  • Страница 2 из 53
    E D Index Inhoud F NL SD I Contents Inhaltsverzeichnis Innehåll Indice 1. Safety Precautions .................................................................................... 4 2. Operation ................................................................................................. 12 2.1.
  • Страница 3 из 53
    ES DK TR RU Contenido Indholdsfortegnelse ‹çindekiler Содержание PR GR Índice ¶ÂÚȯfiÌÂÓ· 1. Medidas de Seguridad .............................................................................. 5 2. Manejo
  • Страница 4 из 53
    E D 1 1. Consignes de sécurité 1. Veiligheidsvoorschriften F NL SD I 1. 1. 1. 1. Safety Precautions Sicherheitsvorkehrungen Säkerhetsåtgärder Misure di sicurezza s Before installing the unit, make sure you read all the “Safety precautions”. s The “Safety precautions” provide very important points
  • Страница 5 из 53
    ES DK TR RU 1. 1. 1. 1. Medidas de Seguridad Sikkerhedsforanstaltninger Güvenlik Önlemleri Меры предосторожности s Antes de instalar la unidad, asegúrese de haber leído el capítulo de “Medidas de seguridad”. s Las “Medidas de seguridad” señalan aspectos muy importantes sobre seguridad. Es
  • Страница 6 из 53
    E D 1 1. Consignes de sécurité 1. Veiligheidsvoorschriften F NL SD I 1. 1. 1. 1. Safety Precautions Sicherheitsvorkehrungen Säkerhetsåtgärder Misure di sicurezza Symbols used in the illustrations : Indicates an action that must be avoided. : Indicates that important instructions must be followed. :
  • Страница 7 из 53
    1. 1. 1. 1. ES DK TR RU Medidas de Seguridad Sikkerhedsforanstaltninger Güvenlik Önlemleri Меры предосторожности Símbolos utilizados en las ilustraciones PR GR 1. Precauções de Segurança 1. ¶ÚÔÊ˘Ï·ÎÙÈο ª¤ÙÚ· ∞ÛÊ·Ï›·˜ 1 Símbolos utilizados nas ilustrações : Indica una acción que debe evitarse. :
  • Страница 8 из 53
    E D 1 1. Consignes de sécurité 1. Veiligheidsvoorschriften F NL CENTRALL Y CONTROL LED CHECK ON OFF ON/OFF – 1Hr. CLOCK ˚C STAND BY DEFROST FILTER CHECK MODE ˚C NOT AVAILABLE TEST RUN SD I 1. 1. 1. 1. Safety Precautions Sicherheitsvorkehrungen Säkerhetsåtgärder Misure di sicurezza Warning: • The
  • Страница 9 из 53
    ES DK TR RU 1. 1. 1. 1. Medidas de Seguridad Sikkerhedsforanstaltninger Güvenlik Önlemleri Меры предосторожности Atención: • La unidad no debe ser instalada por el usuario. Pida a su distribuidor o a una empresa debidamente autorizada que se lo instale. La incorrecta instalación de la unidad puede
  • Страница 10 из 53
    E D 1 F NL 1. Consignes de sécurité 1. Veiligheidsvoorschriften SD I 1. 1. 1. 1. Safety Precautions Sicherheitsvorkehrungen Säkerhetsåtgärder Misure di sicurezza Warning: • Do not remove the front panel or the fan guard from the outdoor unit when it is running. You could be injured if you touch
  • Страница 11 из 53
    ES DK TR RU 1. 1. 1. 1. Medidas de Seguridad Sikkerhedsforanstaltninger Güvenlik Önlemleri Меры предосторожности Atención: • No extraiga el panel frontal del ventilador de la unidad exterior mientras esté en funcionamiento. Puede resultar herido si toca piezas giratorias, calientes o de alto
  • Страница 12 из 53
    E D F NL 2. Fonctionnement 2. Gebruik SD I 2. 2. 2. 2. Operation Betrieb und Bedienung Drift Funzionamento For wireless remote controller [PLH-AK(H) Series] Replacing the Batteries and how to set the current time If no signal is transmitted and the indoor unit’s lamp does not light up even if the
  • Страница 13 из 53
    ES DK TR RU 2. 2. 2. 2. Manejo Drift Çal›flma Эксплуатация PR GR 2. Funcionamento 2. §ÂÈÙÔ˘ÚÁ›· Para controlador remoto inalámbrico [Serie PLH-AK(H)] Para controlo remoto sem fio [Série PLH-AK(H)] Sustitución de las pilas y ajuste de la hora actual Substituição das pilhas e como regular a hora
  • Страница 14 из 53
    E D F NL 2. Fonctionnement 2. Gebruik SD I 2. 2. 2. 2. Operation Betrieb und Bedienung Drift Funzionamento Operating range ON/OFF – 2 CENTRALLY CONTROLLED ON OFF CHECK CLOCK A 1Hr. ˚C FILTER 1 CHECK MODE TEST RUN ˚C Maximum Cooling Minimum Maximum Heating Minimum Indoor air intake temperature
  • Страница 15 из 53
    2. 2. 2. 2. ES DK TR RU Manejo Drift Çal›flma Эксплуатация GR Ámbito de funcionamiento Frío Calor Máximo Mínimo Máximo Mínimo 2. Funcionamento 2. §ÂÈÙÔ˘ÚÁ›· PR Gama de funcionamento Temperatura del aire entrante (interior) Temperatura del aire entrante (exterior) 35 °C TS, 22,5 °C TH 46 °C TS 21 °C
  • Страница 16 из 53
    E D F NL 2. Fonctionnement 2. Gebruik SD I 2. 2. 2. 2. Operation Betrieb und Bedienung Drift Funzionamento 2.2. Mode select 1 If the unit is off, press the ON/OFF button to turn it on. A ON/OFF – 2 CENTRALLY CONTROLLED B ON OFF CHECK A The ON indicator should light up. B 1 CHECK MODE TEST RUN
  • Страница 17 из 53
    ES DK TR RU 2. 2. 2. 2. Manejo Drift Çal›flma Эксплуатация PR GR 2. Funcionamento 2. §ÂÈÙÔ˘ÚÁ›· 2.2. Selección de modo 2.2. Selecção do modo 1 Si la unidad está apagada, pulse el botón de encendido ON/OFF para ponerla en marcha. 1 Se a unidade estiver desligada, carregue no botão ON/OFF para a
  • Страница 18 из 53
    E D F NL 2. Fonctionnement 2. Gebruik SD I A B 2. 2. 2. 2. Operation Betrieb und Bedienung Drift Funzionamento 2.3. Selecting a temperature TEMP. s To decrease the room temperature: 1 Press button to set the desired temperature. A The selected temperature is displayed. 2 ON/OFF – CENTRALLY
  • Страница 19 из 53
    ES DK TR RU 2. 2. 2. 2. Manejo Drift Çal›flma Эксплуатация PR GR 2.3. Ajuste de la temperatura 2. Funcionamento 2. §ÂÈÙÔ˘ÚÁ›· 2.3. Selecção da temperatura TEMP. s Para disminuir la temperatura de la habitación: 1 Pulse el botón para fijar la temperatura deseada. A En el visor aparecerá la
  • Страница 20 из 53
    E D F NL 2. Fonctionnement 2. Gebruik SD I A 2. 2. 2. 2. Operation Betrieb und Bedienung Drift Funzionamento 2.4. Selecting a fan speed 1 Press button to select a desired fan speed. • Each time you press the button, available options change with the display A on the remote controller, as shown
  • Страница 21 из 53
    ES DK TR RU 2. 2. 2. 2. Manejo Drift Çal›flma Эксплуатация PR GR 2. Funcionamento 2. §ÂÈÙÔ˘ÚÁ›· 2.4. Ajuste de la velocidad del ventilador 2.4. Selecção da velocidade da ventoinha 1 Pulse el botón para seleccionar la velocidad de ventilador deseada. • Cada vez que pulse el botón cambian las opciones
  • Страница 22 из 53
    E D F NL 2. Fonctionnement 2. Gebruik A B SD I C D E 2 ON/OFF – 1Hr. FILTER ˚C CHECK CHECK MODE STAND BY DEFROST TEST RUN ˚C Operation Betrieb und Bedienung Drift Funzionamento 2.5. Adjusting vertical airflow direction The vertical air vane helps select the vertical direction of the airflow. 1
  • Страница 23 из 53
    ES DK TR RU 2. 2. 2. 2. Manejo Drift Çal›flma Эксплуатация PR GR 2. Funcionamento 2. §ÂÈÙÔ˘ÚÁ›· 2.5. Ajuste de la dirección vertical del flujo de aire 2.5. Regulação da direcção vertical do fluxo de ar Las paletas verticales ayudan a ajustar la dirección vertical del flujo de aire. 1 Pulse el botón
  • Страница 24 из 53
    E D F NL 2. Fonctionnement 2. Gebruik SD I 2. 2. 2. 2. Operation Betrieb und Bedienung Drift Funzionamento 2.6. Using the timer CLOCK ON OFF 1) Set the current time 1 Press 2 CLOCK ON OFF button to display the “CLOCK” B. CLOCK → Remote controller display A BA ON/OFF – CENTRALLY CONTROLLED 1Hr. ON
  • Страница 25 из 53
    ES DK TR RU 2. 2. 2. 2. Manejo Drift Çal›flma Эксплуатация 2.6. Uso del programador PR GR CLOCK ON OFF 2.6. Utilização do temporizador 1) Fije la hora actual 1 Pulse el botón CLOCK ON y se verá en el visor “CLOCK” B. ON CLOCK → OFF CLOCK → Sin indicación ↑ 2 Cada vez que pulse el botón la hora
  • Страница 26 из 53
    E D F NL 2. Fonctionnement 2. Gebruik SD I 2. 2. 2. 2. Operation Betrieb und Bedienung Drift Funzionamento 2) Set the time to start the unit as follows 1 Press 2 Press CLOCK TIMER SET ON OFF ON button to display B . button to set the time that you want the unit to start. The start time is displayed
  • Страница 27 из 53
    ES DK TR RU 2. 2. 2. 2. Manejo Drift Çal›flma Эксплуатация PR GR 2) Fije la hora de arranque de la unidad como sigue 1 Pulse el botón 2 Pulse el botón CLOCK ON TIMER SET OFF para ver en el visor y ON 2) Regule a hora para ligar a unidade como segue B. 1 Carregue no botão 2 Carregue no botão para
  • Страница 28 из 53
    E D F NL 2. Fonctionnement 2. Gebruik SD I 2. 2. 2. 2. Operation Betrieb und Bedienung Drift Funzionamento For wireless remote controller [PLH-AK(H) Series] AUTO STOP AUTO START 1 Press the or button (TIMER SET). • Time can be set while the following symbol is blinking. is blinking. OFF timer : A
  • Страница 29 из 53
    ES DK TR RU 2. 2. 2. 2. Manejo Drift Çal›flma Эксплуатация PR GR Para controlador remoto inalámbrico [Serie PLH-AK(H)] AUTO STOP AUTO START Para controlo remoto sem fio [Série PLH-AK(H)] AUTO STOP 1 Presione el botón o (TIMER SET). • Se puede fijar la hora mientras parpadee el símbolo siguiente. .
  • Страница 30 из 53
    E D F NL 3. Entretien et nettoyage 3. Onderhoud en schoonmaken SD I 3. 3. 3. 3. Care and cleaning Pflege und Reinigung Skötsel och rengöring Cura e pulizia 3.1. Cleaning the filters and the indoor unit Cleaning the filters • Clean the filters using a vacuum cleaner. If you do not have a vacuum
  • Страница 31 из 53
    ES DK TR RU 3. 3. 3. 3. Mantenimiento y limpieza Vedligeholdelse og rengøring Bak›m ve temizleme Уход и чистка PR GR 3. Cuidados e limpeza 3. ºÚÔÓÙ›‰· Î·È Î·ı¿ÚÈÛÌ· 3.1. Limpieza de los filtros y de la unidad interior 3.1. Limpeza dos filtros e da unidade interior Limpieza de los filtros Limpeza
  • Страница 32 из 53
    E D F NL 3. Entretien et nettoyage 3. Onderhoud en schoonmaken SD I Care and cleaning Pflege und Reinigung Skötsel och rengöring Cura e pulizia I PLH-AK(H) Series Caution: • Always turn off the power, first on the remote controller and then the main switch, before cleaning or servicing the unit. •
  • Страница 33 из 53
    ES DK TR RU 3. 3. 3. 3. Mantenimiento y limpieza Vedligeholdelse og rengøring Bak›m ve temizleme Уход и чистка PR GR I Serie PLH-AK(H) Cuidado: • Apague siempre la unidad, primero en el control remoto y luego desconectando el interruptor principal, antes de limpiar o revisar la unidad. • Cuando
  • Страница 34 из 53
    E D F NL 3. Entretien et nettoyage 3. Onderhoud en schoonmaken SD I 3. 3. 3. 3. Care and cleaning Pflege und Reinigung Skötsel och rengöring Cura e pulizia I PLH-KK(H) Series Caution: • Always turn off the power, first on the remote controller and then the main switch, before cleaning or servicing
  • Страница 35 из 53
    ES DK TR RU 3. 3. 3. 3. Mantenimiento y limpieza Vedligeholdelse og rengøring Bak›m ve temizleme Уход и чистка I Serie PLH-KK(H) Cuidado: • Apague siempre la unidad, primero en el control remoto y luego desconectando el interruptor principal, antes de limpiar o revisar la unidad. • Cuando instale o
  • Страница 36 из 53
    E D F NL 3. Entretien et nettoyage 3. Onderhoud en schoonmaken SD I 3. 3. 3. 3. Care and cleaning Pflege und Reinigung Skötsel och rengöring Cura e pulizia Cleaning the indoor unit • Wipe the outside of the unit with a clean, dry, soft cloth. • Clean off any oil stains or finger marks using a
  • Страница 37 из 53
    ES DK TR RU 3. 3. 3. 3. Mantenimiento y limpieza Vedligeholdelse og rengøring Bak›m ve temizleme Уход и чистка PR GR 3. Cuidados e limpeza 3. ºÚÔÓÙ›‰· Î·È Î·ı¿ÚÈÛÌ· Limpieza de la unidad interior Limpeza da unidade interior • Limpie el exterior de la unidad con un paño limpio, suave y seco. •
  • Страница 38 из 53
    E D F NL 3. Entretien et nettoyage 3. Onderhoud en schoonmaken SD I 3. 3. 3. 3. Care and cleaning Pflege und Reinigung Skötsel och rengöring Cura e pulizia 3.2. Care and cleaning Clean the filter When the A “FILTER” indicator blinks on the remote controller to alert you to the necessity of cleaning
  • Страница 39 из 53
    ES DK TR RU 3. 3. 3. 3. Mantenimiento y limpieza Vedligeholdelse og rengøring Bak›m ve temizleme Уход и чистка PR GR 3. Cuidados e limpeza 3. ºÚÔÓÙ›‰· Î·È Î·ı¿ÚÈÛÌ· 3.2. Cuidados y limpieza 3.2. Cuidados e limpeza Limpie el filtro Limpe o filtro Cuando parpadee en el visor del control remoto la
  • Страница 40 из 53
    E 4. Troubleshooting Before you call out a repair man, check the following table to see whether there is a simple solution to your problem. Problem Unit will not start. Display reading Cause Pilot lamp does not turn on even when the Main power switch is turned off. POWER ON/OFF button is pressed.
  • Страница 41 из 53
    D 4. Fehlerbehebung Bevor Sie sich an den Kundendienst wenden, prüfen Sie nachstehende Tabelle, um festzustellen, ob es eine einfache Lösung für Ihr Problem gibt. Problem Anlage läßt sich nicht starten. Display-Anzeige Ursache Betriebsanzeigelampe schaltet sich nicht Hauptschalter ist
  • Страница 42 из 53
    F 4. Guide de dépannage Avant de faire appel à un technicien pour les réparations, veuillez consulter le tableau suivant pour voir si votre problème ne peut pas être résolu très simplement. Problème L’appareil ne se met pas en marche. Mentions sur l’affichage Cause La lampe pilote ne s’allume pas
  • Страница 43 из 53
    SD 4. Felsökning Innan du tillkallar en reparatör bör följande tabel kontrolleras för att se om det eventuellt finns en enkel lösning på problemet. Problem Enheten startar ej. Display-meddelande Orsak Pilotlampan slocknar ej trots att knappen Huvudströmbrytaren är frånslagen. POWER ON/OFF (PÅ/AV)
  • Страница 44 из 53
    NL 4. Problemen en oplossingen Controleer, voordat u een reparateur belt, de volgende tabel om te zien of er een eenvoudige oplossing voor uw probleem is. Probleem Apparaat gaat niet aan. Melding op display Oorzaak Aan/uit-lampje begint niet te branden, zelfs De netspanning is niet ingeschakeld.
  • Страница 45 из 53
    I 4. Ricerca dei guasti Prima di chiamare un tecnico, fare riferimento alla seguente tabella per controllare se l’inconveniente può essere risolto in un modo più semplice. Inconveniente L’unità non si avvia. Lettura sul display Causa Soluzione La spia luminosa non si accende anche L’interruttore di
  • Страница 46 из 53
    ES 4. Localización de fallos Antes de llamar al servicio técnico, compruebe la tabla siguiente para ver si hay alguna solución fácil a su problema. Problema La unidad no se pone en marcha. Causa Lectura en el display Solución La luz piloto no se enciende cuando se El interruptor principal está
  • Страница 47 из 53
    PR 4. Avarias Antes de chamar um técnico, verifique os pontos que seguem para ver se encontra uma solução simples ao seu problema. Problema O aparelho não arranca. Leitura do visor Causa Solução A lâmpada-piloto não acende mesmo O interruptor de alimentação principal está Ligue a alimentação.
  • Страница 48 из 53
    DK 4. Fejlfinding Før De tilkalder en reparatør, kan De rådføre Dem med følgende tabel, for at se om der er en enkel løsning på Deres problem. Problem Enheden vil ikke starte. Visning på display Årsag Kontrollampen tændes ikke, selv ikke når Der er slukket på hovedafbryderen. der trykkes på knappen
  • Страница 49 из 53
    GR 4. ∂ÓÙÔÈÛÌfi˜ ‚Ï·‚ÒÓ ¶ÚÈÓ Î·Ï¤ÛÂÙ οÔÈÔ ÂȉÈÎfi ÁÈ· ÂÈÛ΢‹ Ù˘ ÌÔÓ¿‰·˜, ÂϤÁÍÂÙ ·fi ÙÔÓ ÈÔ Î¿Ùˆ ›Ó·Î· ÁÈ· Ó· ‰È·ÈÛÙÒÛÂÙÂ Â¿Ó ˘¿Ú¯ÂÈ ·Ï‹ χÛË ÛÙÔ Úfi‚ÏËÌ¿ Û·˜. ∞ÈÙ›· §‡ÛË √ ËÏÂÎÙÚÈÎfi˜ ‰È·ÎfiÙ˘ Â›Ó·È ÎÏÂÈÛÙfi˜. ∞ÓÔ›ÍÂÙ ÙÔÓ ËÏÂÎÙÚÈÎfi ‰È·ÎfiÙË. ªÂÙ¿ ·Ù‹ÛÂÙ ÙÔ ÎÔ˘Ì› Ì ÙËÓ ¤Ó‰ÂÈÍË POWER
  • Страница 50 из 53
    TR 4. Ar›zan›n bulunmas› ve giderilmesi Tamirciyi ça¤›rmadan önce sorunun basit bir flekilde çözülüp çözülemeyece¤ini saptamak için afla¤›daki tabloya bak›n›z. Sorun Cihaz çal›flt›r›lam›yor. Ekrandaki görüntü Nedeni POWER ON/OFF (açma/kapama) Ana elektrik flalteri kapal› durumda. dü¤mesine bas›l›nca
  • Страница 51 из 53
    RU 4. Исправление неполадок Прежде чем вызывать специалиста по ремонту, обратитесь к нижеприведенной таблице. Здесь Вы можете найти простое решение Вашей проблемы. Проблема Прибор не включается. Показание дисплея Причина Индикаторная лампочка не загорается Выключен выключатель питания. даже при
  • Страница 52 из 53
    This product is designed and intended for use in the residential, commercial and light-industrial environment. The product at hand is based on the following EU regulations: • • • Low Voltage Directive 73/23/EEC Electromagnetic Compatibility Directive 89/ 336/EEC Machinery Directive 98/37/EC Please
  • Страница 53 из 53