ENG-10
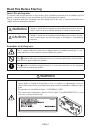
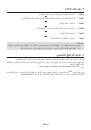
5. Mount the Touch Module at the Top of the Screen
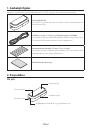
•
Built-in magnets are loaded on the rear face of the touch module as the factory default
setting. No need to secure the touch module by screws on a screen or a white board that
attracts magnets.
•
For using the touch module on a screen or a white board that does not attract magnets,
remove the built-in magnet from the rear face of the touch module and secure the touch
module with commercially available screws.
•
Use commercially available screws (2 pcs) in nominal diameter 3 mm. Prepare bolts that
are appropriate for your circumstances.
•
Project the adjustment screen in the software program. The center position adjustment line
would be displayed, Align this with the centering line on the touch module.
•
Refer to page 5 about the touch module mounting procedures by the table projection
mount unit.
Note:
• Do not connect the USB cable before mounting the touch module onto the screen.
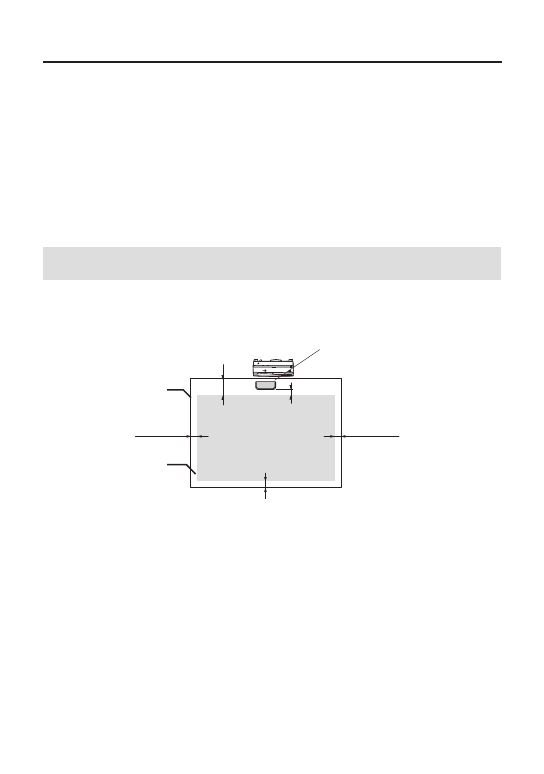
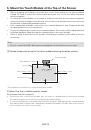
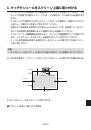
[1] Decide the position to mount the touch module referring the below picture.
Touch module
Over 25 mm / 1 inch
Over 25 mm / 1 inch
25mm - 100mm
*
/ 1 - 4 inches
Over 100 mm / 4 inches
Screen
Projection area
Over 25 mm / 1 inch
* Pay attention to mount not to cut into the projection light.
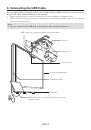
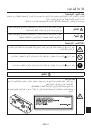
[2] Mount the touch module onto the screen.
Mounting by the built-in magnets
• Put the rear face of the touch module onto a screen or a whiteboard since the touch module
has built-in magnets on its rear face as the factory default setting.
• In case, mounting the touch module by the built-in magnets, take appropriate countermeasure
from falling down. Prepare the commercially available Kensington security wire and connect it
to the security slot on the touch module.
 1
1
 2
2
 3
3
 4
4
 5
5
 6
6
 7
7
 8
8
 9
9
 10
10
 11
11
 12
12
 13
13
 14
14
 15
15
 16
16
 17
17
 18
18
 19
19
 20
20
 21
21
 22
22
 23
23
 24
24
 25
25
 26
26
 27
27
 28
28
 29
29
 30
30
 31
31
 32
32
 33
33
 34
34
 35
35
 36
36
 37
37
 38
38
 39
39
 40
40
 41
41
 42
42
 43
43
 44
44
 45
45
 46
46
 47
47
 48
48
 49
49
 50
50
 51
51
 52
52
 53
53
 54
54
 55
55
 56
56
 57
57
 58
58
 59
59
 60
60
 61
61
 62
62
 63
63
 64
64
 65
65
 66
66
 67
67
 68
68
 69
69
 70
70
 71
71
 72
72
 73
73
 74
74
 75
75
 76
76
 77
77
 78
78
 79
79
 80
80
 81
81
 82
82
 83
83
 84
84
 85
85
 86
86
 87
87
 88
88
 89
89
 90
90
 91
91
 92
92
 93
93
 94
94
 95
95
 96
96
 97
97
 98
98
 99
99
 100
100
 101
101
 102
102
 103
103
 104
104
 105
105
 106
106
 107
107
 108
108
 109
109
 110
110
 111
111
 112
112
 113
113
 114
114
 115
115
 116
116
 117
117
 118
118
 119
119
 120
120
 121
121
 122
122
 123
123
 124
124
 125
125
 126
126
 127
127
 128
128
 129
129
 130
130
 131
131
 132
132
 133
133
 134
134
 135
135
 136
136
 137
137
 138
138
 139
139
 140
140
 141
141
 142
142
 143
143
 144
144
 145
145
 146
146
 147
147
 148
148
 149
149
 150
150
 151
151
 152
152
 153
153
 154
154
 155
155
 156
156
 157
157
 158
158
 159
159
 160
160
 161
161
 162
162
 163
163
 164
164
 165
165
 166
166
 167
167
 168
168
 169
169
 170
170
 171
171
 172
172
 173
173
 174
174
 175
175
 176
176