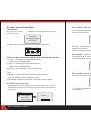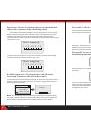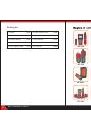
1.Tracing cable (RJ45/RJ11 Cable) which is connected to
switch or router.
Insert the cable into port RJ11/ RJ45 (S), Press the testing key of receiver, “Power”
will be lighted, then hold the receiver close to the cables, when the probe gets close
to the targeted one, you can hear clear and loud “beep,beep, beep” .
(Note: telephone cable into RJ11, Lan cable into port RJ45(S) )
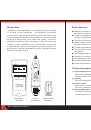
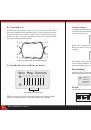
The usage of receiver
Install 9V battery, push the test key, get close to the cables with probe.you can
hear “beep”, the power led flashes. When the probe finds the targeted cable,the
voice will be loudest, and the led light will be brightest.
13
14
Your excellent helper in cable test!
Your excellent helper in cable test!
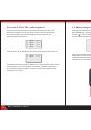
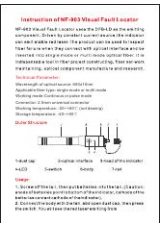
2.
Tracing cable (RJ11 Cable) which is connected to
switch or router.
Insert the cable into port RJ11, Press the testing key of receiver, “Power” will
be lighted, then hold the receiver close to the cables, when the probe gets close
to the targeted one, you can hear clear and loud “beep,beep, beep” .
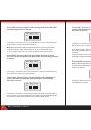
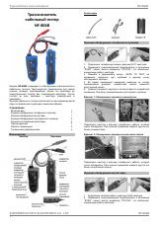
3.Locate the short or breakge point (eg: metal line)
Connect the metal line with the cable clips, press the testing key of receiver,
hold the receiver close to the cables, “beep, beep,beep” will generate, but
when the probe targets the breakge point, “beep,beep,beep” stops, which
indicates that is where the breakage is.
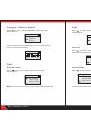
Note: 1) the metal line is de-energized.
2) Turn up the voice, which helps locate breakge easily.
3) Two cables must be connected together, if only one cable, the black
clip has to be grounded.
(
Note:
turning down the voice slowly help trace cable easiler. )