% Press EQ to select the equalizer.
Press
EQ repeatedly to switch between the fol-
lowing equalizers:
SPR-BASS
—POWERFUL—NATURAL—
VOCAL
—CUSTOM—FLAT
Adjusting equalizer curves
You can adjust the currently selected equalizer
curve setting as desired. Adjusted equalizer
curve settings are memorized in
CUSTOM.
! If you make adjustments, CUSTOM curve
is updated.
1
Press AUDIO to select EQ.
2
Press c or d to select the equalizer
band to adjust.
EQ-L (low)
—EQ-M (mid)—EQ-H (high)
3
Press a or b to adjust the level of the
equalizer band.
+6 to
–6 is displayed as the level is increased
or decreased.
# You can then select another band and adjust
the level.
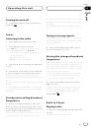
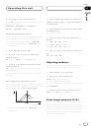
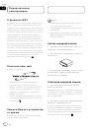
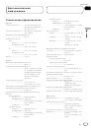
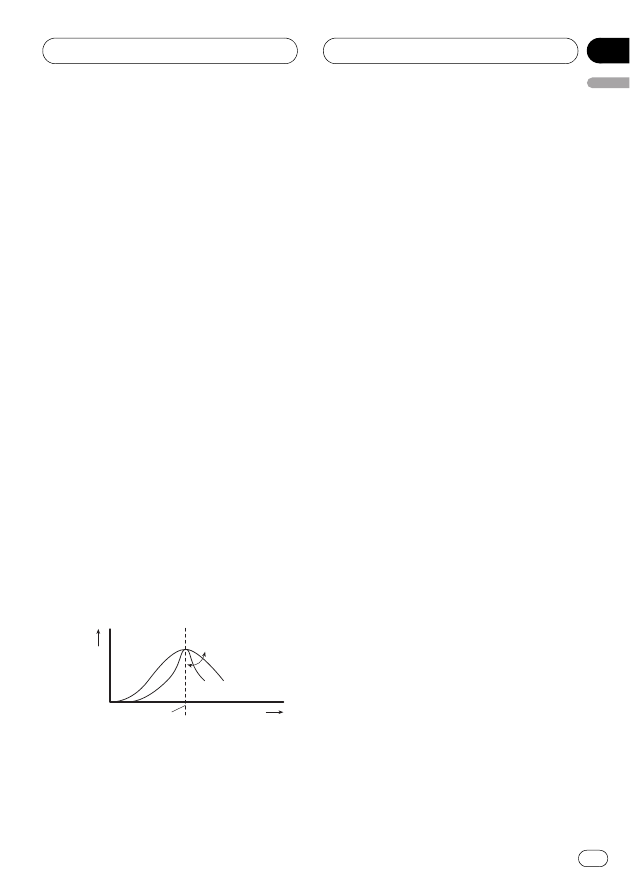
Fine-adjusting equalizer curve
You can adjust the center frequency and the Q
factor (curve characteristics) of each currently
selected curve band (
EQ-L/EQ-M/EQ-H).
Level (dB)
Center frequency
Q=2N
Q=2W
Frequency (Hz)
! If you make adjustments, CUSTOM curve
is updated.
1
Press AUDIO and hold until frequency
and the Q factor (e.g., F- 80 Q 1W) appears
in the display.
2
Press AUDIO to select the desired band
for adjustment.
Low
—Mid—High
3
Press c or d to select the desired fre-
quency.
Low:
40
—80—100—160 (Hz)
Mid:
200
—500—1k—2k (Hz)
High:
3k
—8k—10k—12k (Hz)
4
Press a or b to select the desired Q fac-
tor.
2N
—1N—1W—2W
Adjusting loudness
Loudness compensates for deficiencies in the
low- and high-sound ranges at low volume.
1
Press AUDIO to select LOUD.
2
Press a to turn loudness on.
LOUD indicator is displayed.
# To turn loudness off, press b.
# You can also turn loudness on or off by press-
ing
LOUDNESS.
3
Press c or d to select a desired level.
LOW (low)
—MID (mid)—HI (high)
Front image enhancer (F.I.E.)
The F.I.E. (Front Image Enhancer) function is a
simple method of enhancing front imaging by
cutting mid- and high-range frequency output
from the rear speakers, limiting their output to
low-range frequencies. You can select the fre-
quency you want to cut.
Operating this unit
En
11
English
Section
02