20
21
CAUTiONS
PRECAUTiONS ANd MAiNTENANCE
•
Digital Photo Frame is for indoor use only.
•
To avoid risk of fire or electric shock; do not expose the unit to mois‑
ture or condensation condition.
•
To avoid overheating, do not block the ventilation holes on the Digi‑
tal Photo Frame.
•
Keep the Digital Photo Frame from direct sunlight.
•
Do not dismantle the Digital Photo Frame. There is a risk of electric
shock and there are no user‑serviceable parts inside. Dismantling
the Digital Photo Frame will void your warranty.
CLEANiNG ThE LCd SCREEN
•
Treat the screen carefully. Because the screen of the Digital Photo
Frame is made of glass and it would be easily broken or scratched.
•
You can use a soft, non‑abrasive cloth such as a camera lens or glass
cloth to clean the LCD screen If fingerprints or dust accumulate on
the LCD screen, It will be better to moisten the cleaning cloth with
detergent to wipe the screen.
WARNiNG:
Please power off the unit before inserting or removing a
card or USB device.
Do not put the unit in water or moisture condition to
prevent the risk of electric shock.
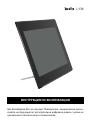
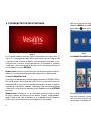
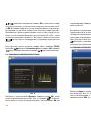
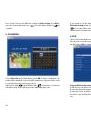
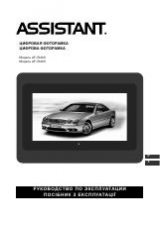
iNTROdUCTiON:
Thank you for your purchase of the Digital Photo Frame. It is designed
to allow quick and easy view of photos taken from your digital cam‑
era, mobile phone, or from a memory storage card. Please read this
User Manual carefully to learn the correct way to use the Digital Photo
Frame.
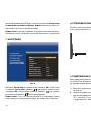
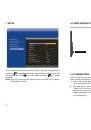
FEATURES:
1. Support Photo formats: JPEG.
2. Support Audio formats: Mp3, WMA
3. Support Video File Formats: MPEG1, MPEG2, MPEG4 (Divx4.0, Di‑
vx5.0 Xvid, AVI), M‑JPEG.
4. Support Memory card: SD/MMC/SDHC/MS
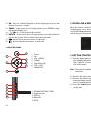
5. USB Connection: USB2.0 HOST, Mini USB
6. Built‑in Calendar, Clock, Alarm Clock, Schedule Auto On/Off
7. Adjustable brightness, contrast, saturation
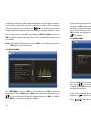
8. Image‑display mode: slideshow, preview, zoom, rotate function.
9. Auto Slideshow when inserting Memory Card
10. Support slideshow with background music
11. Support viewing pictures in thumbnail mode
12. Built‑in stereo speaker (2x2W) and earphone jack
13. Adjustable slideshow speed and above 10 kinds of transition slide‑
show
14. Copy and Delete function
15. OSD Language: Russian, English, French, German, Italian, Spanish
Packaging Check List:
1. Digital photo frame
1 piece
2. User manual
1 piece
3. AC/DC adapter
1 piece
4. Remote control
1 piece
5. Short USB Cable
1 piece
6. Bracket
1 piece