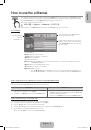
English - 10
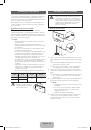
Installing the Wall Mount
The wall mount kit (sold separately) allows you to mount the TV
on the wall. For detailed information on installing the wall mount,
see the instructions provided with the wall mount. Contact a
technician for assistance when installing the wall mount bracket.
We do not advice you to do it yourself.
Samsung Electronics is not responsible for any damage to the
product or injury to yourself or others if you select to install the
TV on your own.
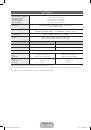
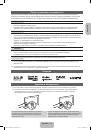
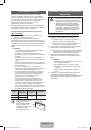
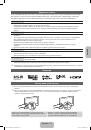
Wall Mount Kit Specifications (VESA)
✎
Wall mount kit is not supplied but sold separately.
Install your wall mount on a solid wall perpendicular to the floor.
When attaching to other building materials, please contact your
nearest dealer. If installed on a ceiling or slanted wall, it may fall
and result in severe personal injury.
✎
NOTE
x
Standard dimensions for wall mount kits are shown in
the table below.
x
When purchasing our wall mount kit, a detailed
installation manual and all parts necessary for assembly
are provided.
x
Do not use screws that do not comply with the VESA
standard screw specifications.
x
Do not use screws longer than the standard dimension,
as they may cause damage to the inside of the TV set.
x
For wall mounts that do not comply with the VESA
standard screw specifications, the length of the screws
may differ depending on their specifications.
x
Do not fasten the screws too strongly, this may damage
the product or cause the product to fall, leading to
personal injury. Samsung is not liable for these kinds of
accidents.
x
Samsung is not liable for product damage or personal
injury when a non-VESA or non-specified wall mount
is used or the consumer fails to follow the product
installation instructions.
x
Do not exceed 15 degrees tilt when mounting this TV.
inches
VESA Spec.
(A * B)
Standard
Screw
Quantity
43~51
400 X 400
M8
4
60~64
600 X 400
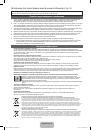
Do not install your Wall Mount
Kit while your TV is turned on.
It may result in personal injury
due to electric shock.
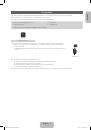
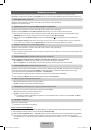
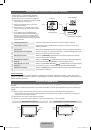
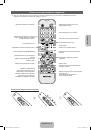
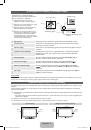
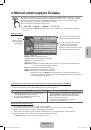
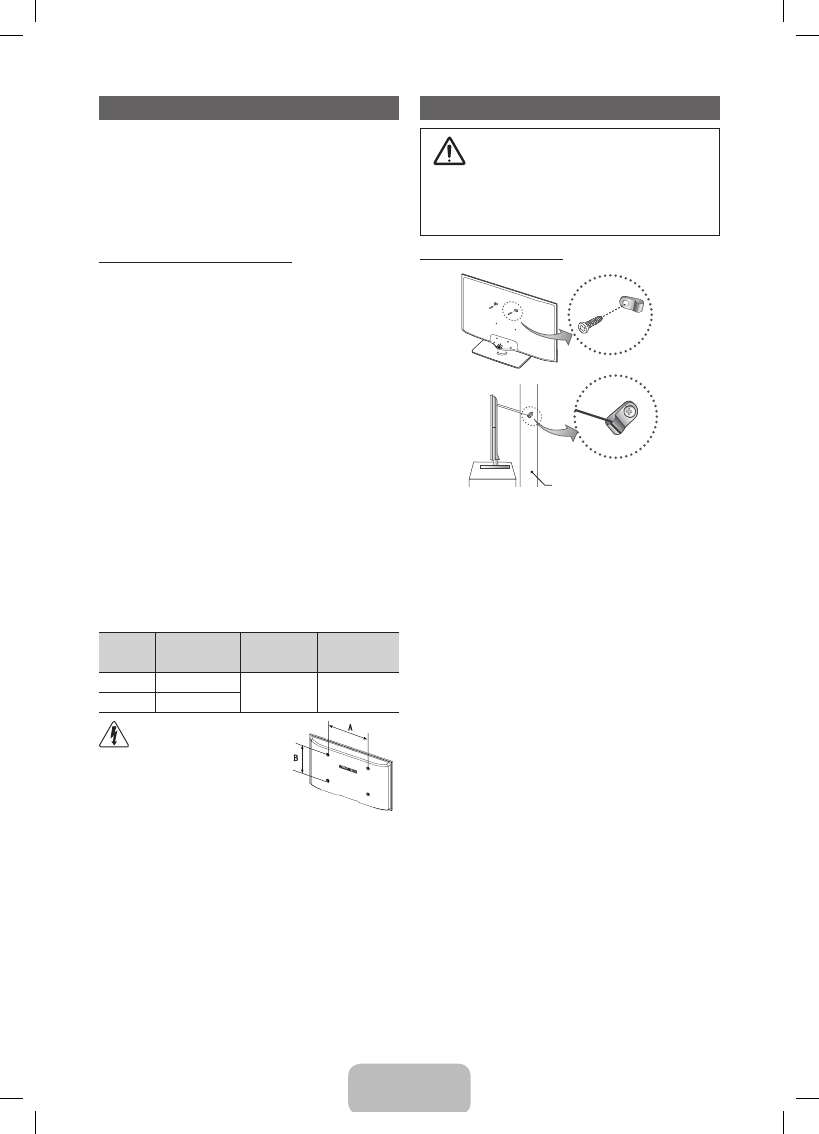
Securing the TV to the Wall
Caution
: Pulling, pushing, or climbing onto the TV
may cause the TV to fall. In particular, ensure that
your children do not hang over or destabilize the TV;
doing so may cause the TV to tip over, resulting in
serious injuries or death. Follow all safety precautions
provided on the included Safety Flyer. For added
stability, install the anti-fall device for safety
purposes, as follows.
To avoid the TV from falling
Wall
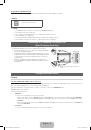
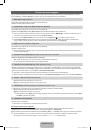
1.
Put the screws into the clamps and firmly fasten them onto the
wall. Confirm that the screws have been firmly installed onto the
wall.
✎
You may need additional material such as an anchor
depending on the type of wall.
✎
Since the necessary clamps, screws, and string are
not supplied, please purchase these additionally.
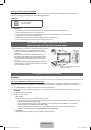
2.
Remove the screws from the centre back of the TV, put the
screws into the clamps, and then fasten the screws onto the TV
again.
✎
Screws may not be supplied with the product. In this
case, please purchase the screws of the following
specifications.
3.
Connect the clamps fixed onto the TV and the clamps fixed onto
the wall with a strong string and then tie the string tightly.
✎
NOTE
•
Install the TV near to the wall so that it does not fall
backwards.
•
It is safe to connect the string so that the clamps
fixed on the wall are equal to or lower than the
clamps fixed on the TV.
•
Untie the string before moving the TV.
4.
Verify all connections are properly secured. Periodically check
connections for any sign of fatigue for failure. If you have
any doubt about the security of your connections, contact a
professional installer.
[PE530-RU]BN68-04068P.indb 10
2012-07-26 3:35:59