Доступность: Бесплатно как и все руководства на сайте. Без регистрации и SMS.
Дополнительно: Чтение инструкции онлайн
30
,
.
.
,
,
.
.
Страница: (30 из 53)
навигация
1
2
3
4
5
6
7
8
9
10
11
12
13
14
15
16
17
18
19
20
21
22
23
24
25
26
27
28
29
30
31
32
33
34
35
36
37
38
39
40
41
42
43
44
45
46
47
48
49
50
51
52
53
Оглавление инструкции
Страница 1 из 54 SM-CMD3001 MULTIMEDIA DVD/CD/MP3 RECEIVER WITH BUILT-IN 3” TFT DVD/CD/MP3Instruction manual 3” TFT-
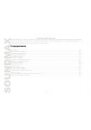
Страница 2 из 54 Dear customer! Thank you for purchasing our product. For safety, it is strongly recommended to read this manual carefully before connecting, operating and/or adjusting the product and keep the manual for reference in the future. Table of contents Table of
Страница 3 из 54 Important safeguards - - Read carefully through this manual to familiarize yourself with this high-quality sound system. Disconnect the vehicle's negative battery terminal while mounting and connecting the unit. When replacing the fuse, be sure to use one with an identical amperage rating. Using a
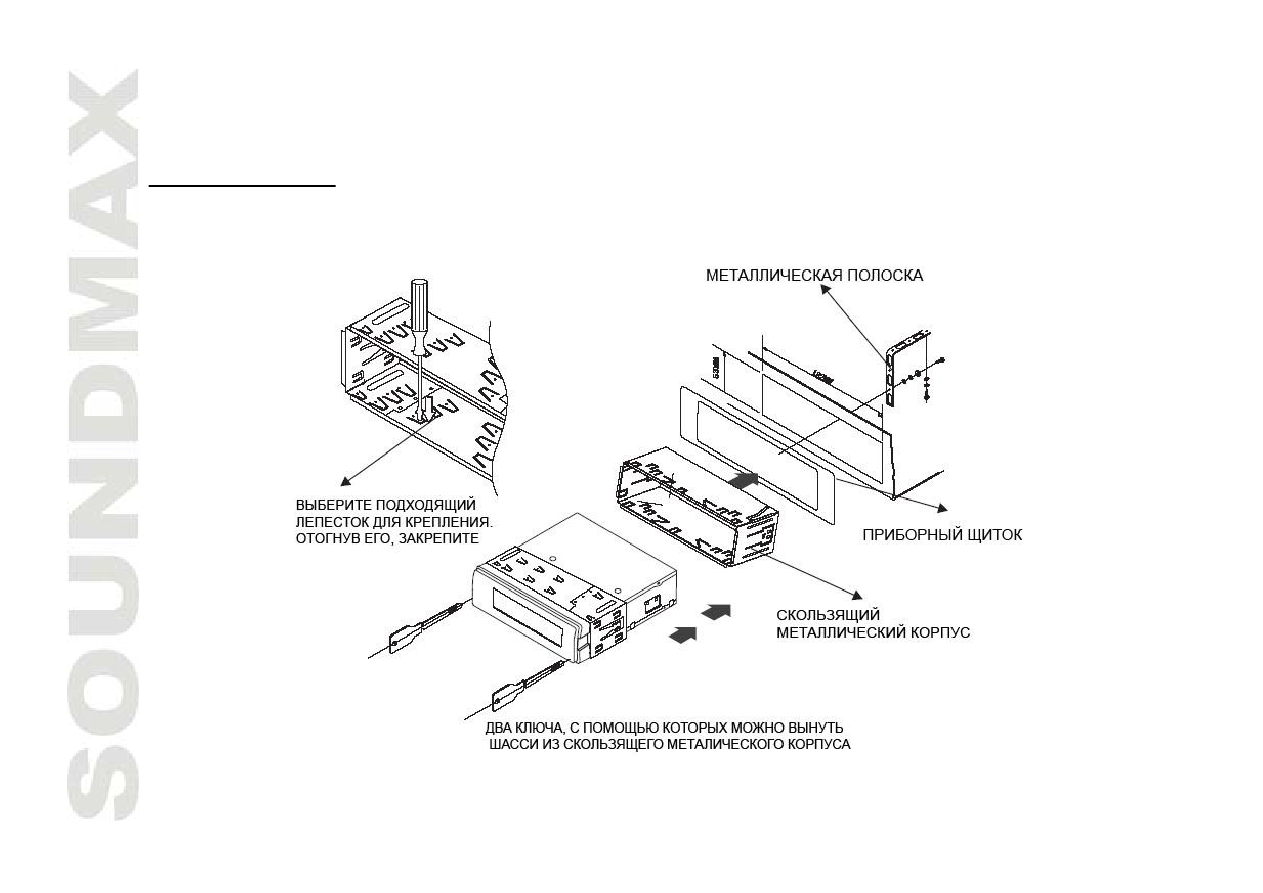
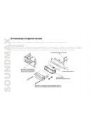
Страница 4 из 54 Installation/Connections First complete the electrical connections, and then check them for correctness. Installation It is an anti-theft installation way. The chassis wear a metal sliding housing. Please have the wiring connection of the power supply, speakers and antenna as for the requirement of
Страница 5 из 54 Attaching the control panel 1. 2. 3. Insert the left side of the control panel into the shaft of the main unit. Push the panel to the left and insert the right side of it. Press the right side of the panel until a “click” sound is heard. Detaching the front panel 1. 2. Press the OPEN button on the
Страница 7 из 54 Notes: - In spite of having any kinds of speaker system, use 4 ohms impedance of speaker to reduce the distortion during high volume level. - It is prohibited to make the conductors of auto antenna and ground touch with each other. - For your driving safety, please link your brake detecting wire
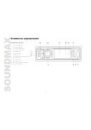
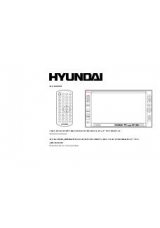
Страница 8 из 54 Panel controls Front panel 1. 2. 3. 4. 5. 6. 7. 8. 9. 10. 11. 12. 13. MENU button BAND button SOURCE button Cursor buttons Microphone PTY button USB slot APS/PLAY/PAUSE button AF button TA button LCD display VOL/ENTER knob OPEN button 8
Страница 9 из 54 Inner panel The front panel of this unit can be detached to show the inner panel with disk slot. Press EJECT button to open the inner panel. To unload the disk press EJECT again To set the unit to the initial settings press RESET button. 14. SD-slot 15. RESET button 16. EJECT button 9
Страница 11 из 54 General operations Reset the unit Operating the unit for the first time or after replacing the car battery, you must reset the unit. Press OPEN button, then press the RESET button with some sharp object to restore the unit to the original factory settings. Power button Press SOURCE button on the
Страница 12 из 54 Radio operations Note: RDS (Radio Data System) service availability varies with areas. Please understand if RDS service is not available in you area, the following service is not available, either. BAND selection Press BAND button on the panel or on the RC repeatedly to select your desired radio
Страница 13 из 54 - Hold UP/DOWN cursor buttons to store a station. To recall a station: - Select a band (if needed). - Press UP/DOWN cursor buttons to recall the stored station. Mono/Stereo selection Press the ST/RPT button on the RC to select ST OFF (Mono) or ST ON (Stereo) mode. TA (Traffic Announcement) function
Страница 14 из 54 DVD/CD operations Disc glossary PBC (PlayBack Control) PBC is a menu recorded on the disc with SVCD or VCD2.0 format. For the discs contained PBC, it can playback interactive software with the menu displayed on TV. And if the disc contains still images, it can playback high definition of still
Страница 15 из 54 Inserting the USB device Insert the USB device into USB jack. Press SOURCE button on the RC to go into USB mode. The first USB device track playback will start. Note: USB functions (flash memory type) MP3 music play FAT 12/FAT 16/FAT 32 is possible - FAT 12/16 (dir: 200 support, file: 500 support),
Страница 16 из 54 Stop playback During MP3/MPEG-4/USB mode, press STOP button on the RC to stop the playback. Press it again to resume the playback. During VCD/CD mode, press STOP button to pause playing, press PLAY/PAUSE to play, and press STOP button twice to stop playing completely. To start playing, press
Страница 17 из 54 Selecting subtitle language (for DVD only) If DVD disc supports multi-subtitle playback, press SUB-T button on the RC repeatedly to switch among languages. OSD (OnScreen Display) function Press OSD button on the RC repeatedly to show the current track/chapter, current time on the display. Title
Страница 18 из 54 Audio/Video/Picture file operations Insert the CD with mixed files (.mp3, .jpeg, .wma, mpeg4 files), press STOP button. Category/ Folder/ File list will be displayed on the screen, and file/folder name being played will be displayed on top. Current selected item will be highlighted. Category Select
Страница 19 из 54 Operating with System Menu To enter the System Setting Menu press MENU button. You will enter Menu pages for Video Mode, Audio Mode and System Mode using UP/DOWN/LEFT/RIGHT cursor buttons. Video Mode You may adjust the settings: BRIGHT, COLOR, CONTRAST, TINT, V.MODE (STAN => SOFT => USER). Audio
Страница 20 из 54 MP3 & WMA overview Notes on MP3 and WMA: MP3 is short for MPEG Audio Layer 3 and refers to an audio compression technology standard. This product allows playback of MP3 files on CD-ROM, CD-R or CD-RW discs. The unit can read MP3 files written in the format compliant with ISO 9660. However it does
Страница 21 из 54 - - You should not write non-MP3 files or unneeded folders along with MP3 files on the disc otherwise it takes a long time until the unit starts to play MP3 files. With some CD-R or CD-RW media, data may not be properly written depending on their manufacturing quality. In this case, data may not be
Страница 22 из 54 System setup menu 1. 2. 3. 4. 5. 6. Press the SETUP button on the RC to display the system setup menu. Use LEFT/RIGHT cursor buttons on RC to select the desired menu: System setup, Language setup, Video setup. Press ENTER to enter it. Use the UP/DOWN cursor buttons to select the needed setting.
Страница 23 из 54 Language setup OSD language Select the OSD language. Audio language Select the audio language (if DVD disc supports several audio languages). Subtitle language Select the subtitle language (if DVD disc supports several subtitle languages). Menu language Select the DISC menu language (if DVD disc
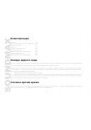
Страница 24 из 54 Accessories Receiver Remote control ISO connector Frame Mantle Keys Customer information Warranty card Instruction manual 1 1 1 1 1 2 1 1 1 pc pcs pcs pcs pcs pcs pc pc pc Back view camera This unit is equipped with back view camera output. The camera is used to observe the situation behind the
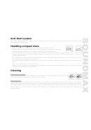
Страница 25 из 54 Anti-theft system This unit is equipped with a slide-down detachable and mask panel. Panel can be detached and taken with you, helping to deter theft. Handling compact discs - Dirty, scratched or warped discs may cause skip ping or noise. Handle the disc only by the edges. To keep clean do not
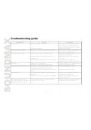
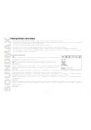
Страница 26 из 54 Troubleshooting guide Symptom No power Cause The car ignition is not on. Disc cannot be loaded. The fuse is blown. Presence of CD disc inside the player. Disc cannot be read. Inserting the disc in upside down. Compact disc is extremely dirty or defective. Temperature inside the car is too high. No
Страница 27 из 54 Specification General Power supply Maximum power output Fuse Dimensions (L x W x H) Supported storages Supported formats FM stereo radio Frequency range Storable stations Display Display Aspect ratio Video system Resolution Brightness Contrast View angle AM Section Frequency range Storable stations