Operation
Operation
10
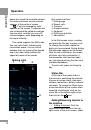
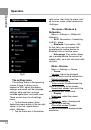
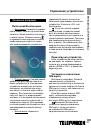
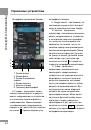
Wi-Fi-networks and displays their
names; select a network you want
to connect and, if necessary, enter
the password. When the connection
is successful, the display shows the
Wi-Fi icon in the notification area. The
number of blue sectors of the icon
shows the level of Wi-Fi signal.
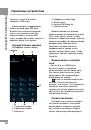
To add a Wi-Fi network to the
list, click “Add Network” in the top right
corner, then use the pop-up keypad
to enter the network name and click
“Save”.
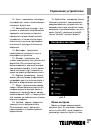
3G connectivity
Insert a 3G SIM-card into the
appropriate slot of the unit. Click the
applications menu button (4) in the top
right corner of the main screen, in the
tab “Applications” select “Settings”. In
“Wireless & Networks” select “More
...”. Click on “Mobile Networks”, put a
tick next to «Modem power» and enter
the PIN-code. In the “Mobile network
settings”, select “Access Point». Select
your access point from the list or
adjust manually. When a successful
connection is performed,
icon
appears in the system tray.
When using a device with
3G, while out of network coverage,
you must disable the transmission of
data in order to free the system from
constant attempts to register in the
network. This is recommended to
prevent braking system and a long
battery life.
• Impossibility of 3G-connection
can be caused by the lack of 3G
coverage in place where you are
staing, and in this case it is not a defect
of the device.
A-GPS
• A-GPS function enables you
to determine the coordinates of the
location of mobile devices and display
it on the map. Determination of location
is performed via cellular connection
channel and/or Wi-Fi.
• Click the applications menu
button in the top right corner of the
main screen, in the tab “Applications”
select “Settings”. In “Location services”
put a tick next to the option “Google’s
location service” and remove the
tick for the option “GPS satellites».
Now when you start working with
map application (Google Maps), after
clicking on the
icon the map will
display the location of your device.
This unit is equipped with a
GPS module, that allows to determine
your coordinates without connection to
a Wi-Fi network or cellular connection.
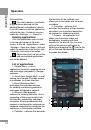
Connect the memory card
This smartphone is equipped with
a slot for memory cards microSD. The
maximum supported card capacity
- 32 Gb. After properly installing a
memory card, this device detects it
automatically. To safely remove the
memory card, follow these steps: click
the applications menu button in the
top right corner of the main screen, in