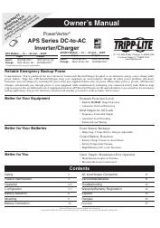
1
Owner’s Manual
W
arranty
Registration
Register online toda
y f
or a chance
to win a FREE
Tr
ipp Lite product!
www
.tr
ipplite
.com/w
arr
anty
PDUMH15NET/PDUMH20NET
Switched Rack PDU
• 120V, 60Hz AC Input and Output
PDUMH15HVNET/PDUMH20HVNET
Switched Rack PDU
• 208/230V, 50/60Hz AC Input and Output
Important Safety Instructions
2
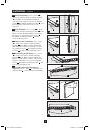
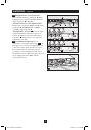
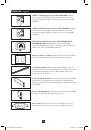
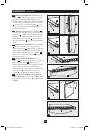
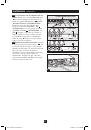
Installation
2
Features 9
Technical Support
12
1111 W. 35th Street, Chicago, IL 60609 USA
www.tripplite.com/support
Copyright © 2011 Tripp Lite. All rights reserved.
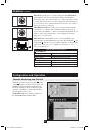
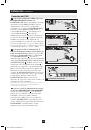
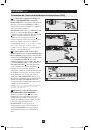
Configuration and Operation
11
Warranty and Warranty Registration
12
Español
13
Français 25
201110149-93-2718.indd 1
11/9/2011 11:17:25 AM