3
CONTENTS
Warnings . . . . . . . . . . . . . . . . . . . . . . . . . . . . . . . . . . . . . . . . . . . . . . . . . . . . . . . . . . . . . . . . . . . . . . . . . . .
2
Use - Cleaning the interior - Operation - Temperature regulation - Quick-freezing - Freezing fresh food - . . .
4
Use - Storage of frozen food - Ice-cube production - Operation - Temperatur regulation - . . . . . . . . . . . . . . . .
Fresh food refrigeration - Thawing . . . . . . . . . . . . . . . . . . . . . . . . . . . . . . . . . . . . . . . . . . . . . . . . . . . . . . . . . . .
5
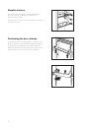
Use - Movable shelves - Positioning the door shelves . . . . . . . . . . . . . . . . . . . . . . . . . . . . . . . . . . . . . . . . . . . .
6
Hints - Hints for refrigeration - Hints for freezing - Hints for storage of frozen food . . . . . . . . . . . . . . . . . . . . . .
7
Maintenance - Periods of no operation - Periodic cleaning - Illumination lamp - Defrosting . . . . . . . . . . . .
8
Customer service and spare parts - Technical information . . . . . . . . . . . . . . . . . . . . . . . . . . . . . . . . . . .
9
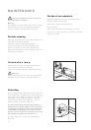
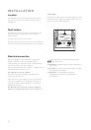
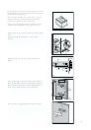
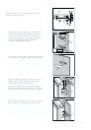
Installation - Location - Shelf-holders - Electrical connection . . . . . . . . . . . . . . . . . . . . . . . . . . . . . . . . . . . 10
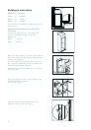
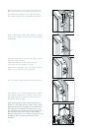
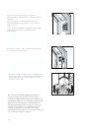
Installation - Door reversibility - Building-in instructions . . . . . . . . . . . . . . . . . . . . . . . . . . . . . . . . . . . . . . . . 11
damage to the appliance. Do not use a
mechanical device or any artificial means to
speed up the thawing process other than those
recommended by the manufacturer. Never use
metal objects for cleaning your appliance as it
may get damaged.
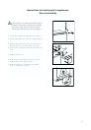
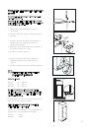
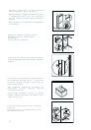
Installation
• During normal operation, the condenser and
compressor at the back of the appliance heat up
considerably. For safety reasons, minimum
ventilation must be as shown in the instructions.
Attention: keep ventilation openings clear of
obstruction.
• Care must be taken to ensure that the appliance
does not stand on the electrical supply cable.
Important: if the supply cord is damaged, it must
be replaced by a special cord or assembly availa-
ble from the manufacturer or its service agent.
• If the appliance is transported horizontally, it is
possible that the oil contained in the compressor
flows in the refrigerant circuit. It is advisable to
wait at least two hours before connecting the
appliance to allow the oil to flow back in the
compressor.
• There are working parts in this product which
heat up. Always ensure that there is adequate
ventilation as a failure to do this will result in
component failure and possible food loss. See
installation instructions.
• Parts which heat up should not be exposed.
Wherever possible the back of the product should
be against a wall.
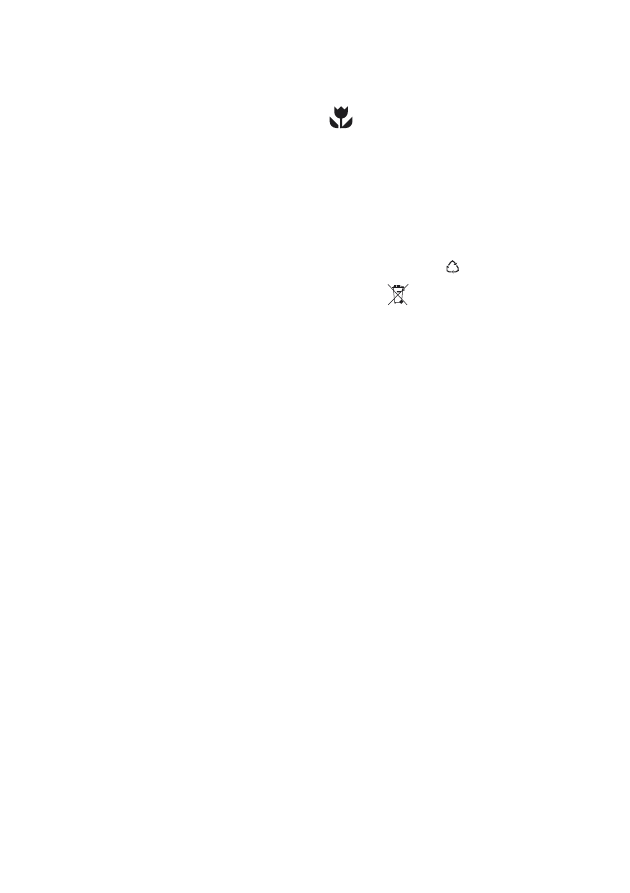
Environment Protection
This appliance does not contain gasses which
could damage the ozone layer, in either its
refrigerant circuit or insulation materials. The
appliance shall not be discarded together with
the urban refuse and rubbish. Avoid damaging
the cooling unit, especially at the rear near the
heat exchanger. Information on your local
disposal sites may be obtained from municipal
authorities. The materials used on this appliance
marked by the symbol
are recyclable.
The symbol on the product or on its packaging
indicates that this product may not be treated as
household waste. Instead it shall be handed over to
the applicable collection point for the recycling of
electrical and electronic equipment. By ensuring this
product is disposed of correctly, you will help prevent
potential negative consequences for the
environment and human health, which could
otherwise be caused by inappropriate waste
handling of this product. For more detailed
information about recycling of this product, please
contact your local city office, your household waste
disposal service or the shop where you purchased
the product.