Operation
26
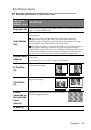
Switching input signal
The projector can be connected to multiple devices at the same time. However, it can only
display one at a time.
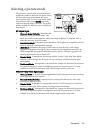
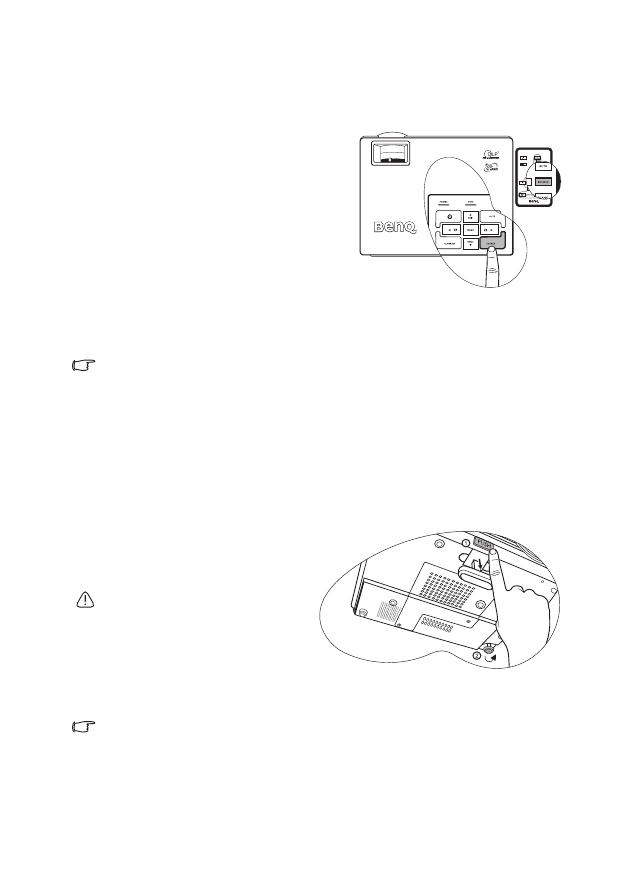
When SOURCE on the projecotr control panel
or the remote control is pressed, information of
current signal and resolution will display at the
lower right corner. Press SOURCE again to
display a source selection bar. You can manually
press SOURCE repeatedly until your desired
signal is selected or let the projector
automatically search for the availabel signal.
Once detected, the selected source information
will display at the lower right corner of the
screen for 3 seconds. If there is multiple
equipment connected to the projector, you can
press the button again to search for another
signal.
Be sure the Source Scan function in the Advanced menu is activated if you want the
projector to automatically search the signals. See
for details
The brightness level of the projected image will change accordingly when you switch between
different input signals. Data (graphic) "PC" presentations using mostly static images are
generally brighter than "Video" using mostly moving images (movies).
The input type affects the options available for the Application Mode. See
for details.
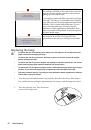
Adjusting the projected image
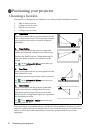
Adjusting the projection angle
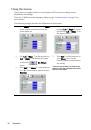
The projector is equipped with 1 quick-release adjuster foot and 1 rear adjuster foot. These
adjusters change the image height and projection angle. To adjust the projector:
1.
Lift the projector up and press the
adjuster button to release the
adjuster. The adjuster will drop
into position and be locked.
Do not look into the lens while the lamp is
on. The strong light from the lamp may
cause damage to your eyes.
2.
Screw the rear adjuster foot to fine
tune the horizontal angle.
To retract the foot, hold up the projector
while pressing the quick-release button, then slowly lower the projector. Screw the rear
adjuster foot in a reverse direction.
If the screen and the projector are not perpendicular to each other, the projected image
becomes vertically trapezoidal. To correct this situation, adjust the value of Keystone in the
Picture menu, on the projector control panel, or on the remote control. See
for details.