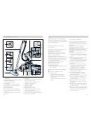
11
en
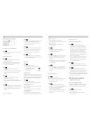
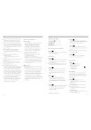
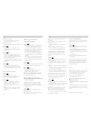
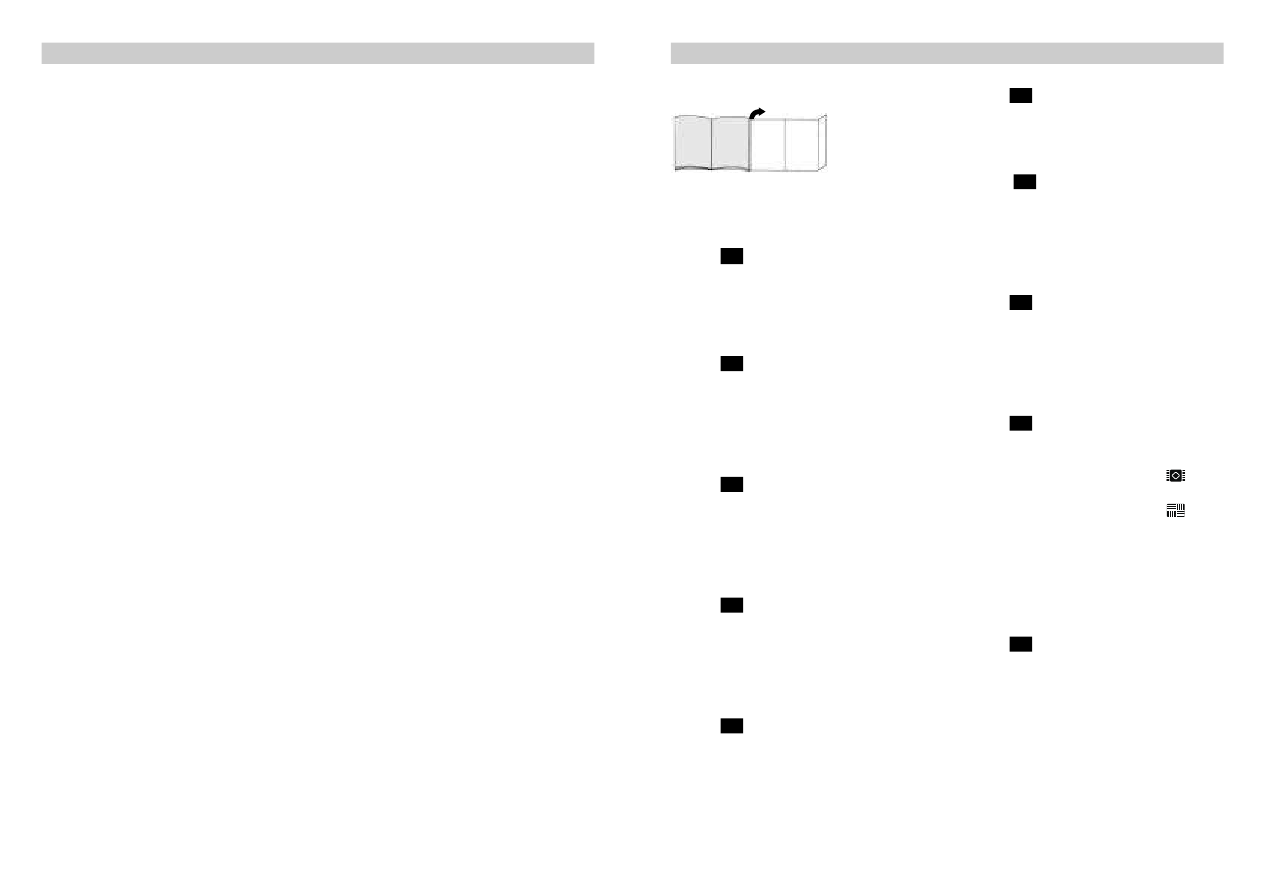
Fold out picture pages.
Before using for the first time
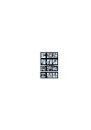
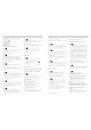
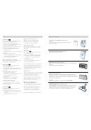
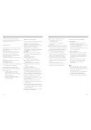
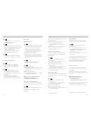
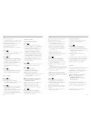
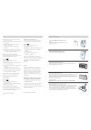
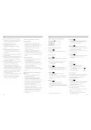
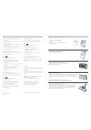
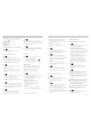
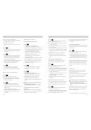
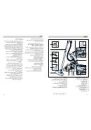
Figure
Push the handle onto the flexible tube
and until it engages.
Setting up
Figure
a) Insert the flexible hose connector into
the opening on the vacuum cleaner
until it engages.
b)To remove the flexible hose, press the
release button and pull out the hose.
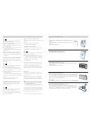
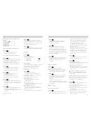
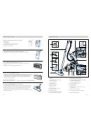
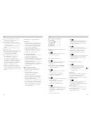
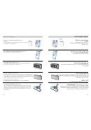
Figure
Push the handle into the telescopic
tube.
To release the connection, turn the
handle slightly and pull out of the
pipe.
Figure
Put the telescopic tube into the
connecting piece of the floor tool.
To release the connection, turn the
pipe slightly and pull out of the floor
tool.
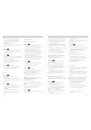
Figure
Unlock the telescopic tube by moving
the release button in the direction of
the arrows and then set it to the
required length.
5*
4*
3*
2
1*
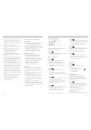
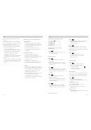
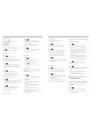
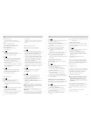
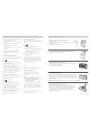
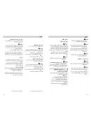
Figure
Take the mains plug, pull the mains
cable to the required length and insert
the plug into a wall socket.
Figure
To switch your vacuum cleaner on,
press the On/Off button in direction of
arrow.
b)The button can also be pressed using
the swing handle.
Figure
Use the slide control to adjust the
suction to the required level.
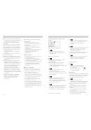
Vacuuming
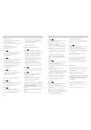
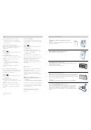
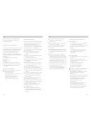
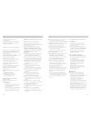
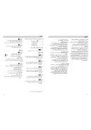
Figure
Adjusting the floor tool:
Ⅲ For cleaning rugs
and carpets
=>
Ⅲ For cleaning
hard floors
=>
Turbo brush
If your appliance is equipped with a
turbo brush, please read the notes on
use and maintenance in the enclosed
instructions.
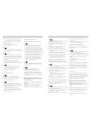
Figure
Vacuuming with accessories
(attach to handle or suction pipe as
required).
a) Crevice nozzle
For cleaning crevices and corners.
b)Upholstery nozzle
For cleaning upholstered furniture,
curtains, etc.
c) Furniture brush
For vacuuming picture frames, books,
delicate furniture, etc.
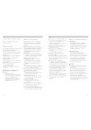
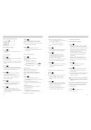
10*
9
8
7
6
10
en
Ⅲ Do not use the vacuum cleaner if it is
damaged. Unplug the power cord
from the mains if a fault is detected.
Ⅲ To prevent you from being exposed to
risks, vacuum cleaner repairs and the
fitting of replacement parts must only
be carried out by the authorised after-
sales service.
Ⅲ The vacuum cleaner should be
protected from external weather
conditions, moisture and sources of
heat.
Ⅲ Do not vacuum any drill dust or
building rubble
=> this can damage the vacuum
cleaner.
Ⅲ Switch off the vacuum cleaner when it
is not in use.
Ⅲ At the end of its life, the vacuum
cleaner should be disposed of in an
appropriate manner.
Ⅲ For safety reasons, vacuum
cleaners with an output of 2,000 watts
or more are fitted with a temperature
safety switch, which automatically
switches the vacuum cleaner off if it is
blocked and overheating. Unplug the
power cord from the mains and make
sure that the nozzle, tube and hose
are not blocked. Also check whether
the dust bag needs changing.
Having cleared the blockage, leave
the vacuum cleaner to cool down for
at least one hour. It can then be
switched back on again.
Disposal information
Ⅲ Packaging
The packaging is designed to protect
the vacuum cleaner from being
damaged during transportation.
It is made of environment-friendly
materials and can be recycled.
Dispose of unneeded packaging at
the appropriate recycling points.
Ⅲ Used vacuum cleaners
Old appliances still contain many
recyclable materials.
Therefore, please take used
appliances to your retailer or recycling
centre so that they can be recycled.
For current disposal methods, please
enquire at your appliance dealership
or local council.
!
Please note
The mains socket must be protected
by a 16A fuse.
If a fuse should blow when you switch
on the vacuum cleaner, this may be
because other electrical appliances
which have a high current draw are
connected to the same power circuit.
To prevent the fuse from tripping,
select the lowest power setting before
switching the vacuum cleaner on, and
increase the power only once it is
running.
*Depending on equipment